

В данной статье рассмотрим как быстро и легко сменить язык в Windows 11. Рассмотрим две ситуации, когда у Вас установлен например русский язык и Вы хотите поменять его на английский, а так же, рассмотрим другую ситуацию, когда вы хотите сменить один язык на любой другой.
При установке Windows 11 на русском языке, или любом другом (например украинский) по умолчанию уже будет английская раскладка клавиатуры, мы можем просто дозагрузить английский интерфейс из настроек.
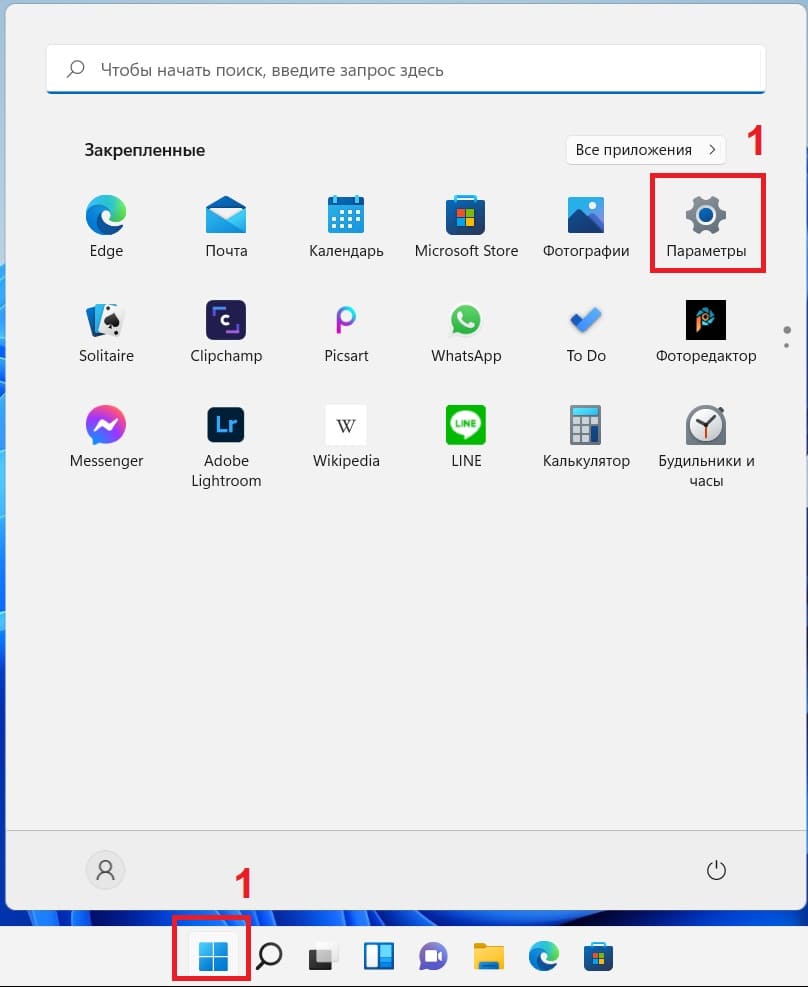
— Для этого заходим в меню Пуск => Параметры
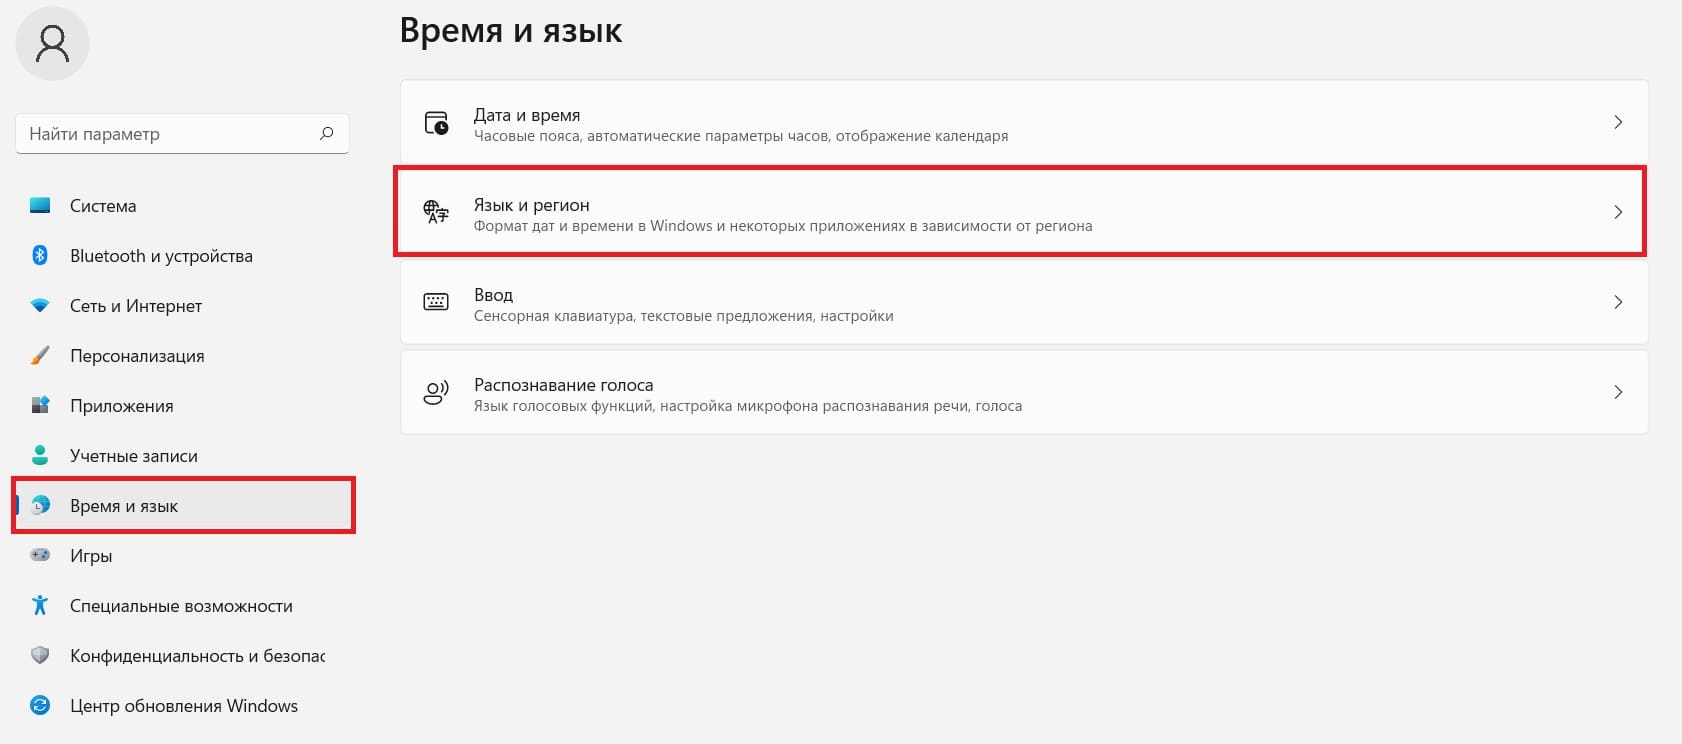
— Во вкладке «Время и язык» нажимаем на «Язык и регион».
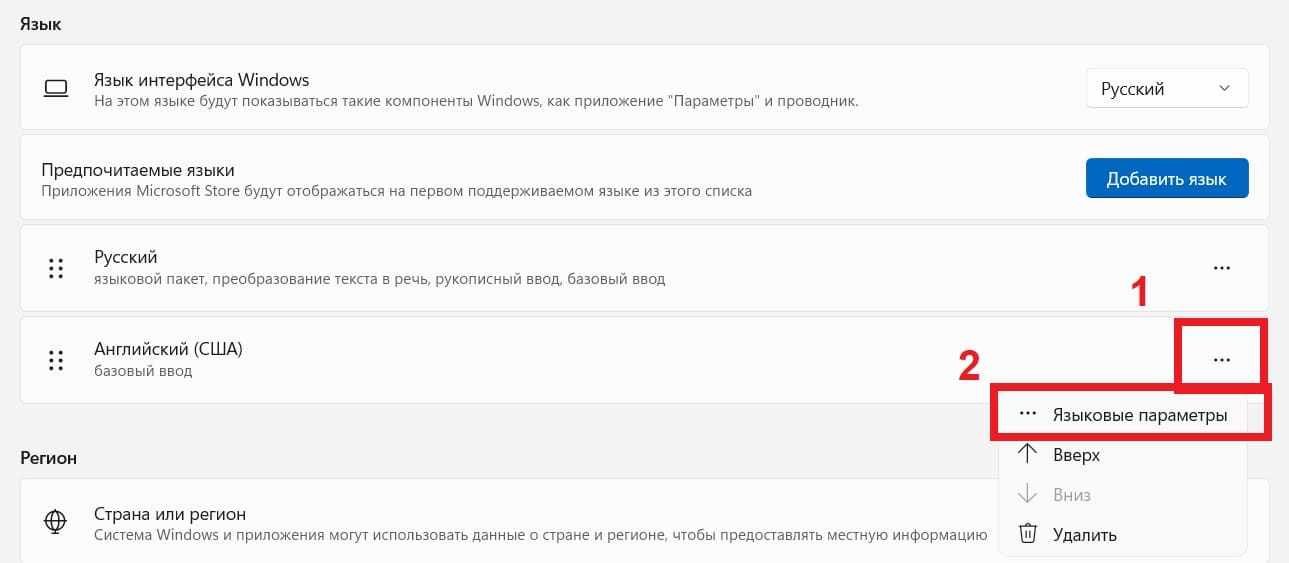
— Нажимаем на три точки на пункте «Английский» => Языковые параметры.
— Далее в следующем меню «Языковой пакет» => Загрузить.
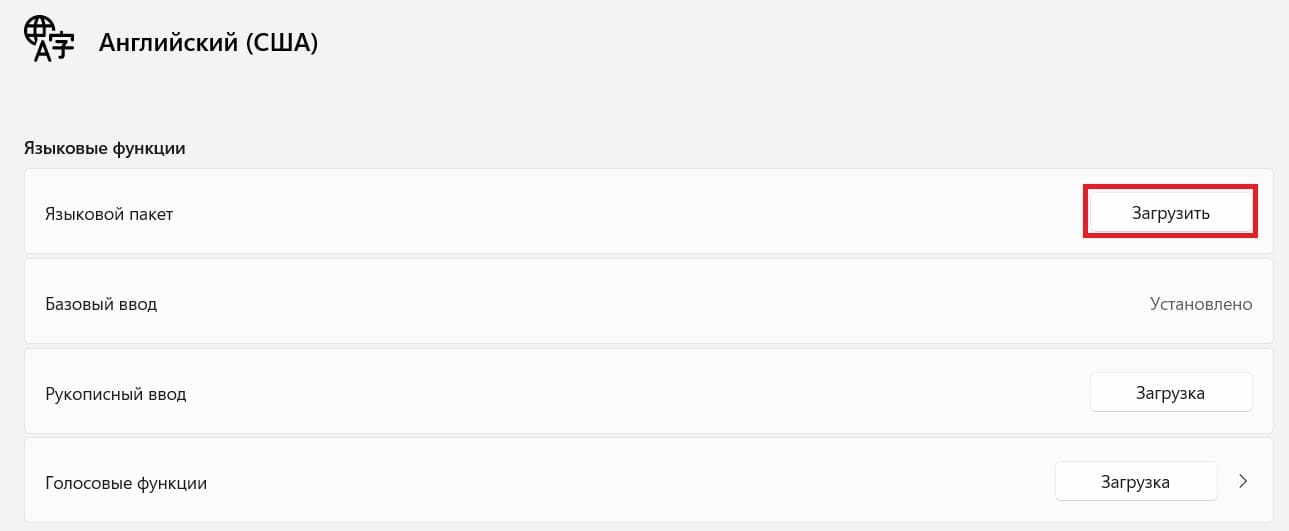
— Дождитесь установки, пока не будет сообщено, что пакет установлен.
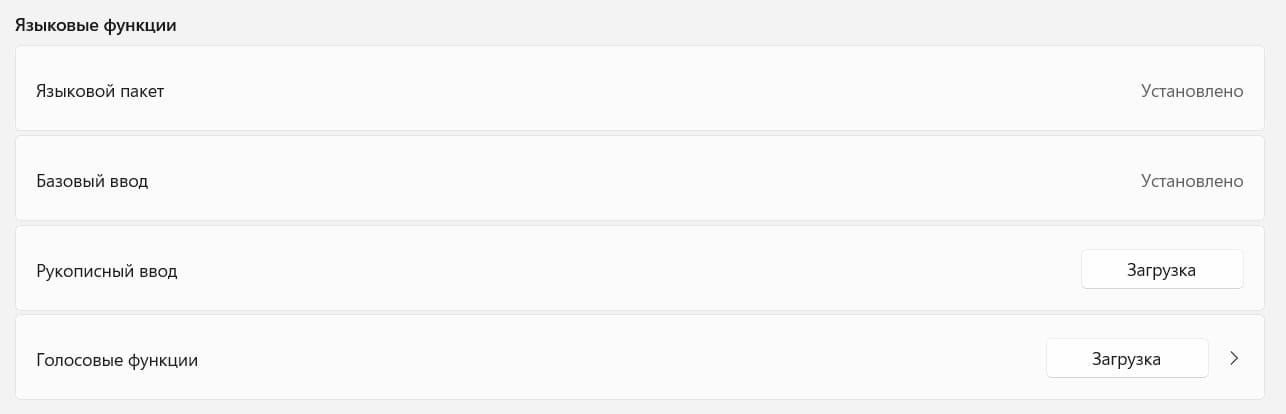
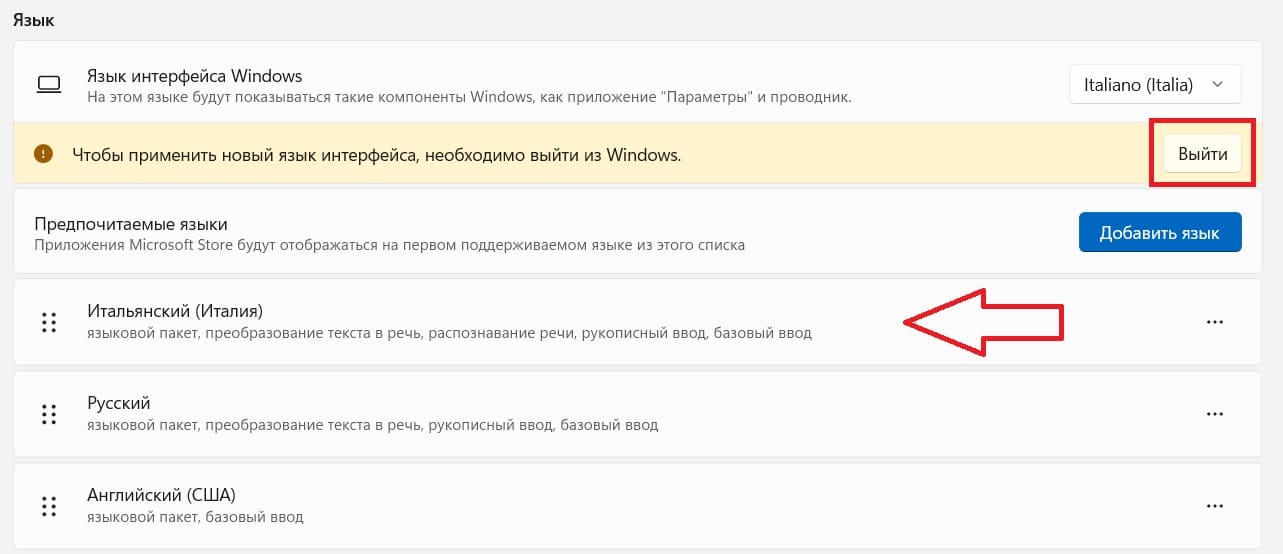
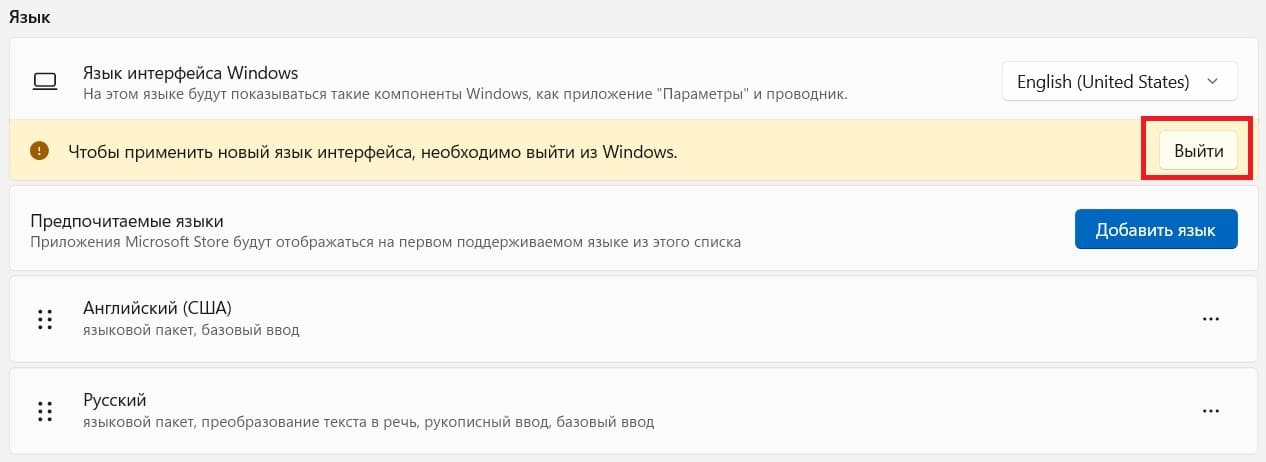
— Возвращаемся назад, в прошлое меню. В пункте «Язык интерфейса Windows» из выпадающего меню меняем его на английский (English).
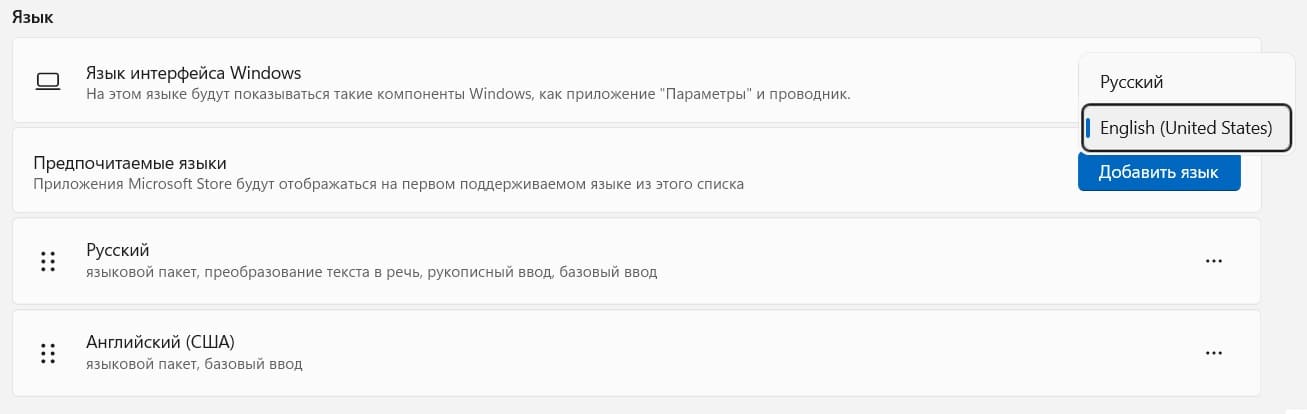
— Для применения смены языка необходимо будет перезайти в систему. Язык интерфейса будет сменен.
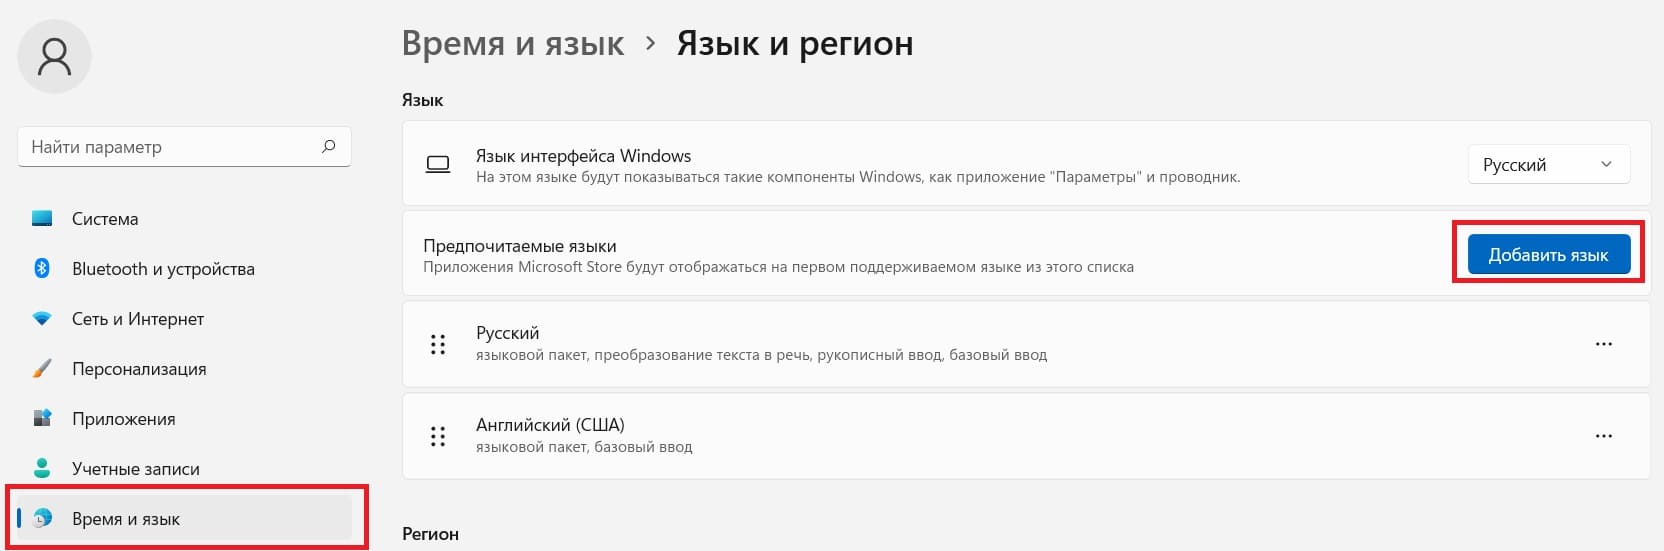
Теперь рассмотрим ситуацию, когда мы хотим сменить язык в Windows 11 на любой другой, допустим на итальянский. Снова заходим в меню Пуск => Параметры => Вкладка «Время и язык». В этой вкладке нажимаем «Добавить язык».
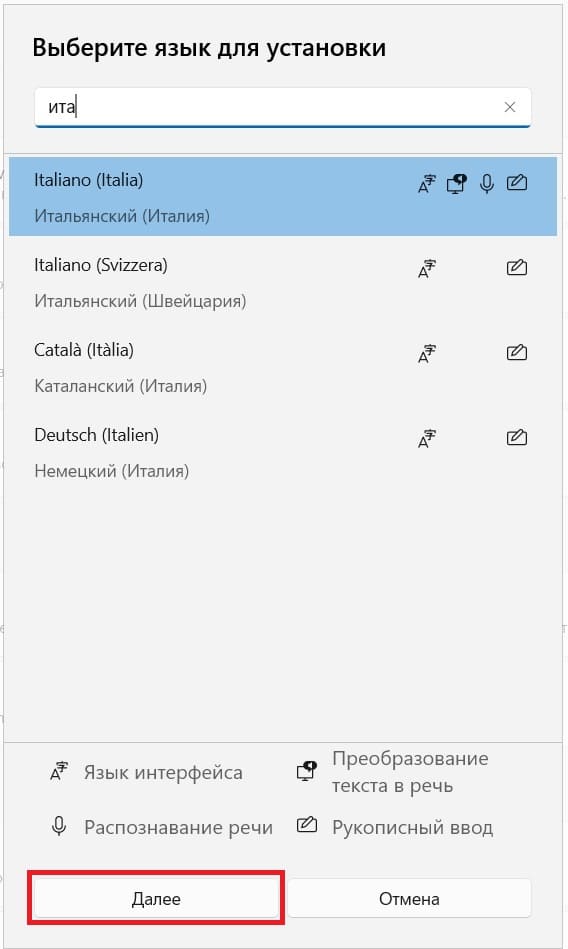
— Выбираем нужный Вам язык, нажимаем «Далее».
— Чтобы сразу язык интерфейсам был сменен, выставляем галку на пункте «Назначить языком интерфейса Windows» и нажимаем «Установить».
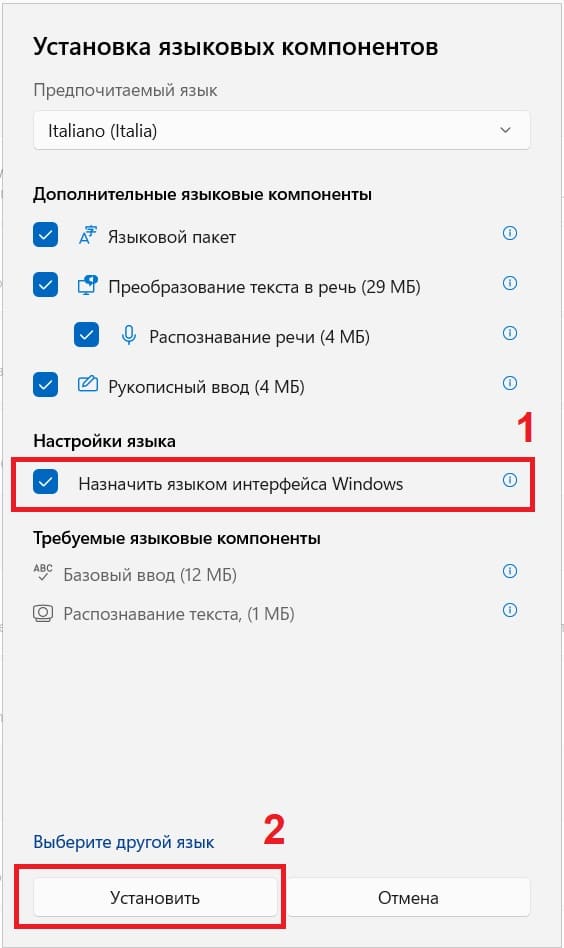
— После скачивания языкового пакета, так же нужно перезайти в систему и язык интерфейса будет изменен.