


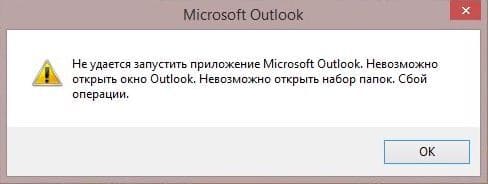
В данной статье обсудим следующую ошибку — «Microsoft Outlook: набор папок невозможно открыть» при запуске настольного приложения Outlook? Это может быть крайне неудобно, особенно когда нужно срочно получить доступ к важному деловому письму.
Microsoft Outlook является одним из самых надежных сервисов корпоративной электронной почты по всему миру. Его популярность среди профессионалов, фрилансеров и частных лиц заслуживает высокой оценки. Однако иногда в Outlook возникают неожиданные проблемы, которые могут вызвать трудности у пользователей. В этой статье мы расскажем, как исправить ошибку «Набор папок невозможно открыть» в Outlook и быстро вернуться к работе.
Приобрести оригинальный ключ активации Microsoft Outlook 2016, 2019, 2021 можно у нас в каталоге, от 1090
Причины ошибки «Набор папок невозможно открыть»
Основные причины включают:
— Большой объем почтовых сообщений в общей папке.
— Повреждение файла OST из-за сбоев.
— Некорректные или несовместимые надстройки.
— Перемещение OST-файла в другое место.
— Повреждение профиля электронной почты.
— Проблемы с сетью.
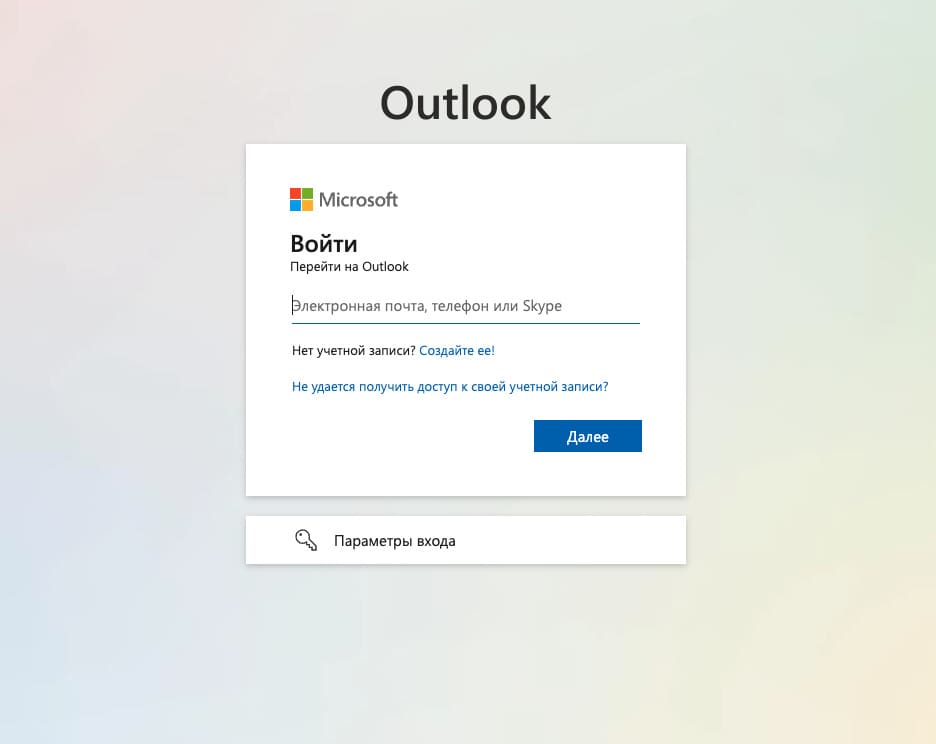
Способ 1. Проверка учетной записи Outlook через веб-приложение
1. Войдите в портал Office Outlook 365, используя свои учетные данные.
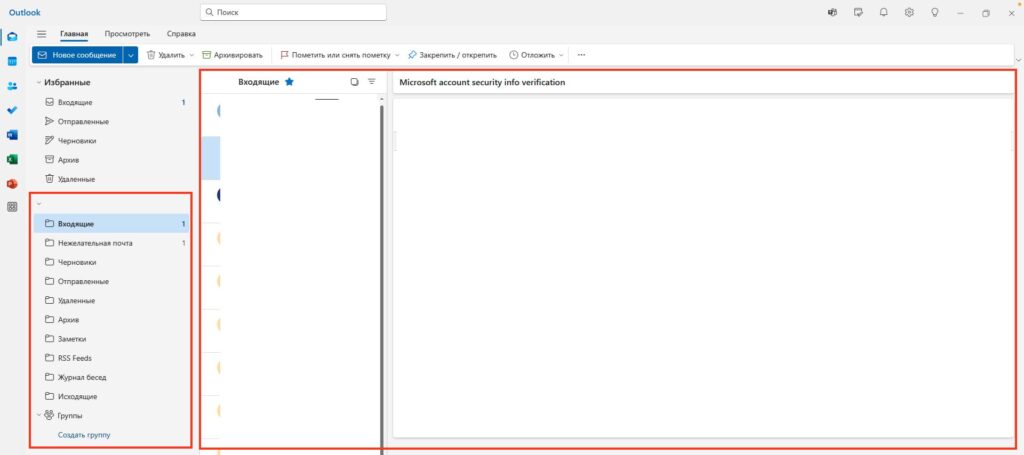
2. На главном экране Outlook найдите панель навигации слева, где должна отображаться команда «Папки».
3. Если доступ к вашему профилю Outlook возможен, перейдите к следующему способу.
Способ 2: Отключите Приложение для смены IP-адреса
Часто ошибка «Набор папок невозможно открыть» возникает из-за проблем синхронизации между настольным приложением Outlook и серверами Microsoft Exchange 365. Использование Приложения для смены IP-адреса может вызвать эти проблемы.
Чтобы устранить эту вероятность, выполните следующие шаги:
1. Нажмите «Параметры» в меню Пуск
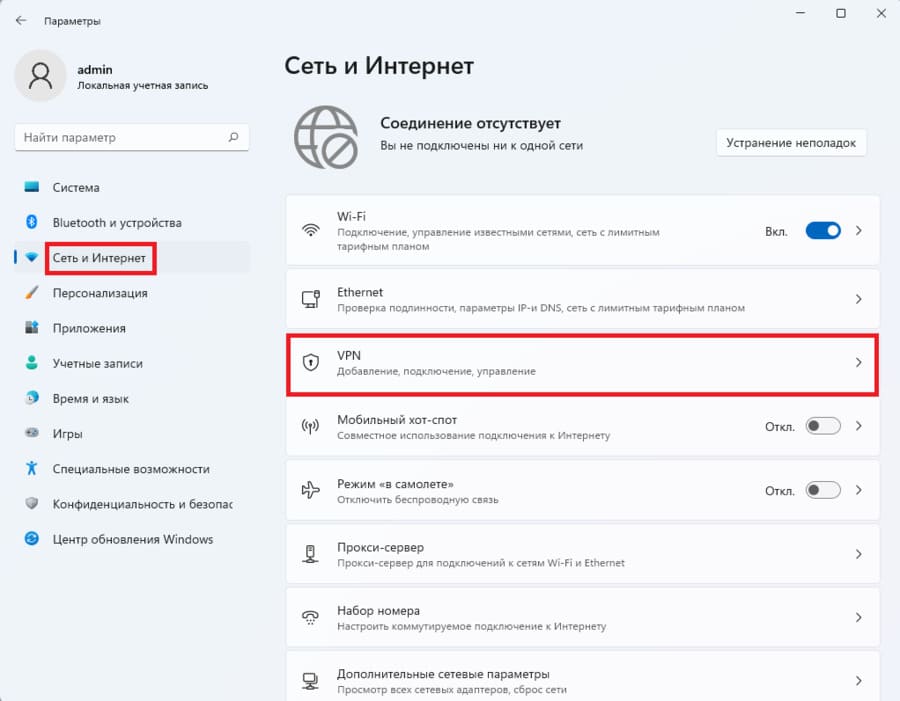
2. Далее перейдите в Сеть и Интернет => Приложение для смены IP-адреса
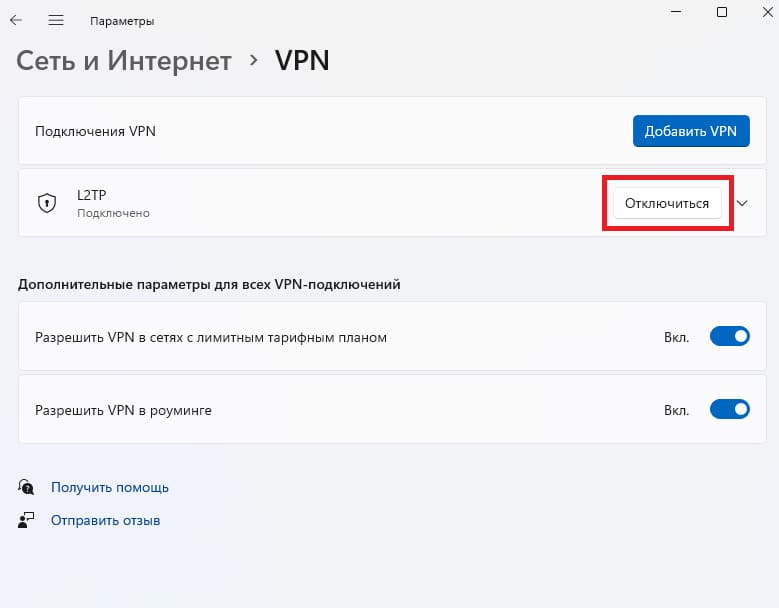
3. Выберите подключение и нажмите «Отключить».
Способ 3: Остановите загрузку общих папок
Если Outlook открывается, но вы не видите последние письма, выполните следующие действия:
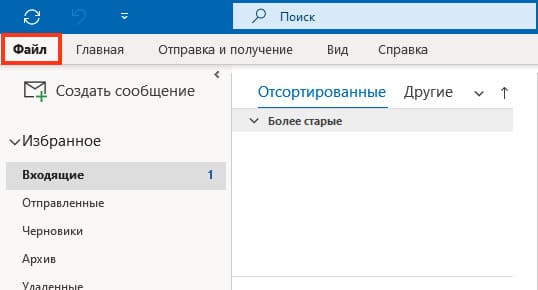
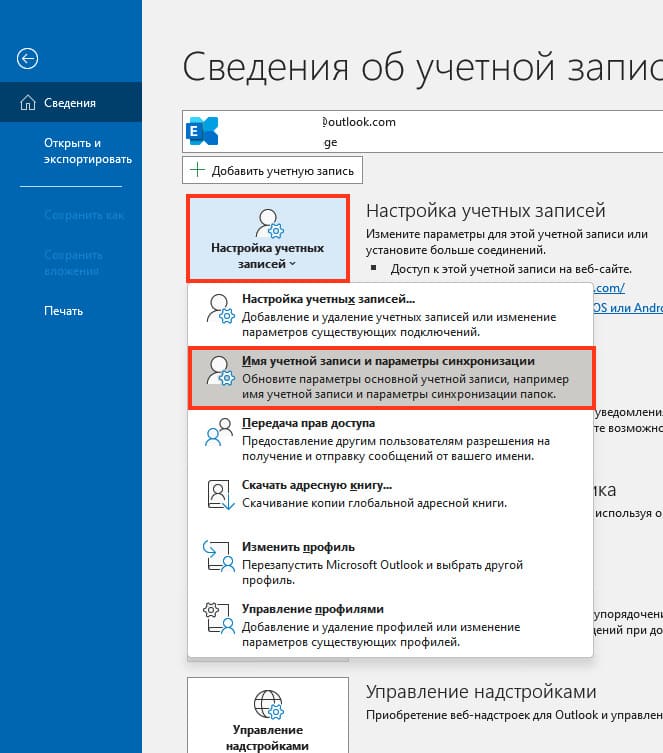
1. Нажмите «Файл» и выберите «Настройки учетной записи».
2. В раскрывающемся списке выберите «Имя учетной записи и параметры синхронизации».
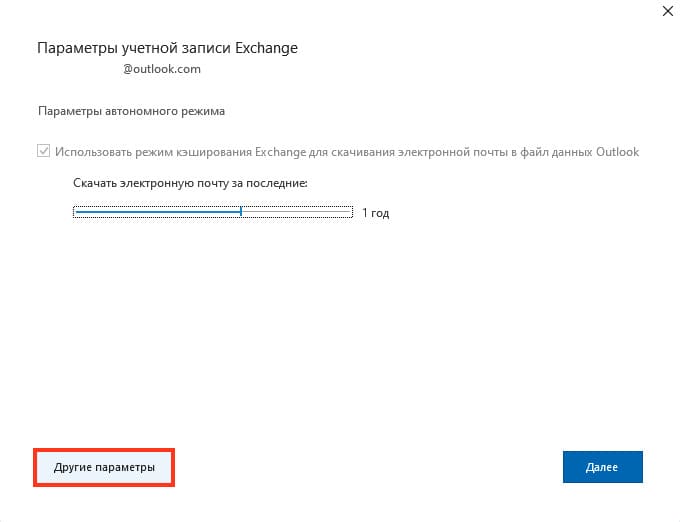
3. В сплывающем окне нажмите «Другие параметры»
4. В диалоговом окне «Microsoft Exchange» перейдите на вкладку «Дополнительно» и снимите галочку с опции «Использовать режим кэширования Exchange».
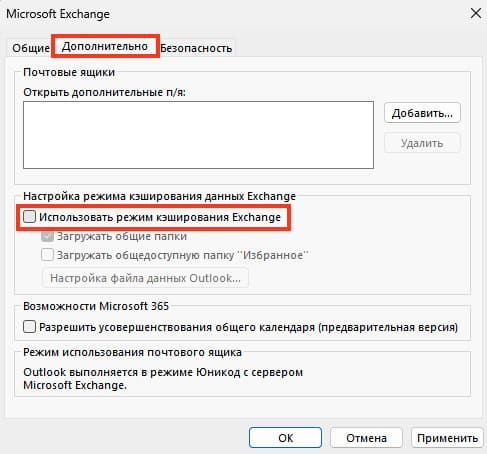
5. Нажмите «ОК» и «Применить».
6. Перезапустите Outlook.
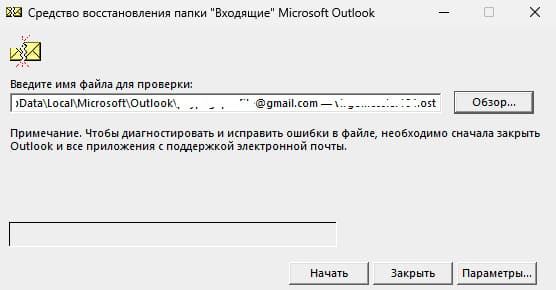
Способ 4. Восстановление файла PST/OST
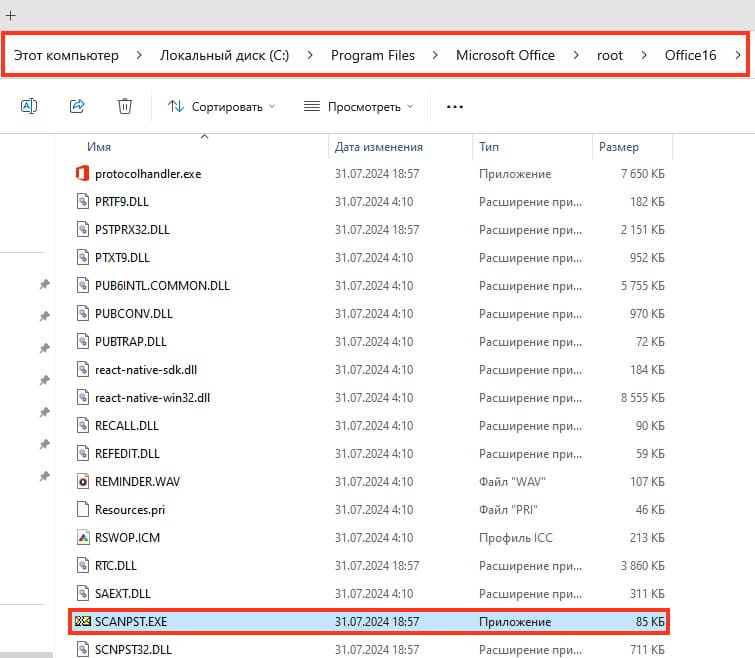
Закройте Outlook и выполните следующие действия для проверки и исправления поврежденного файла PST/OST:
1. Перейдите в папку C:\Program Files\Microsoft Office\root\Office16
2. Найдите файл SCANPST.exe и запустите его.
3. Выберите нужный файл PST или OST и нажмите «Начать».
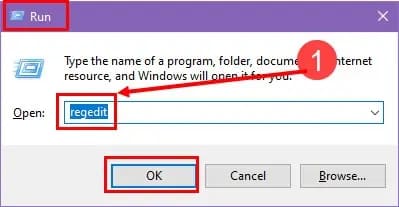
Способ 5: Воссоздание профиля электронной почты Outlook
Перед началом обязательно создайте резервные копии всех файлов PST и OST:
1. Откройте «Редактор реестра» (Windows + R, затем введите regedit).
2. Перейдите в раздел HKEY_CURRENT_USER\SOFTWARE\Microsoft\Office\16.0\Outlook\Profiles
3. Щелкните правой кнопкой мыши по папке Outlook и выберите «Экспортировать». Сохраните файл конфигурации реестра.
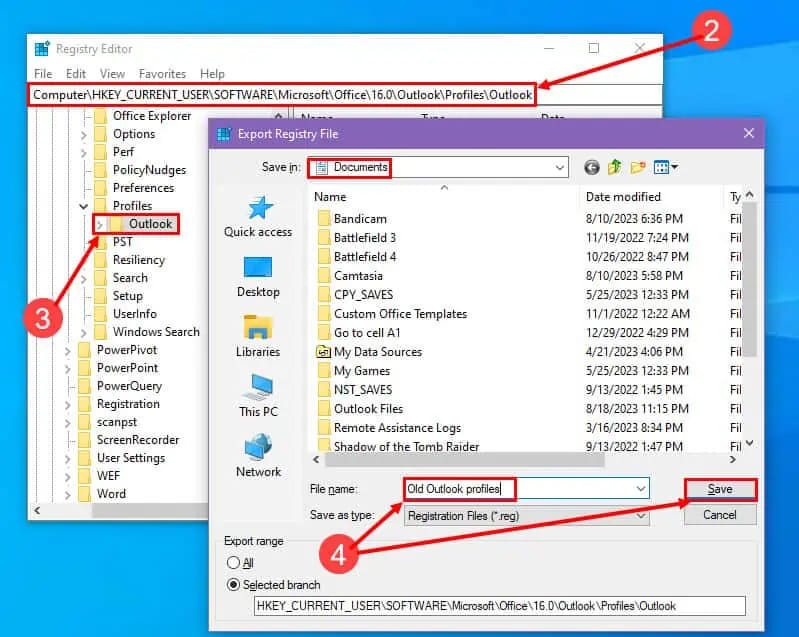
4. Затем удалите папку Outlook, подтвердив действие.

После этого создайте новый профиль Outlook:
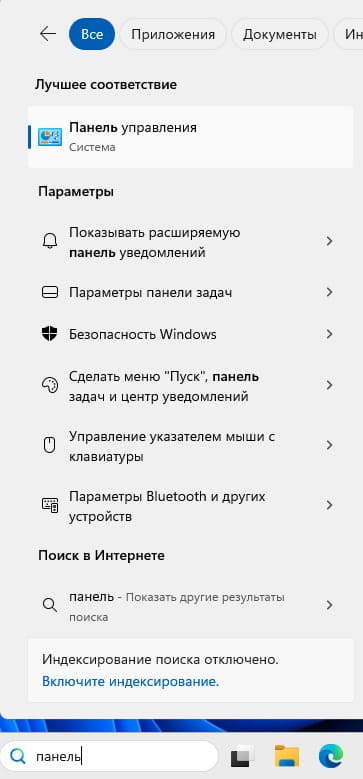
1. Откройте меню «Пуск», перейдите в «Панель управления» и выберите «Почта».
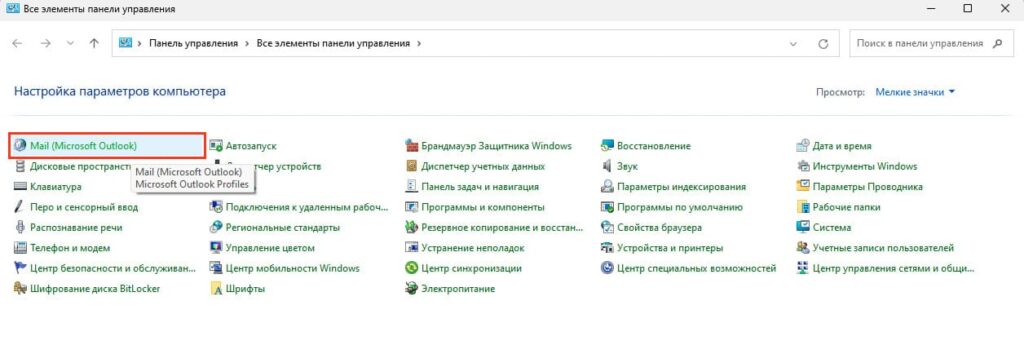
Затем перейдите в «Файлы данных».
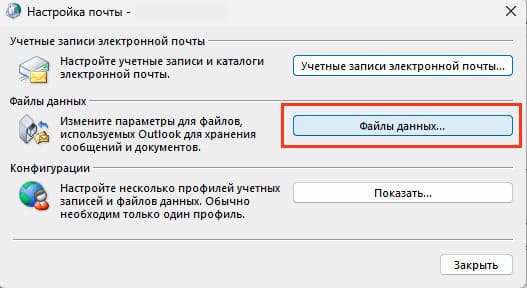
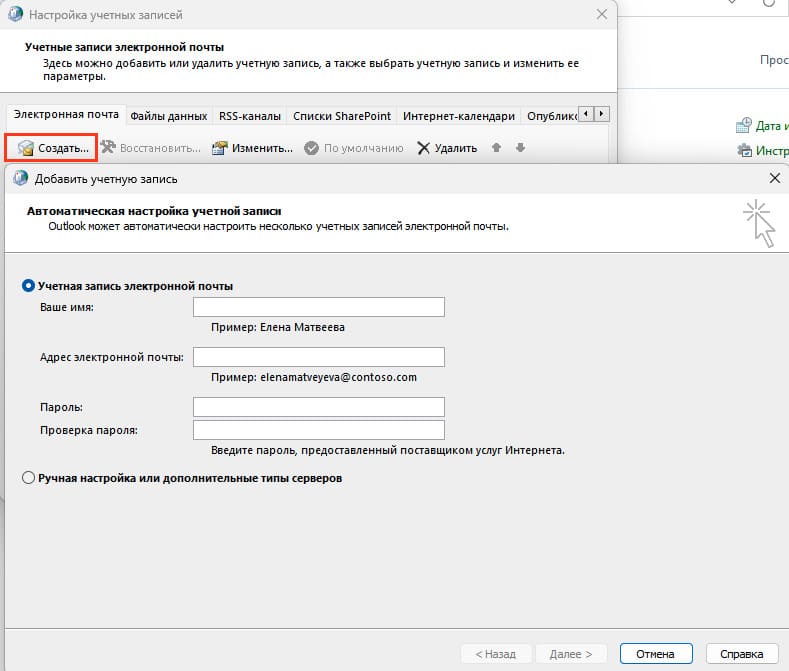
2. Нужно добавить новый почтовый ящик.
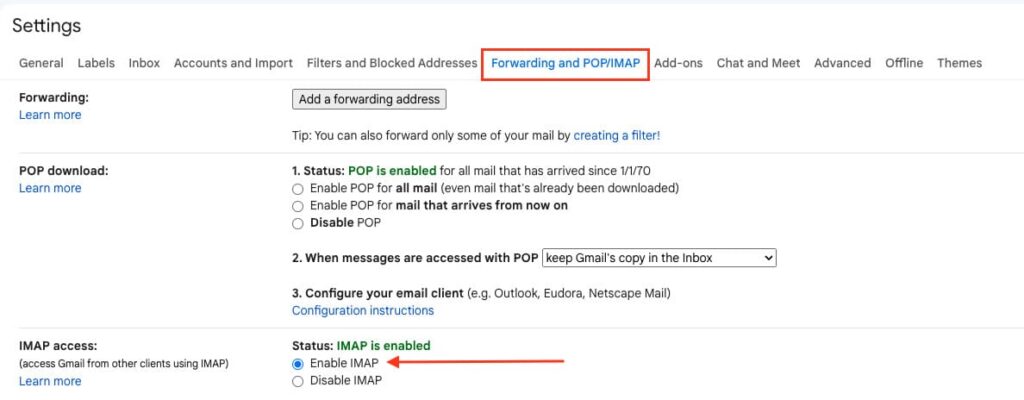
Чтобы добавить новый почтовый ящик например на @gmail.com потребуется в настройках включить IMAP и создать отдельный пароль для приложений, иначе добавить почту на @gmail.com внутри outlook не получится.
Зайдите в свой почтовый ящик gmail, нажмите на Шестеренку и «see all settings» (Показать все настройки).

Далее перейдите в раздел который отвечает за POP/IMAP и включите IMAP как показана на скриншоте, после чего в самом низу нажмите Сохранить\Применить.
Теперь перейдите в раздел создание пароля для приложений.
Либо можете зайти в этот раздел через справку в google.
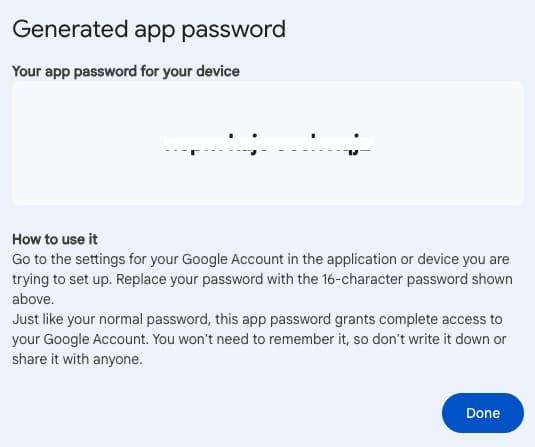
Создайте новый пароль для приложений, название можно придумать любое.
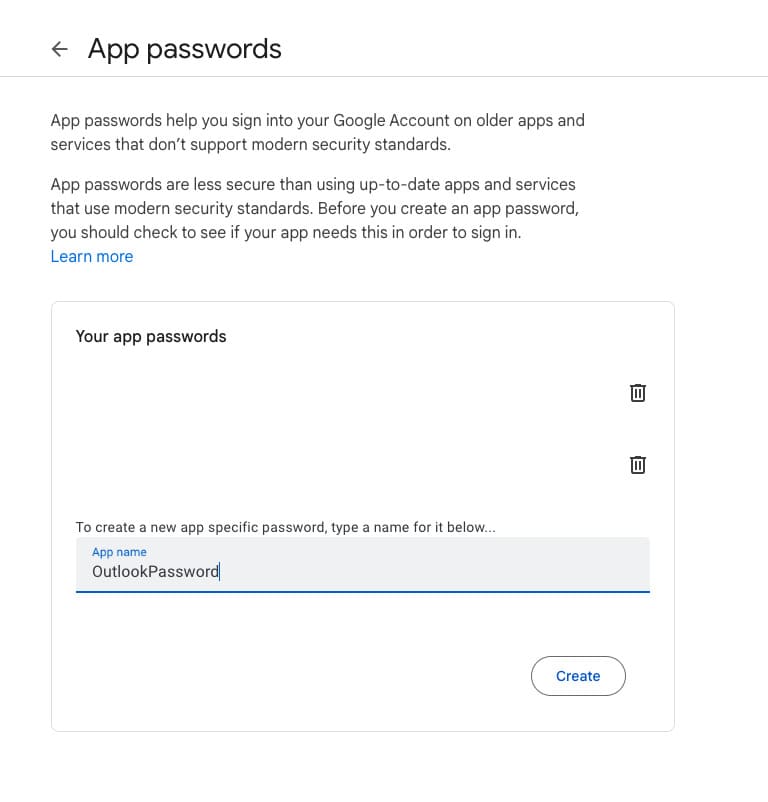
Скопируйте его и где то запишите, так как он показывается только один раз и является одноразовым паролем, если вдруг вы удалите свою почту из outlook и попытаетесь снова добавить ее, вам потребуется создать новый пароль.
3. Теперь можно полноценно добавить вашу почту на @gmail.com и в поле «Пароль», «Проверка пароля» ввести именно тот пароль который вам дал google после создания так называемого пароля для приложений.
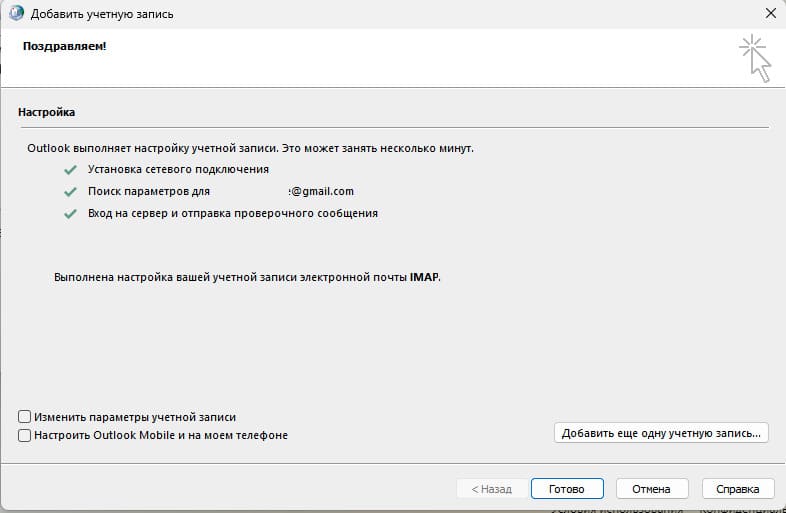
После того как вы нажмете далее, начнется подключение вашей почты к Outlook и если вы все сделали правильно то подключение завершится успешно.
Следуя вышеперечисленным советам по устранению неполадок, вы сможете быстро решить проблему и продолжить работу.