

In this article, we will look at the most basic settings of Windows Server 2022 - Active Directory, DNS, DHCP, (Remote Desktop) terminal license settings, adding users... These settings are optional, but they are usually used as basic settings for most tasks.
- You can download the ISO disk image of Windows Server 2022 Standard and Datacenter for free in our catalog.
- Step-by-step instructions for installing Windows Server 2022 in our last article.
- You can also buy product license keys for Windows Server 2022 Standard and Datacenter in our online store.
1) The next step, we need to set a name to the server for an easier connection to it. Go to the explorer => On the left "This PC" => Properties.
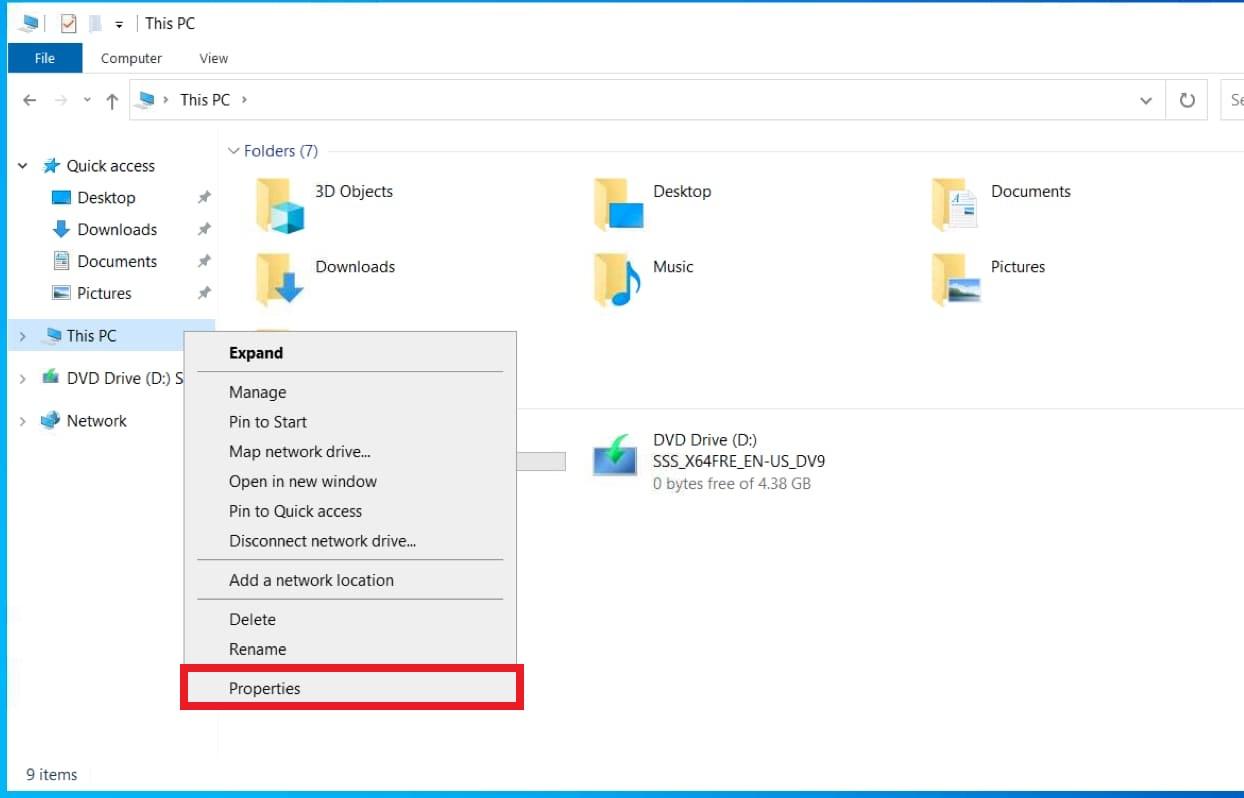
- About => System protection
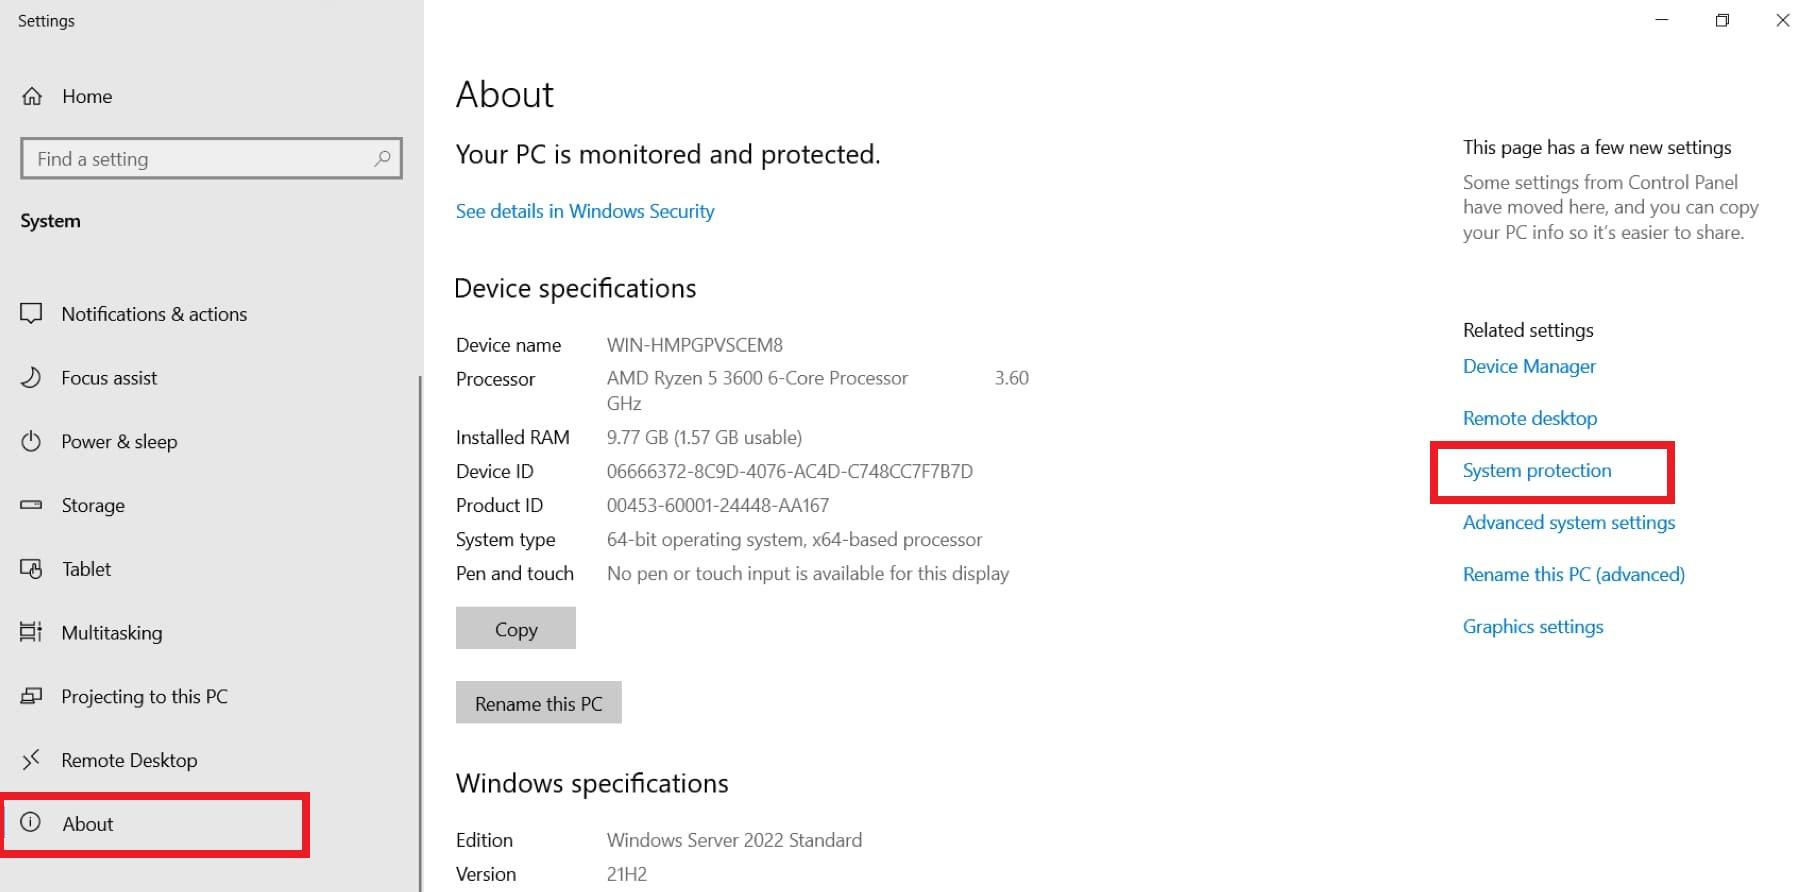
- Computer Name => Change
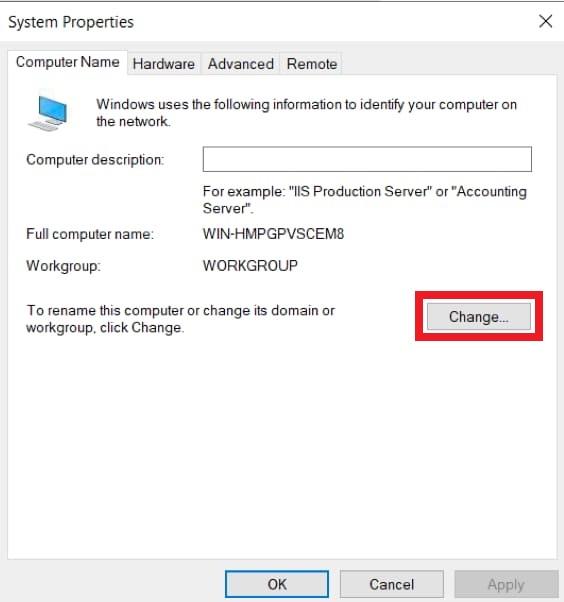
- The computer can be named anything, but we recommend using only Latin letters and numbers.
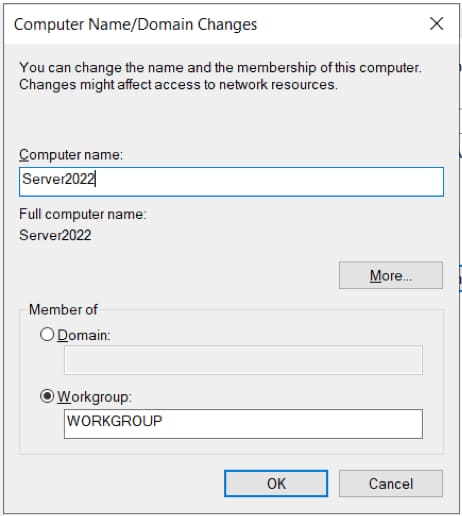
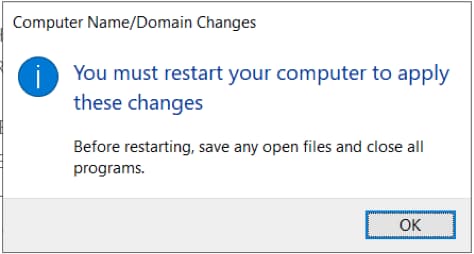
- You need to restart the server.
2) Next, we will set the local static IP address of the server. This is also necessary for an uninterrupted connection to it. (It is recommended to use a static public IP to connect to it correctly from an external Internet network). This setting is also necessary for configuring the DHCP server later on.
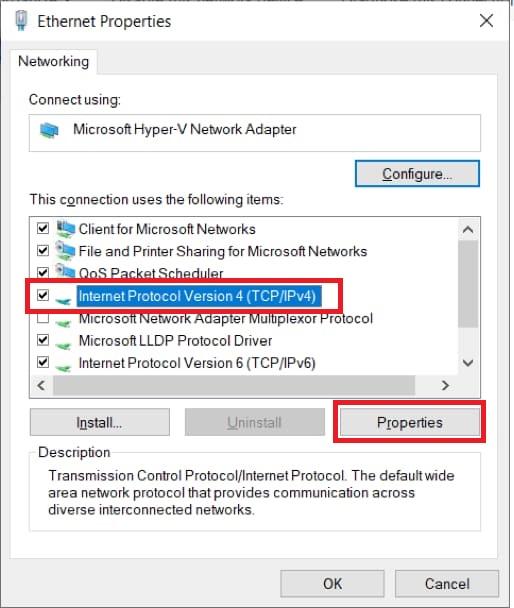
- Enter ncpa.cpl in the search.

- Right-click on the network adapter => Properties.
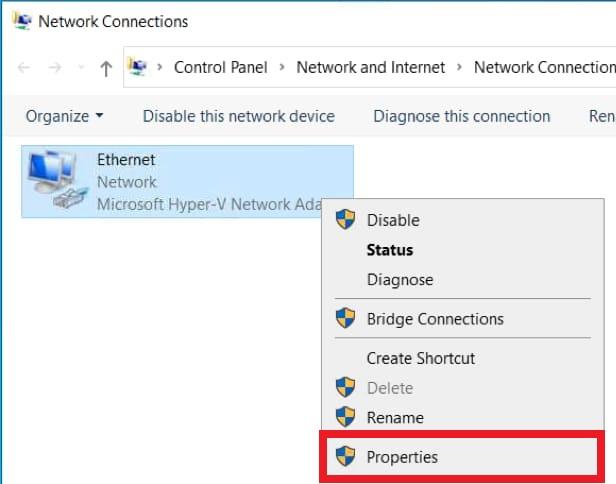
- We will configure Ipv4, select it with the cursor and click "Properties".
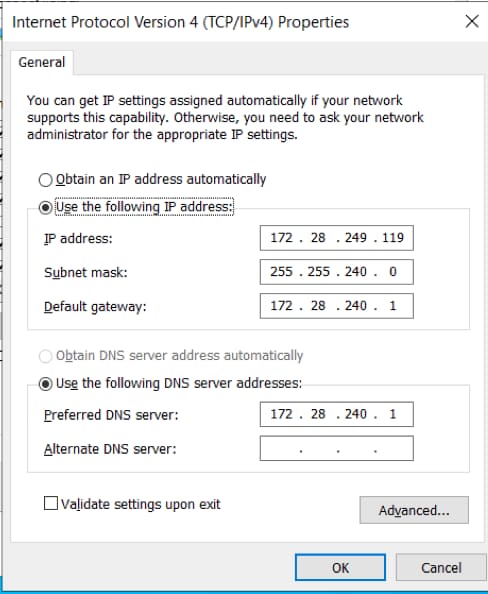
- Setting the IP settings of your local network. Attention! The screenshot below is an example, you should have your own settings for your network.
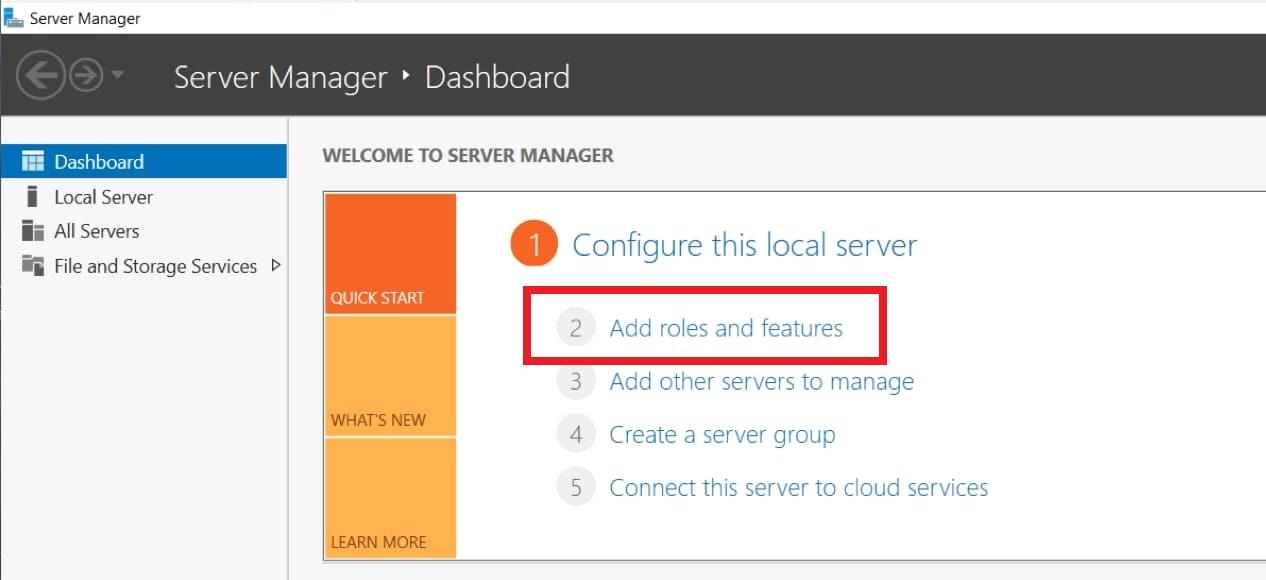
3) Now let's move on to adding roles and features in Active Directory (Server Manager).
- Click the Start menu => Server Manager.
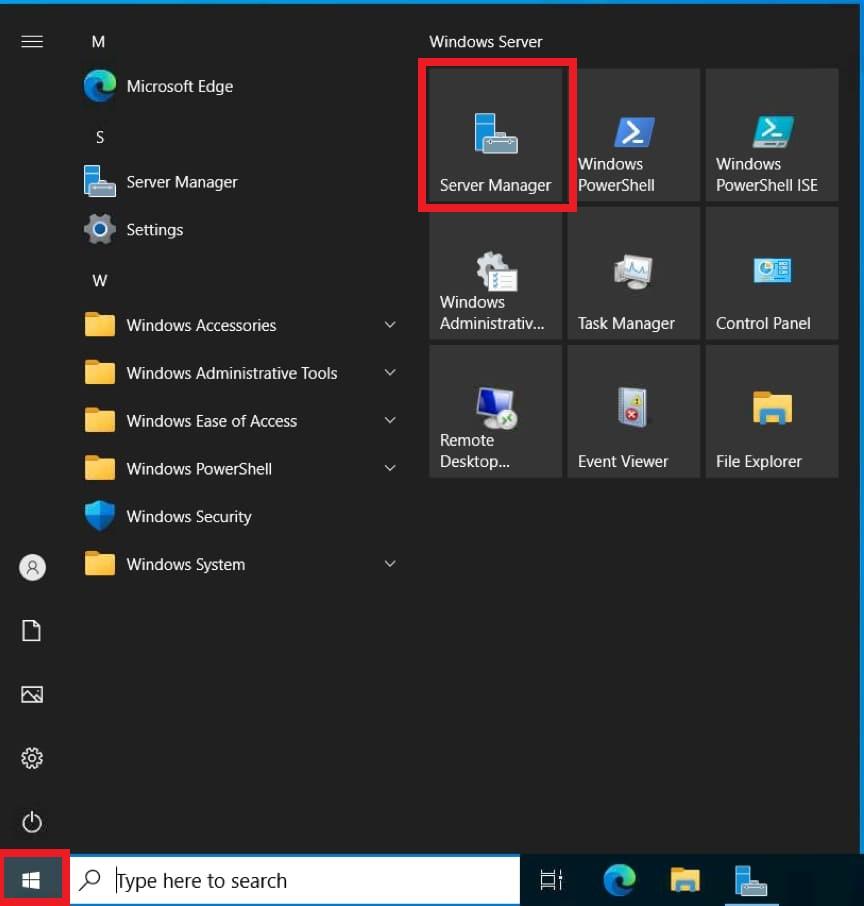
- Add roles and features.
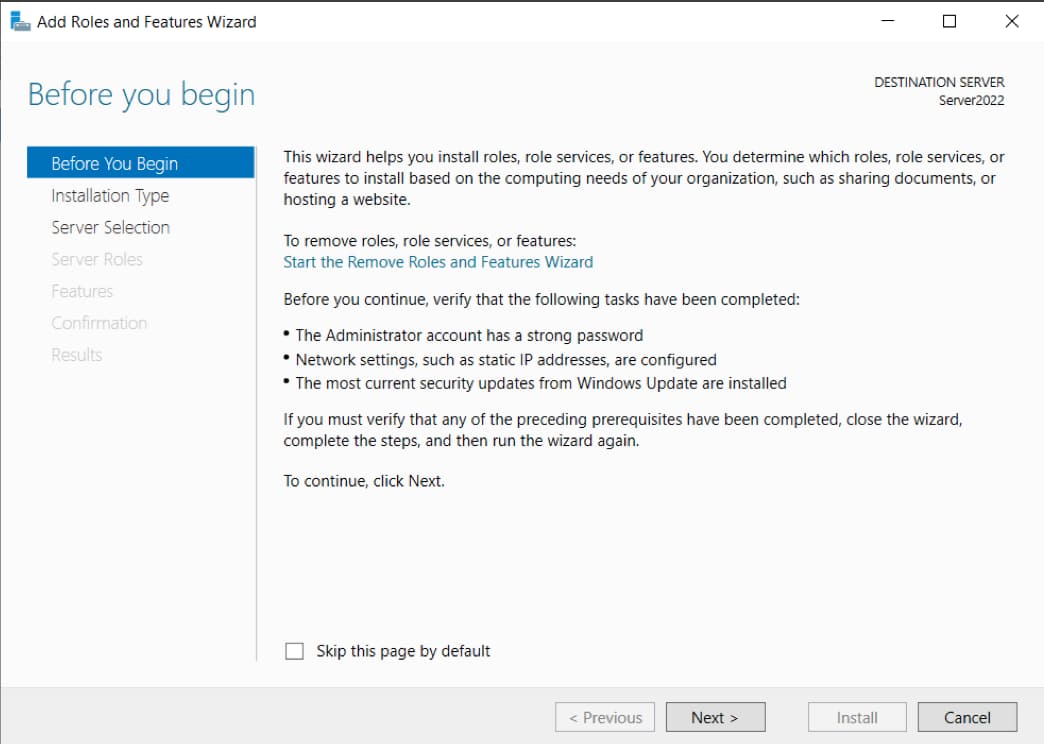
- In the next window, just click "Next".
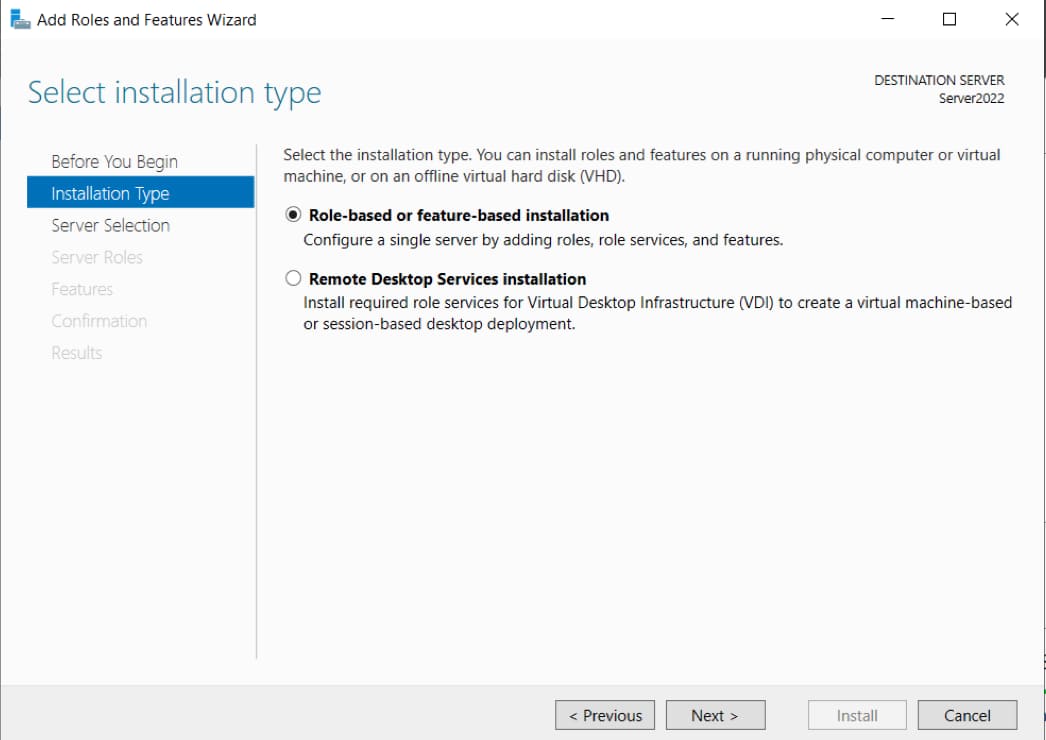
- In the "Installation type" menu, select => Install "Role-based or feature-based installation".
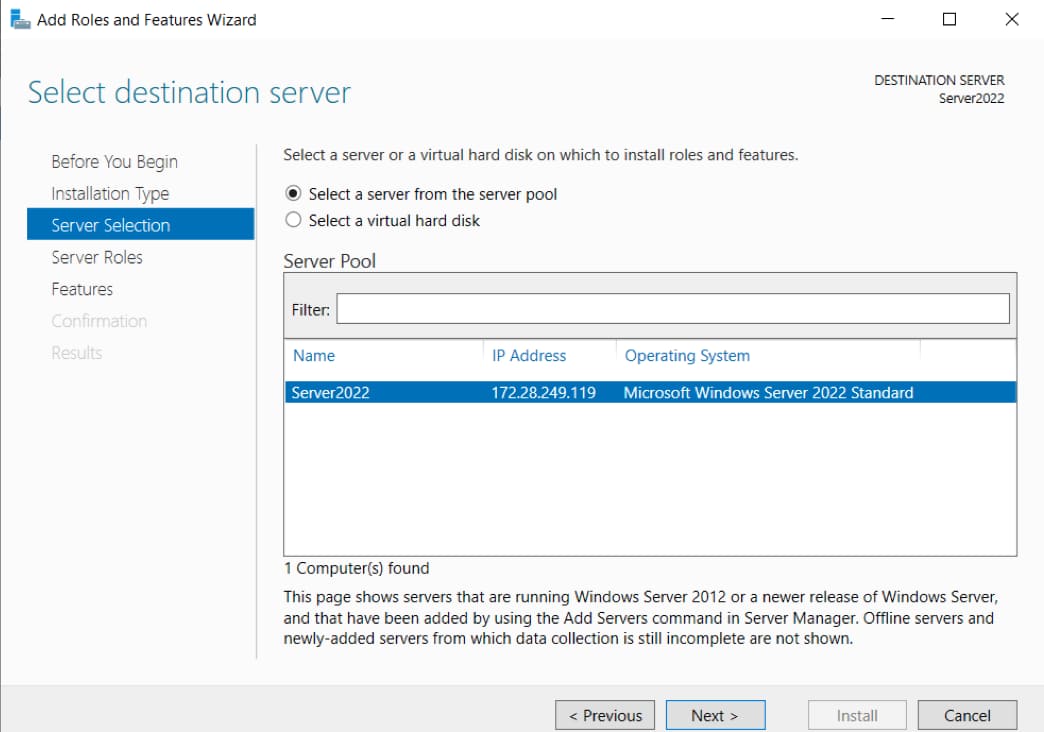
- Next, "Select a server from the pool". We should have one.
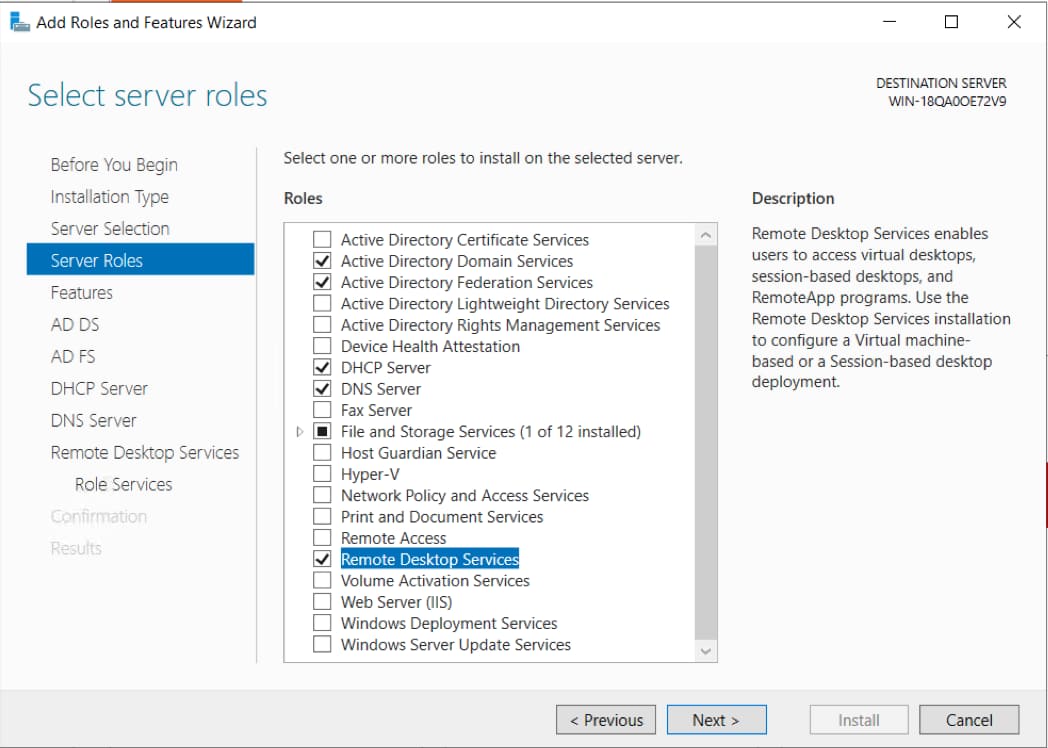
- Next, we select the roles you need (server functionality), in which case, you can always add something else if you need something additional.
We will use the example of a DHCP server, DNS server (Attention! DNS (domain) it is not always needed for work tasks, make sure that you need it before choosing it for installation. We install it just for example.), Domain services and Remote Desktop Services (to connect to the server via RDP).
After selecting the desired functionality, click "Next".
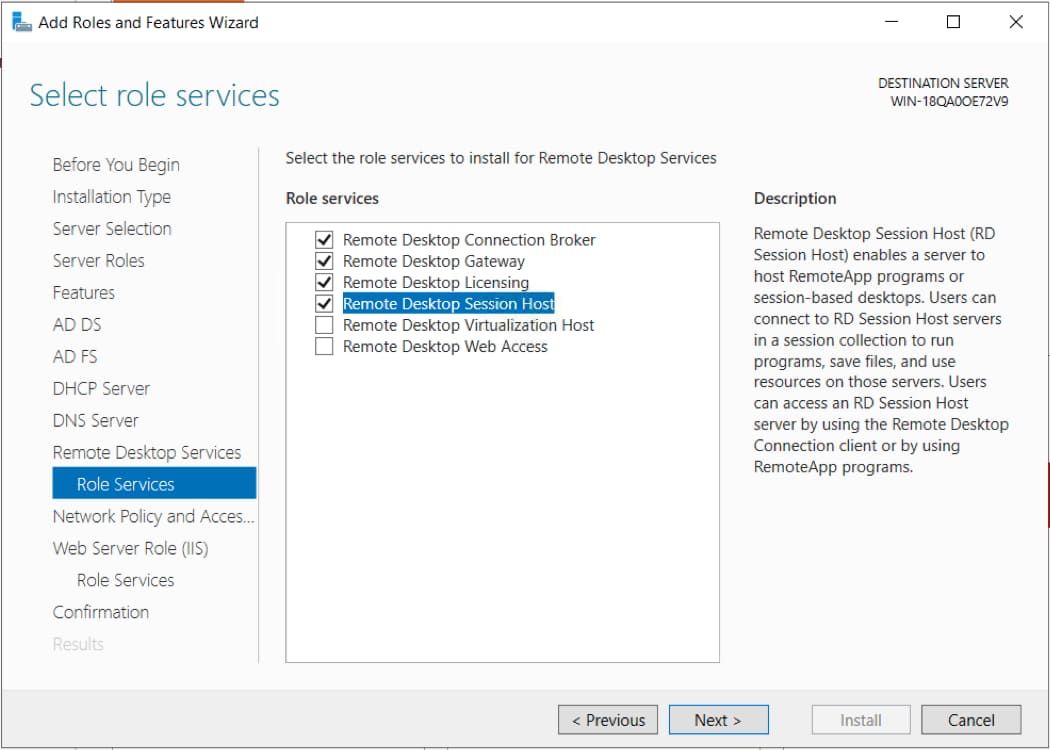
- We get to "Roles Service" => Choose there "Remote Desktop Licensing", you can also install - "Remote Desktop Gateway", "Remote Desktop Session Host", and "Remote Desktop Connection Broker".
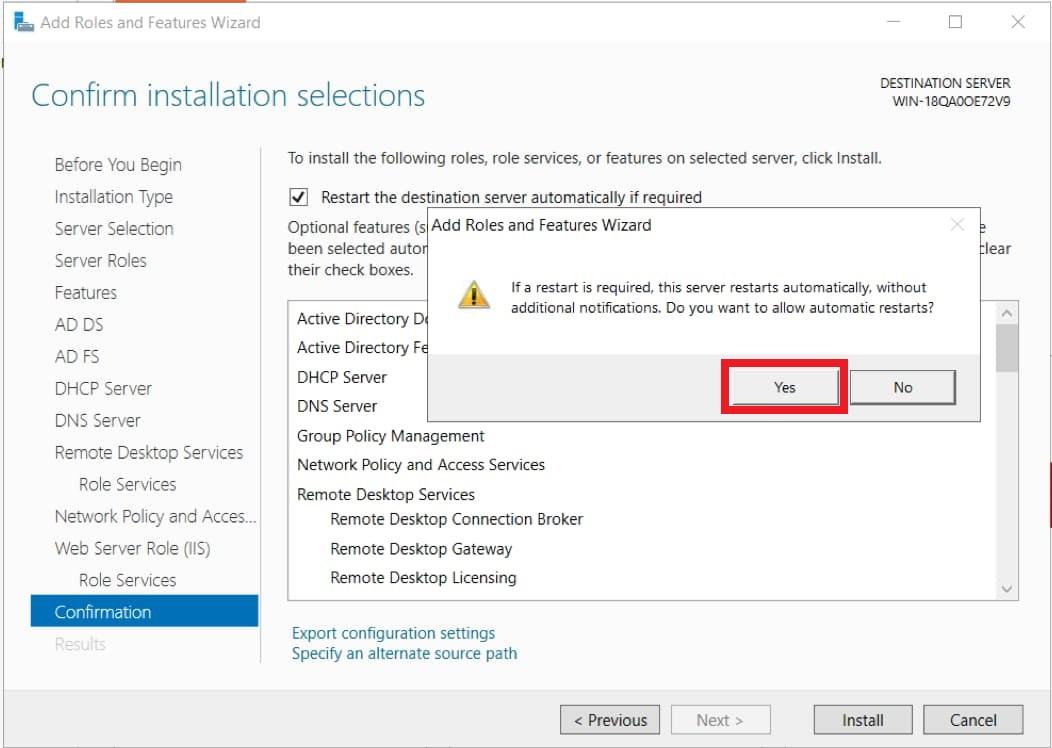
- We reach the end and reboot the server to apply the settings.
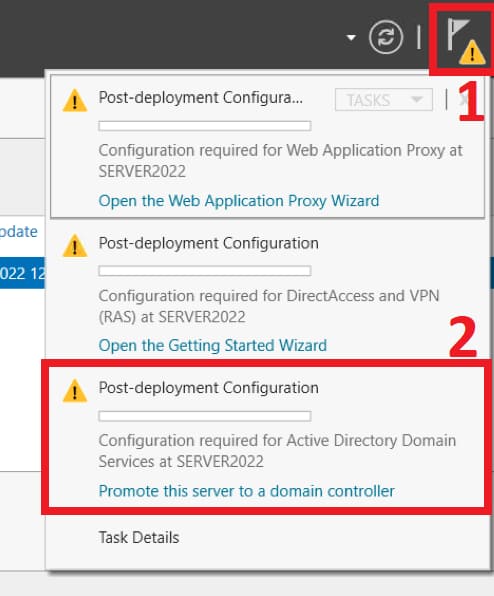
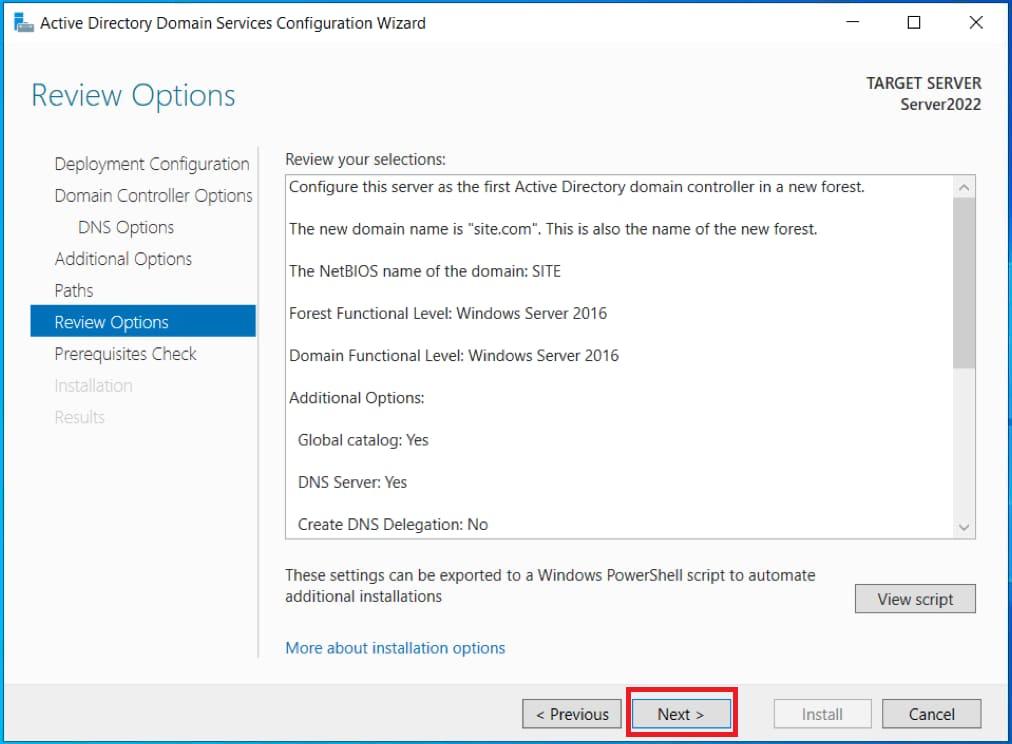
4) Now it will go back to the server manager => flag button => Promote this server to a domain controller. Attention! If you have not installed this component, then skip this setting.
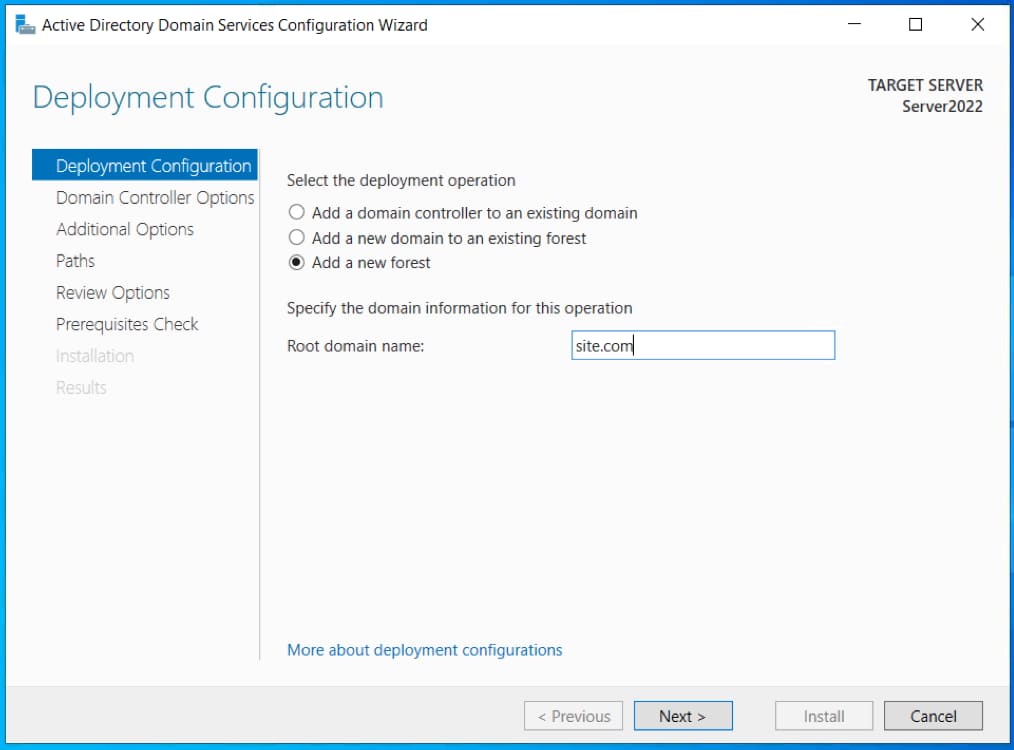
- Select the item "Add a new forest" => and set a name for the domain, it can be any, for example, the name of your company, or the name of your website. It is recommended to only use Latin letters (or numbers).
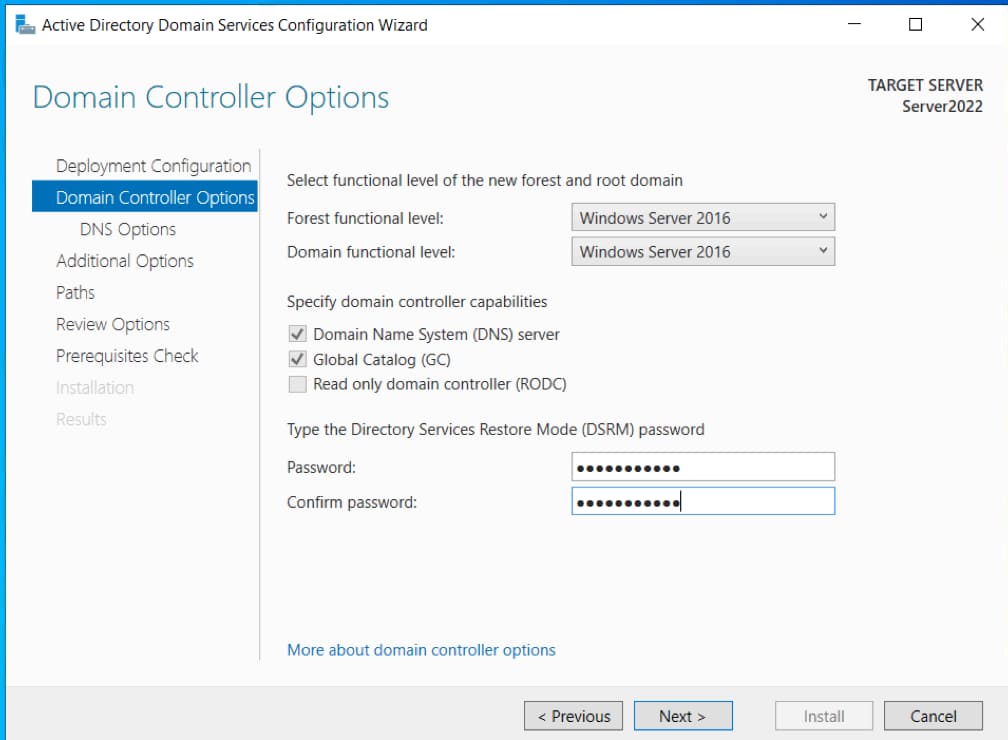
- In the domain controller options, we set the password for your domain.
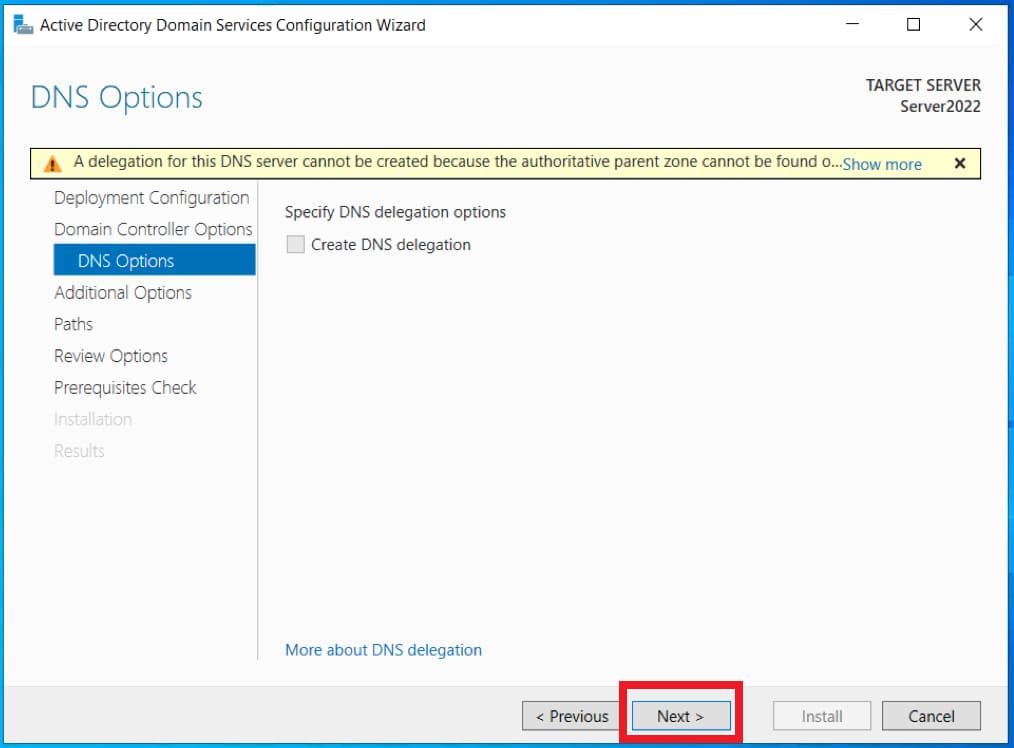
- The next step is just to click "Next" if you have it out.
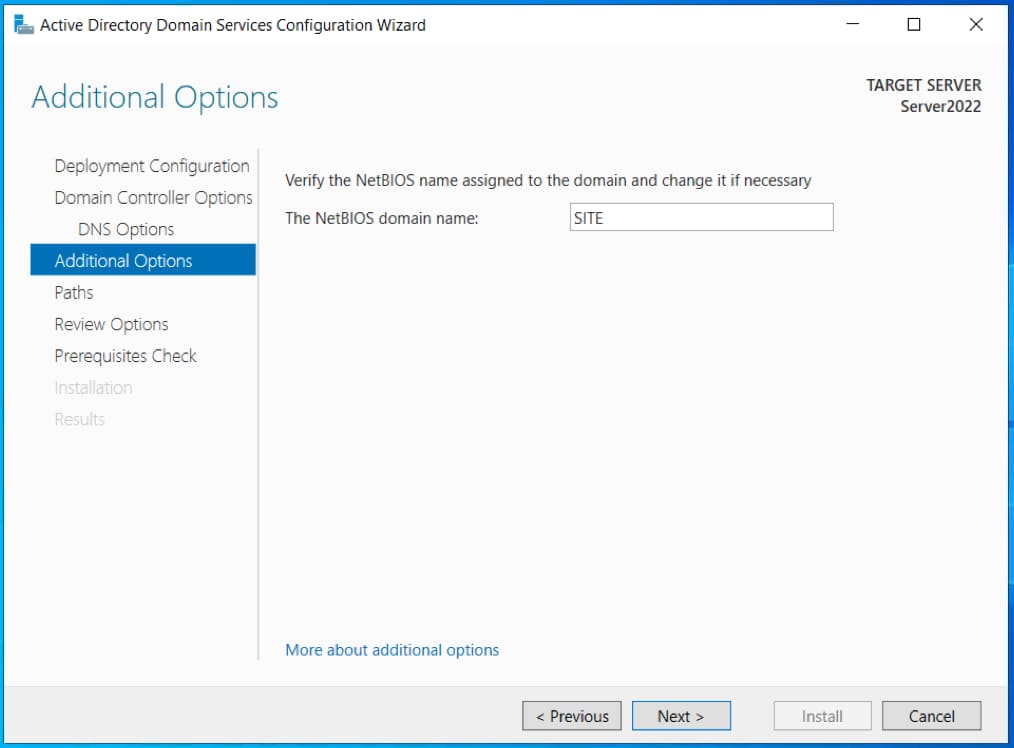
- The NetBIOS parameter is usually set automatically on behalf of the domain.
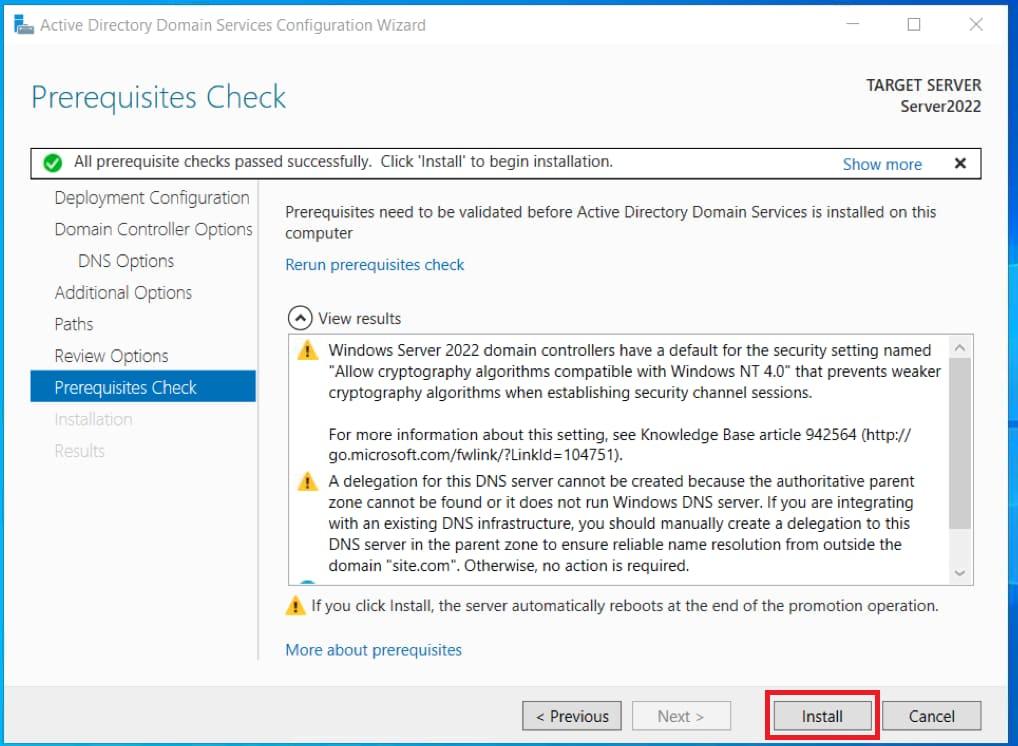
- We get to checking the prerequisites and click "Install". Wait for the installation. Your server should be rebooted after.
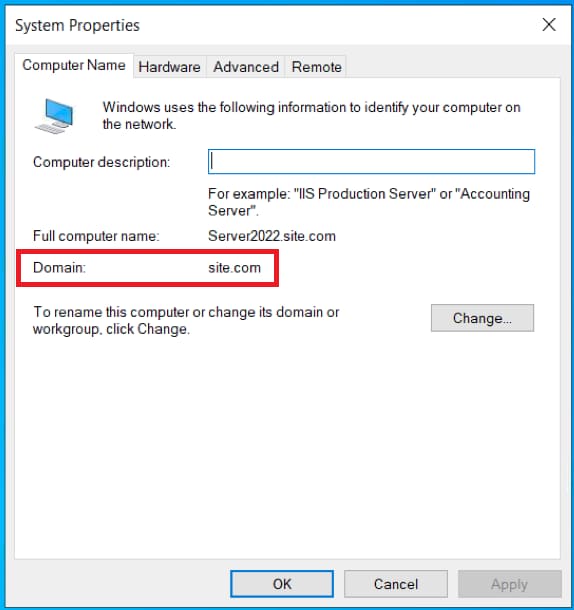
- After installing the domain, you can check in the system properties that your server has been added to the domain.
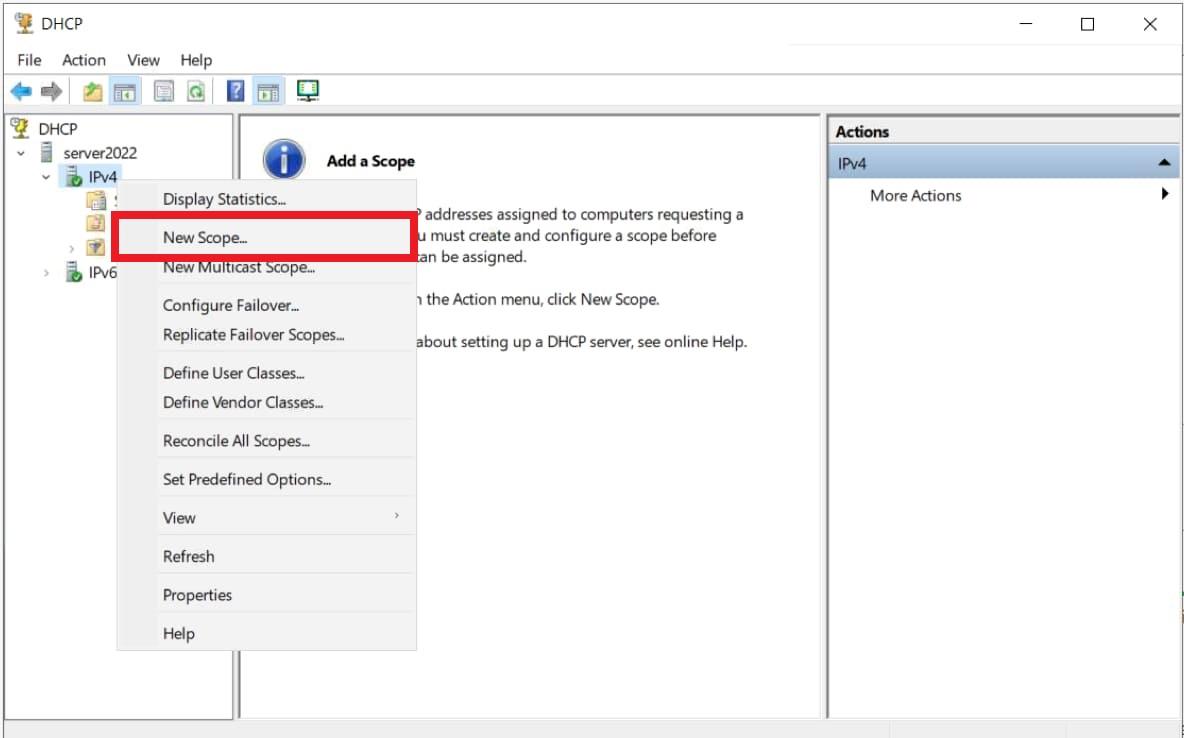
5) Let's move on to configuring DHCP so that the server can distribute IP addresses to client PCs.
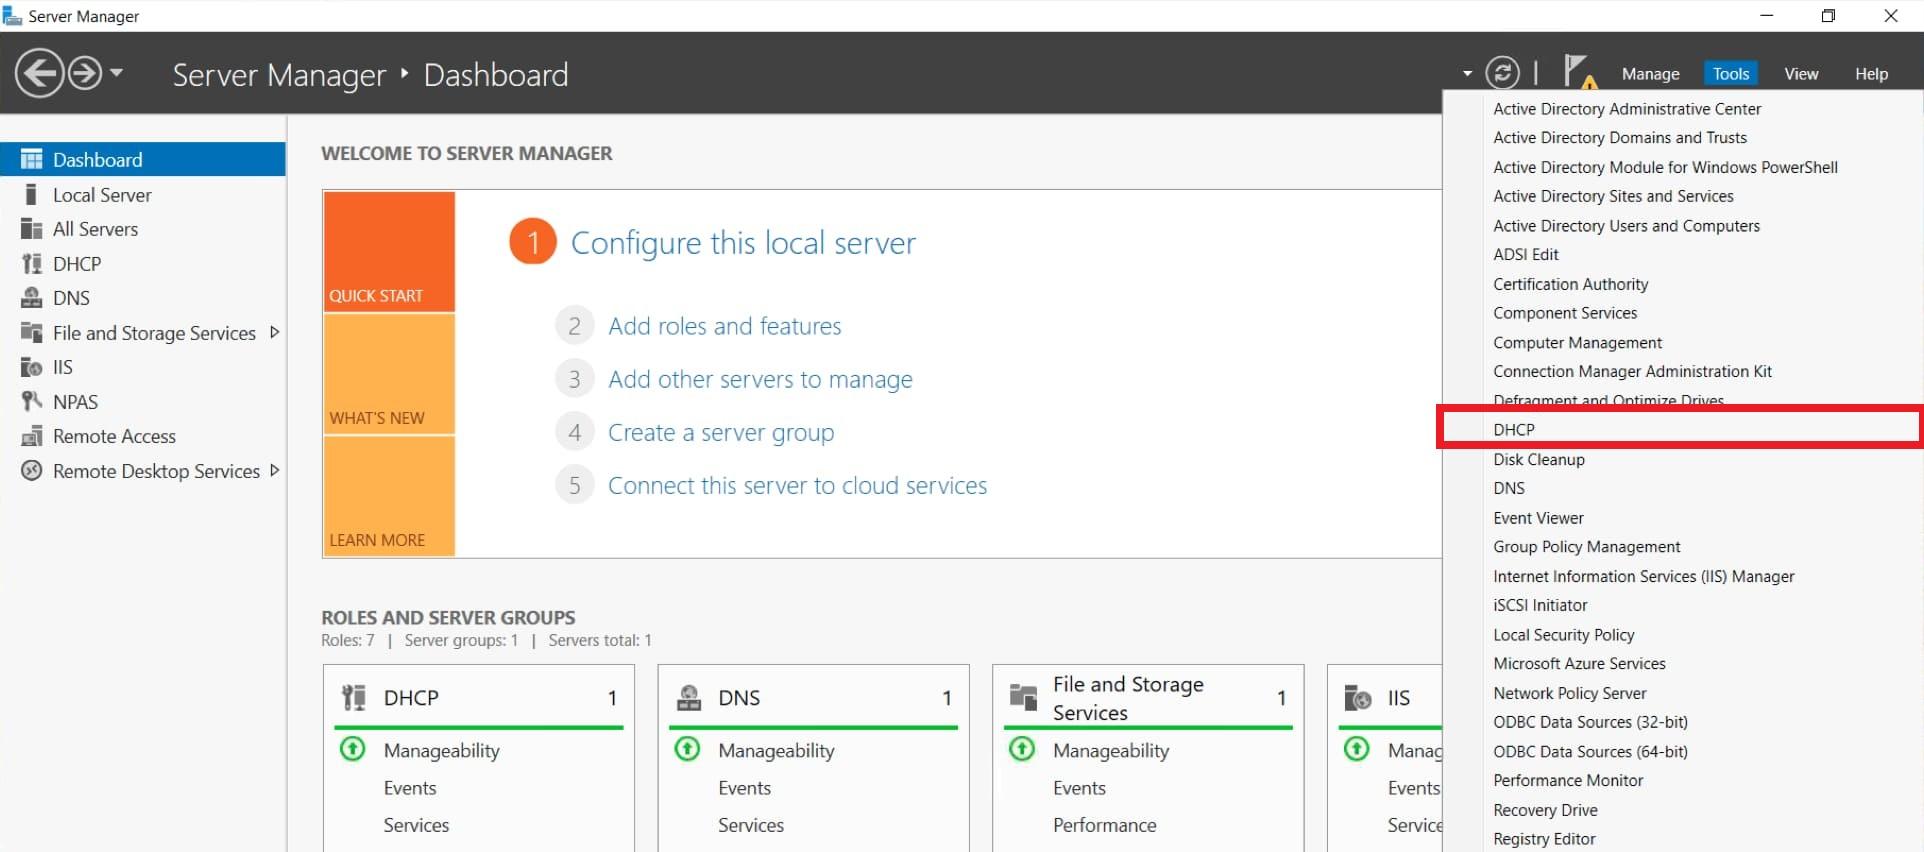
- Choosing IPv4 => New Scope.
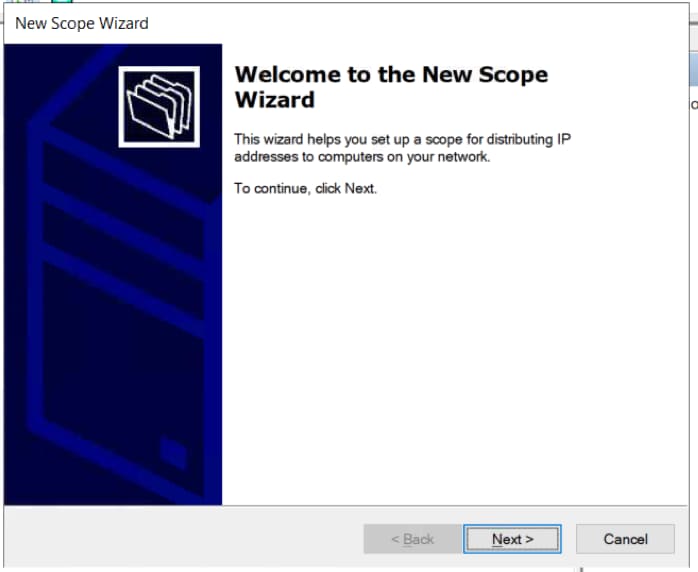
- Click "Next".
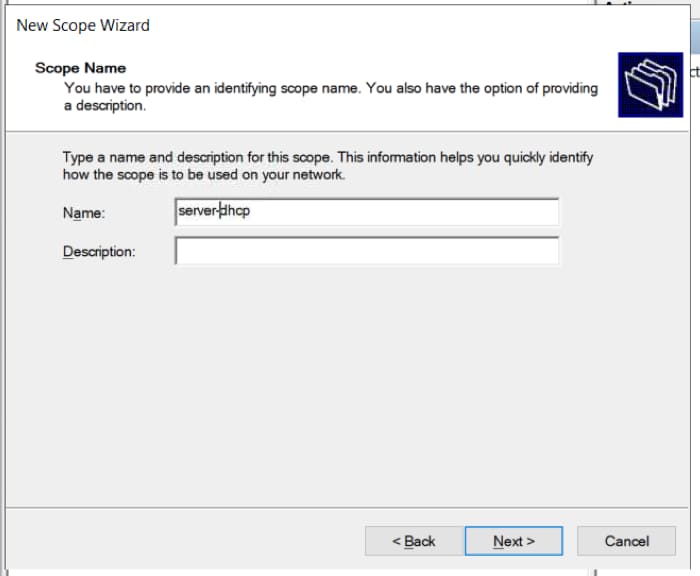
- We set any name of the area.
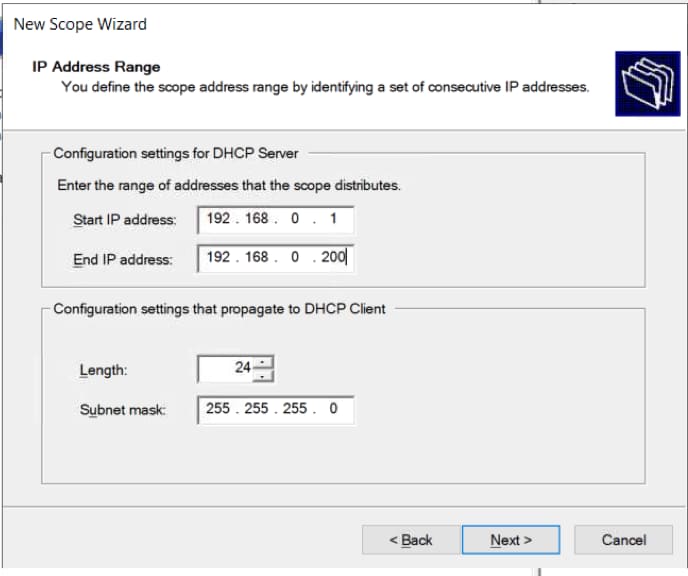
- Next, we set the range of IP addresses that the server will distribute to local computers, as well as the subnet mask. (The screenshot below is an example, you can have your own range).
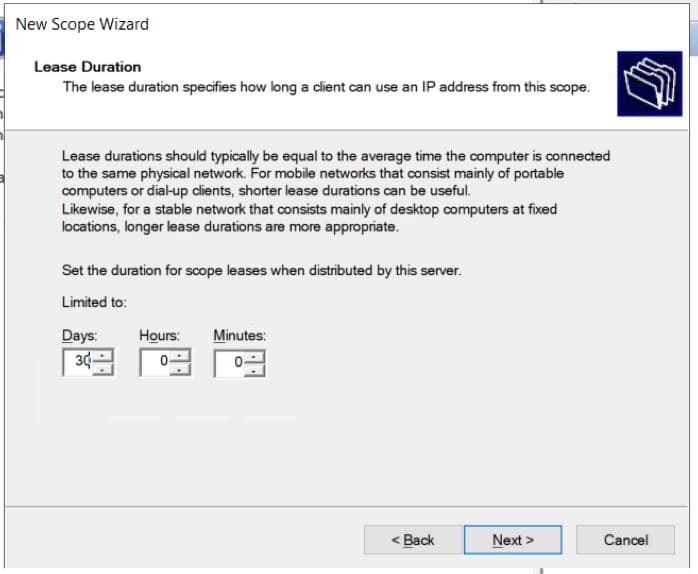
- We set the expiration date for the distribution of IP addresses to computers. We will set an example for a period of 30 days, you can set any other.
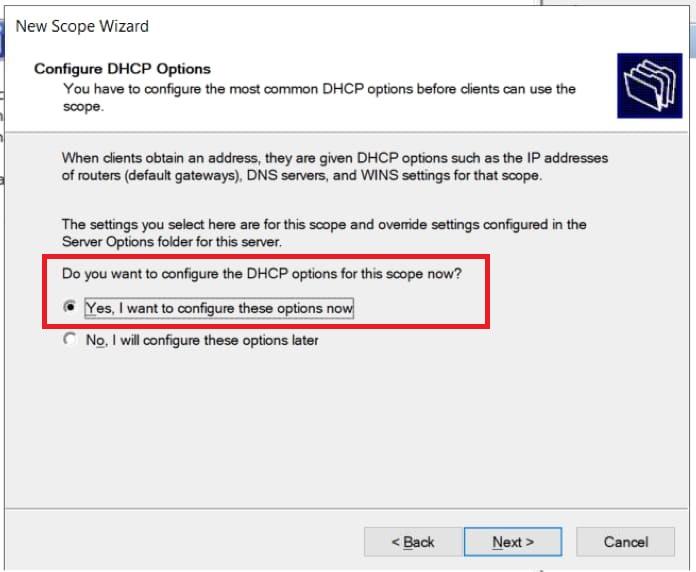
- Select the item "Yes, I want to configure these options now".
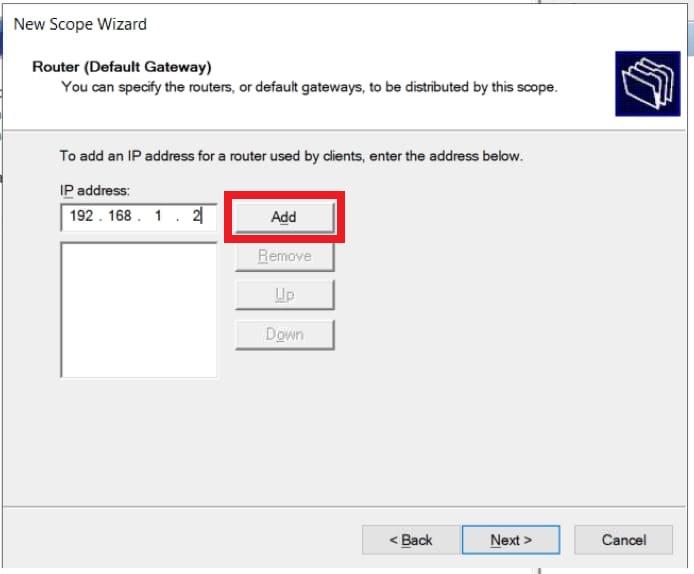
- You can add the address of the router from your network.
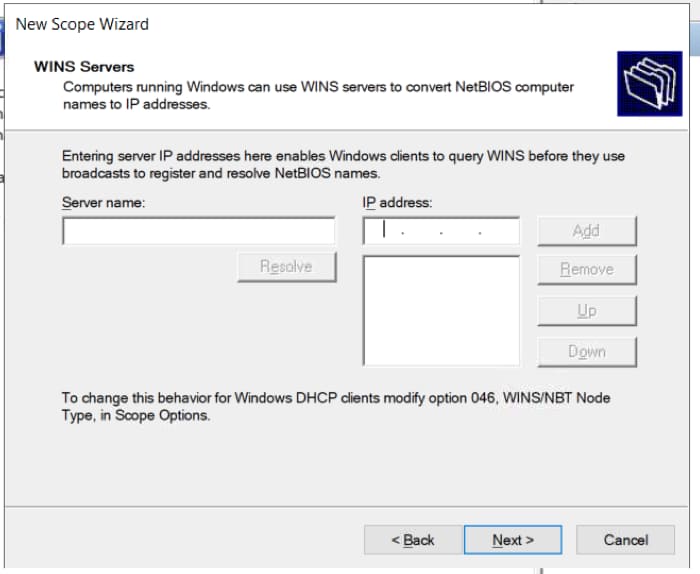
- You can add a WINS server, if you already had it previously configured on the server, then it will be added automatically. Or you can skip this setting item.
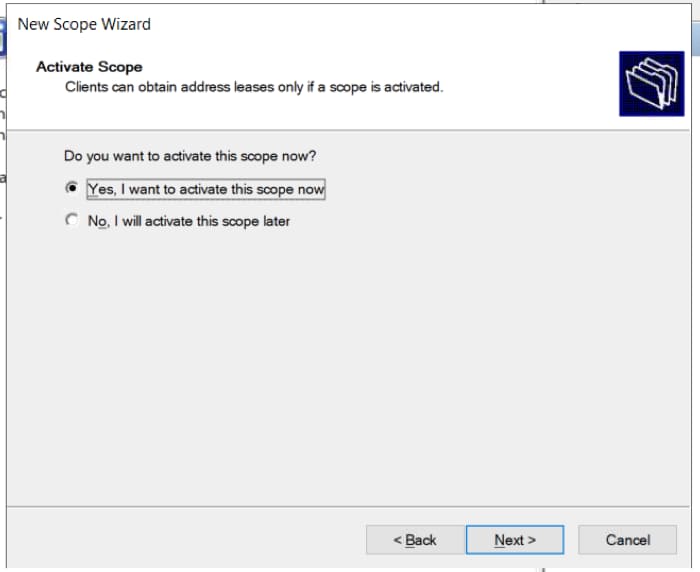
- Yes, I want to activate this scope now.
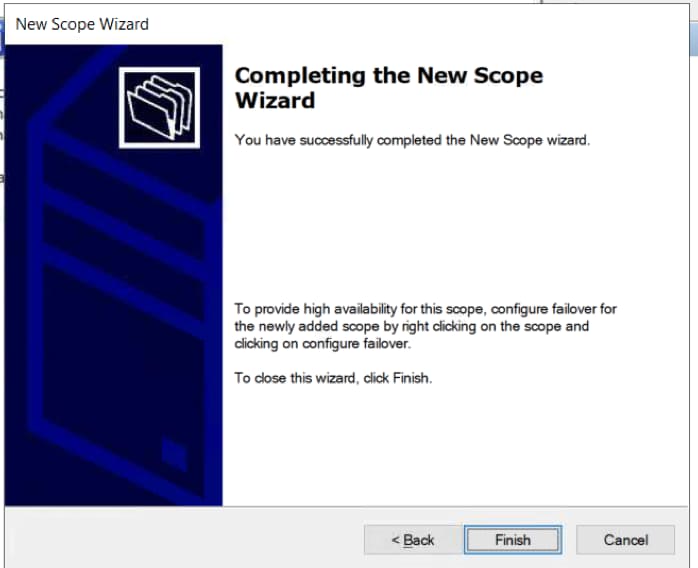
- Done.
6) Now let's start licensing remote desktop services (RDP/RDS) so that you can connect to the server from client PCs via RDP.
- The first thing you need is a Windows Server 2022 RDS User or Device CAL product key. You can buy it in our catalog on the next page. Delivery of the key within 3 hours after payment to your email. And also, we provide free 24/7 technical support.
- What is the difference between User CAL and Device CAL can be found in our last article.
- To activate the RDS key, you can now use the following instructions for configuring and activating this functionality in our last article. The instruction is universal, starting from the 2012 r2 version to Windows Server 2022.
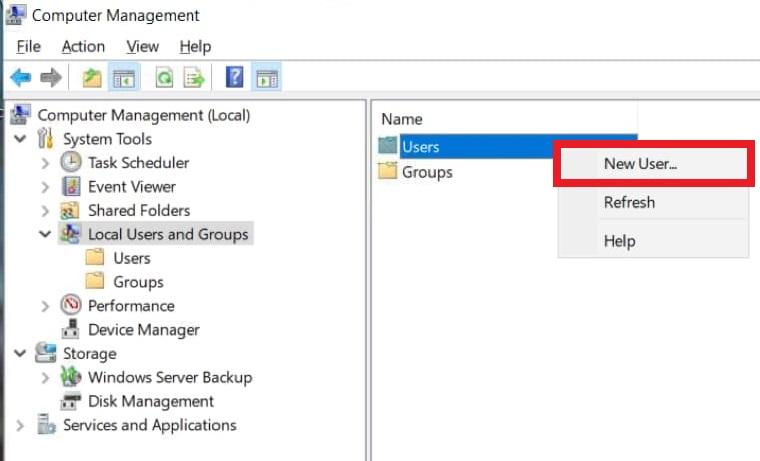
7) The next step is to consider how to add a user to Windows Server, if you have not installed a domain (DNS) on the server. With the created users, you can connect to the server via RDP under their accounts.
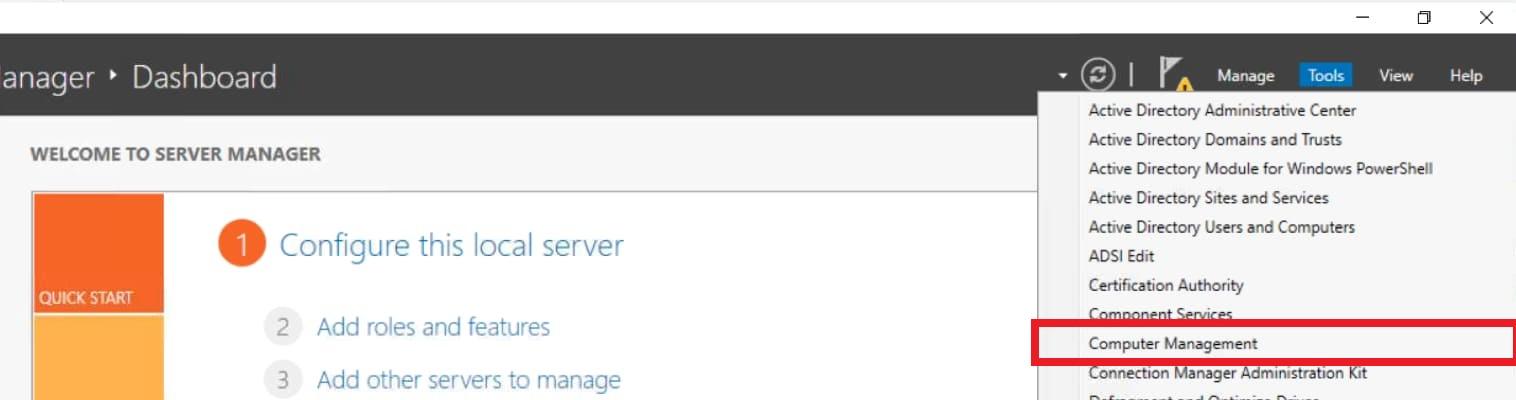
- Go to Active Directory => Tools => Computer Management => Local Users and Groups => Users => New User.
- We set the user's name, you can also specify his position, or a short description. Be sure to give him a password to log in. If desired, you can set the points prohibiting the user from changing the password and disable the password expiration date.
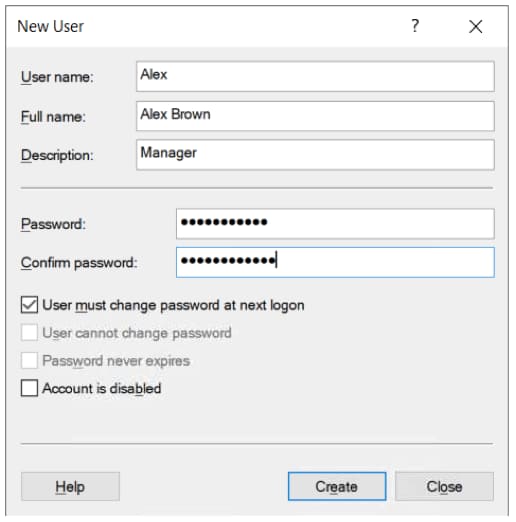
- The user has been created. By double-clicking on it with the mouse cursor, you can set the user more detailed settings, if necessary.


