In this article, we will explain how to uninstall a Windows 11 update if the system or programs start working incorrectly after installing it. Removing the update and pausing automatic updates can temporarily solve the problem until Microsoft releases a corrected patch.
Step 1: Opening the Control Panel
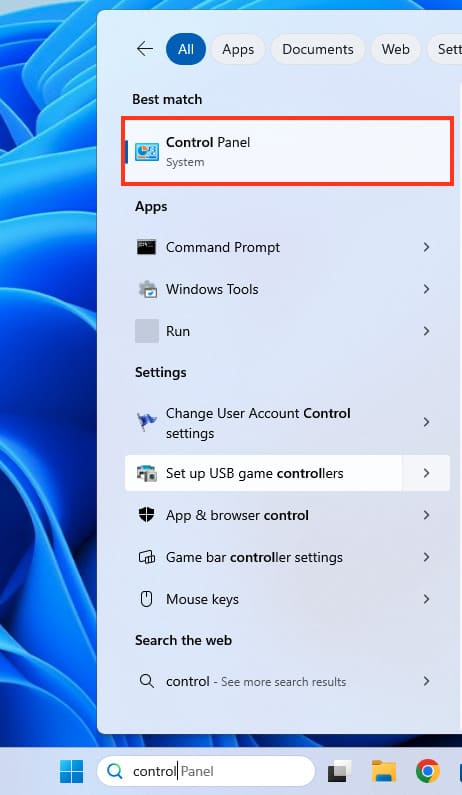
1. Click on Start and type “Control Panel” in the search box.
2. In the results, select Control Panel.
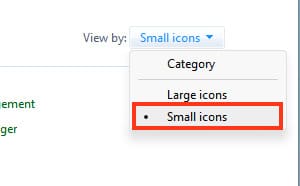
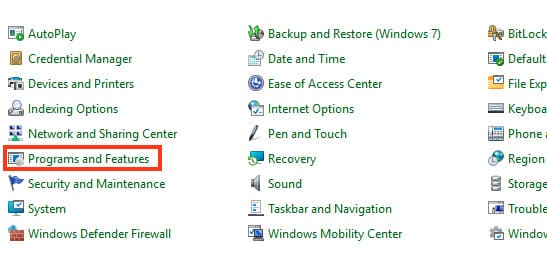
3. For convenience, switch the view to Small Icons to find the necessary items more quickly.
Step 2: Removing the Update
1. In the Control Panel, go to Programs and Features.
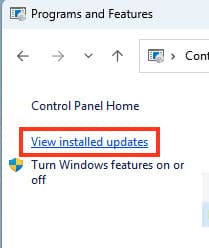
2. On the left, select View installed updates.
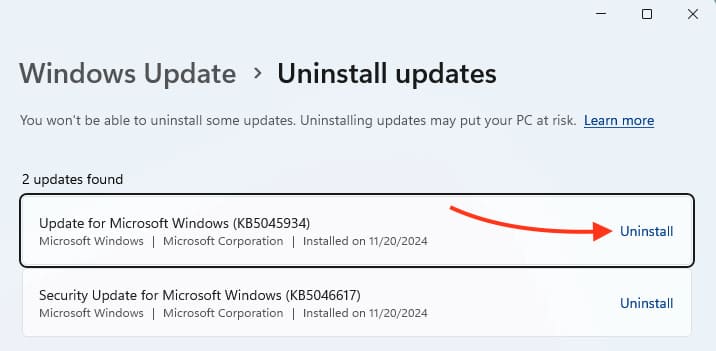
3. Find the most recent update by the installation date (for example, KB5045934).
4. Right-click on the update and select Uninstall.
Step 3: Pausing Automatic Updates
After removing the update, it is important to prevent it from automatically reinstalling. To do this:
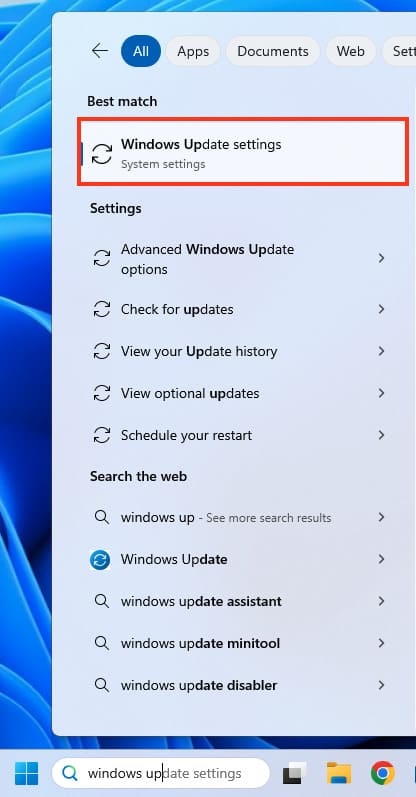
1. Open Windows Update (type Windows Update in the Start search bar).
2. Click on Pause updates.
3. Choose how long to pause — for example, 1 week, 2 weeks, or up to 5 weeks.
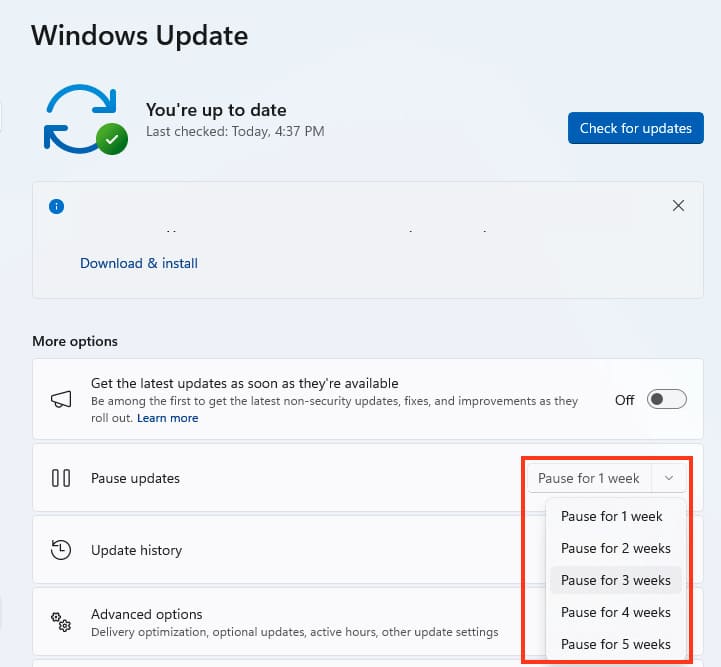
This will help avoid the problematic update from being reinstalled until Microsoft releases its fixed version.
In this way, you can remove the problematic update and temporarily pause automatic system updates. After Microsoft fixes the issue, you can turn updates back on by selecting Resume updates.
