

In this article, we will review the update of the popular bootable USB creation utility, Rufus, to version 4.0. You will learn about the new features and limitations introduced in the new version, as well as see a step-by-step guide for creating a bootable flash drive with Windows 10 or Windows 11. Additionally, we will touch on the topic of supporting older versions of Windows, such as Windows 7, and the specifics of working with the new features.
You can download Rufus from our server via direct link or from the official website.
Steps to create a bootable flash drive
1. Select device and language
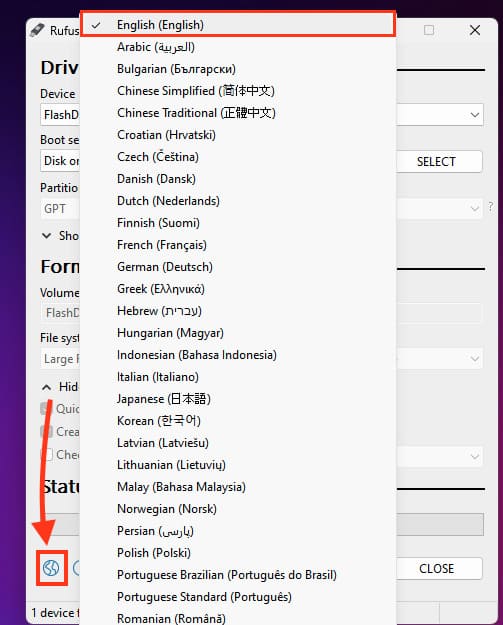
First, after opening Rufus, set your preferred language.
– Click on the Planet icon and choose your language, in our case, it’s English.
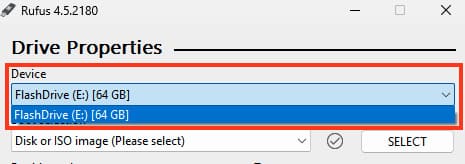
Next, select the USB device for creating the bootable flash drive in the “Device” section.
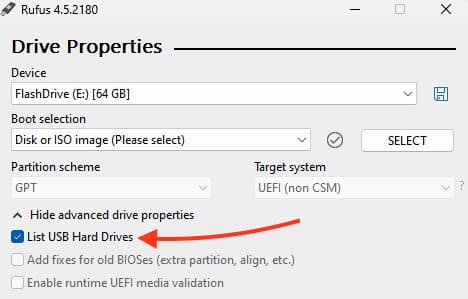
If the drive is displayed as a local disk, it may not appear in the list. To fix this:
– Open “Show advanced drive properties”.
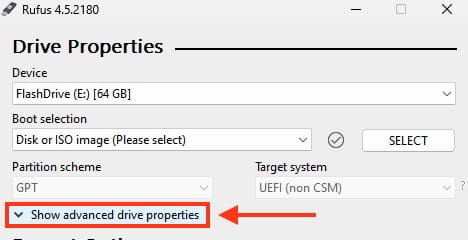
– Check the box for “List USB drives”. Now the device will be available.
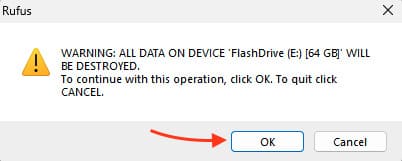
Please note that all data on the USB drive will be erased.
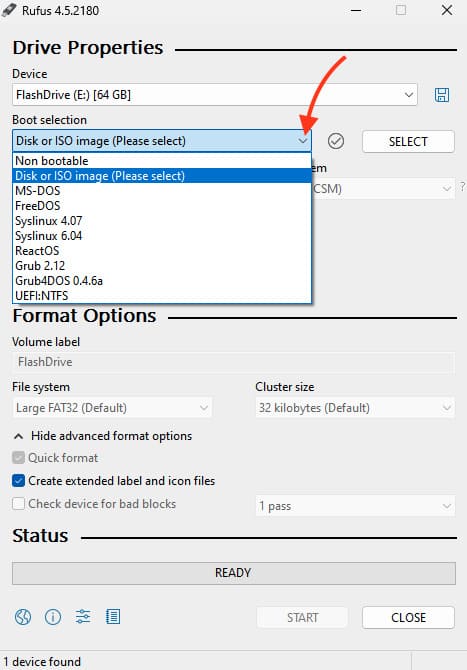
2. Select the boot method
Select the boot method. Typically, “Disk or ISO image” is used.
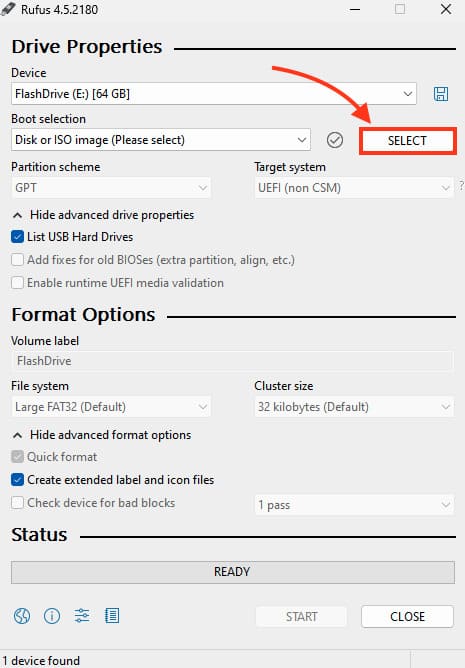
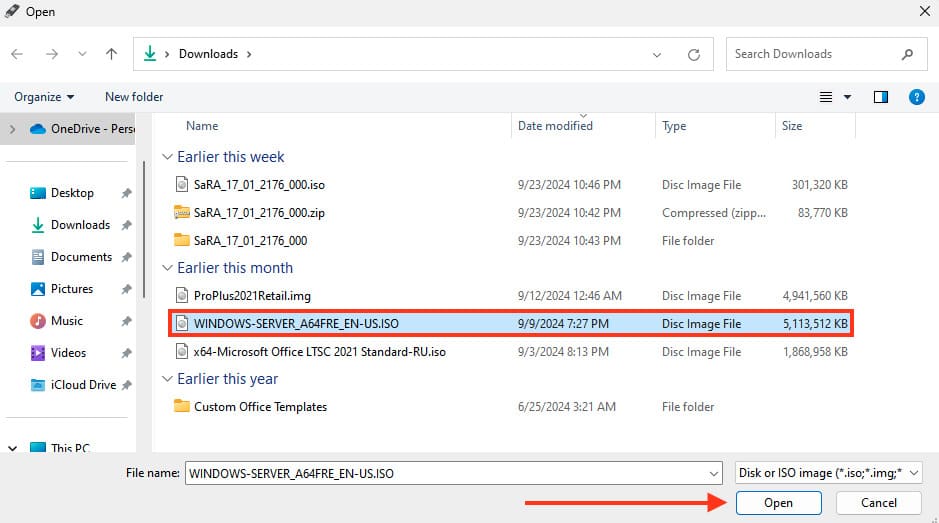
3. Select the image
If you already have an operating system image, click “SELECT” and choose the desired distribution. Or download it first from our catalog.
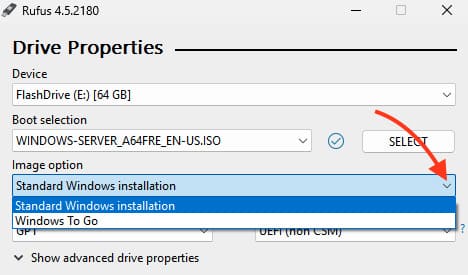
4. Choose the installation type
After selecting the image, Rufus will offer two options:
– Choose Standard Windows installation.
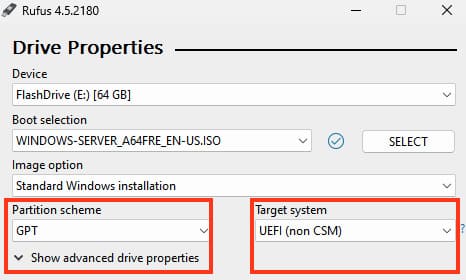
5. Set the partition scheme and target system
For modern computers, the partition scheme GPT and system UEFI are usually selected. You can leave these settings as default.
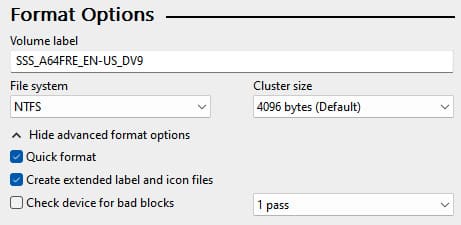
6. Set the disk label and formatting
You can set the disk label and select quick format. Leave the default settings unless other requirements apply.
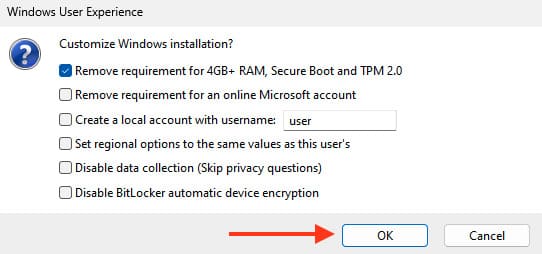
7. Compatibility options for Windows 11
Click “START”, and if you are using a Windows 11 image, Rufus will offer:
– Remove requirement for 4GB+ RAM, Secure Boot and TPM 2.0.
– Remove requirement for an online Microsoft account.
– Create a local account with username.
– Set regional options to the same values as this user’s.
– Disable data collection (Skip privacy questions).
– Disable BitLocker automatic device encryption.
If you have an older PC or laptop that doesn’t support TPM 2.0 and more than 4GB of RAM, you can check the first box.
Select the options you need and click “OK”.
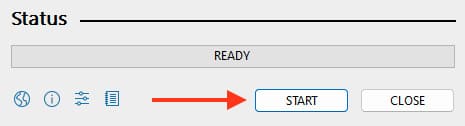
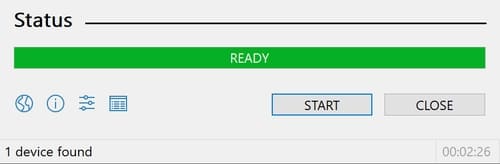
8. Start creating the flash drive
Click “Start” or “OK” after selecting the previous options.
A final pop-up will appear before the distribution begins writing to the flash drive, click “OK”.
After that, the writing process will start, and once it’s complete, Rufus will create a bootable flash drive that can be used to install or run Windows.
After writing the flash drive, you will need to boot it through BIOS/UEFI to begin the installation, selecting it as the boot disk. You can read more about how to do this in our other article.
Additionally, our online store offers you the opportunity to purchase licensed Windows product keys for various versions at the lowest prices. Instant key delivery to your email immediately after payment in automatic mode.