


В данной статье мы подробно покажем как установить Widnows 11 на виртуальную машину Hyper-V. Гипервизор Hyper-V — это встроенная ВМ на системах Windows 10 и Windows 11, т.е для ее работы не нужно ничего скачивать, ее нужно только включить и настроить.
Включается данная ВМ одинаково на обеих операционных системах.
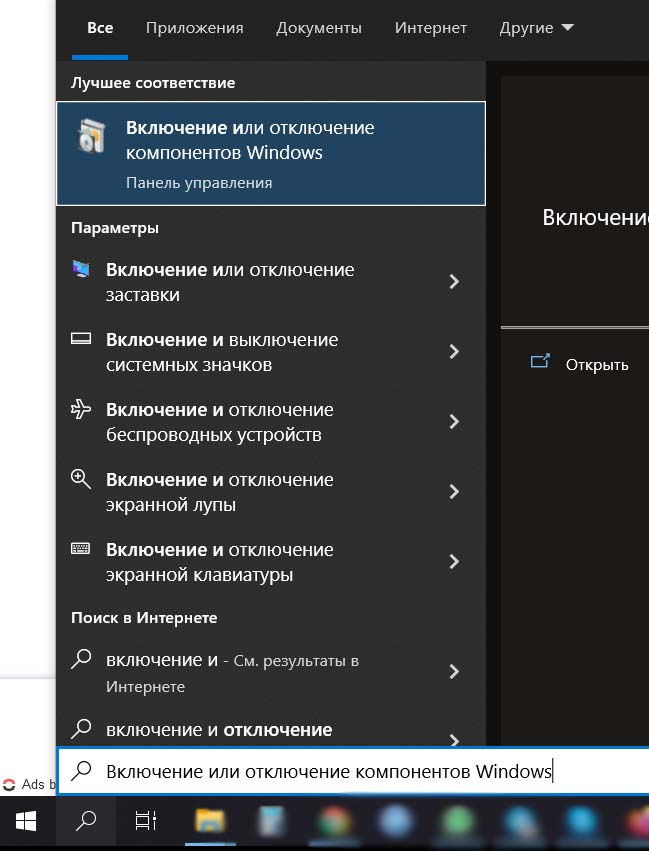
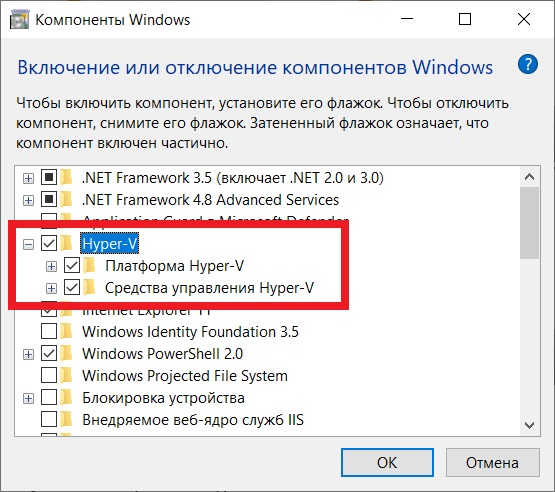
— Вводим в поиск Включение или отключение компонентов Windows => Переходим на соответствующий результат поиска.
— Отмечаем галкой Hyper-V и его вложенные папки. => нажимаем ОК => Перезагружаем ПК.
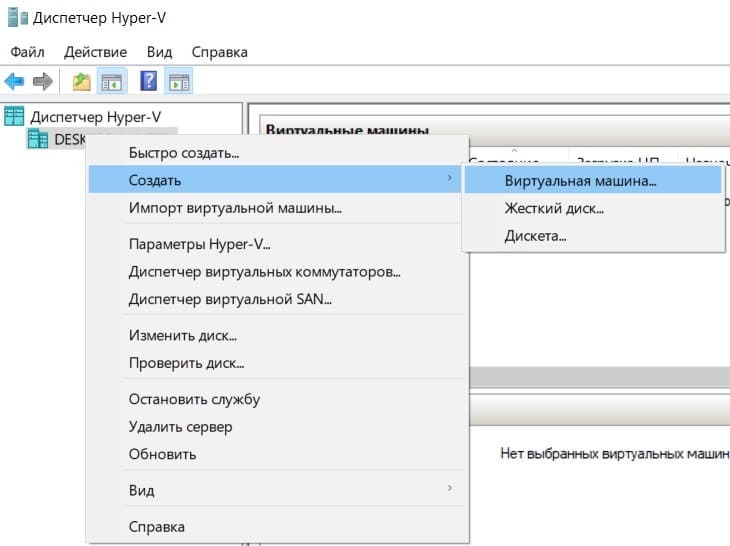
Теперь переходим непосредственно к настройке. Открываем Диспетчер Hyper-V, найти его вы можете через поиск на панели задач.
— Разворачиваем «Диспетчер Hyper-V» => Ваш Dektop => Правой кнопкой мыши по нему => Создать => Виртуальная машина.
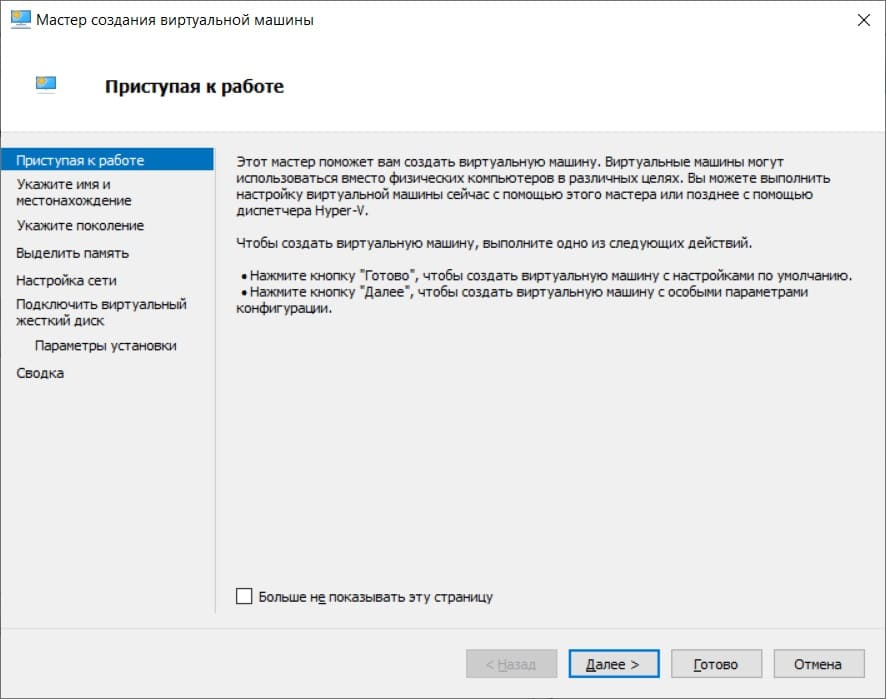
— Далее
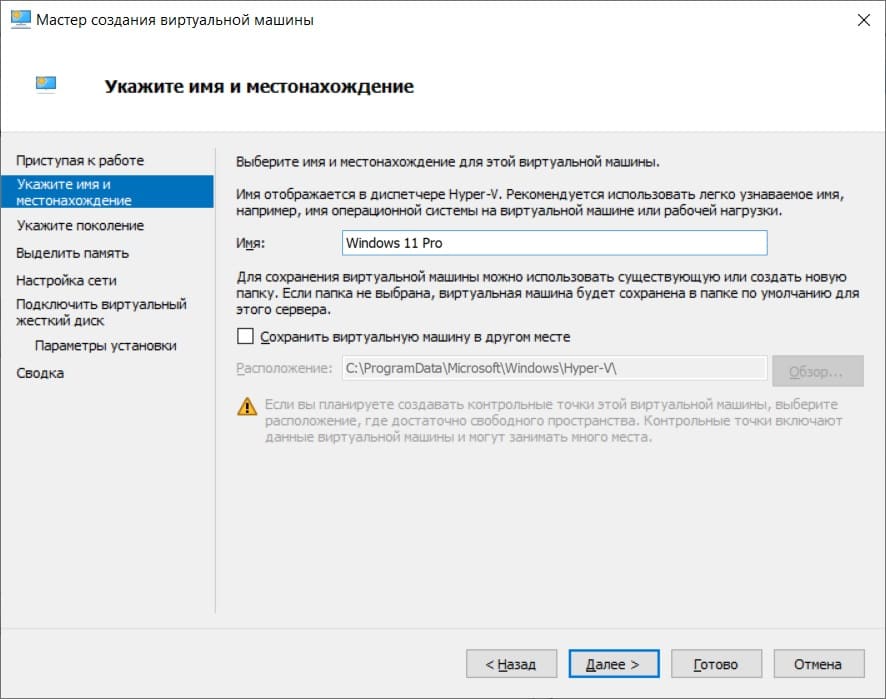
— Задаем имя виртуальной машине, можете указать любое. И жмем «Далее».
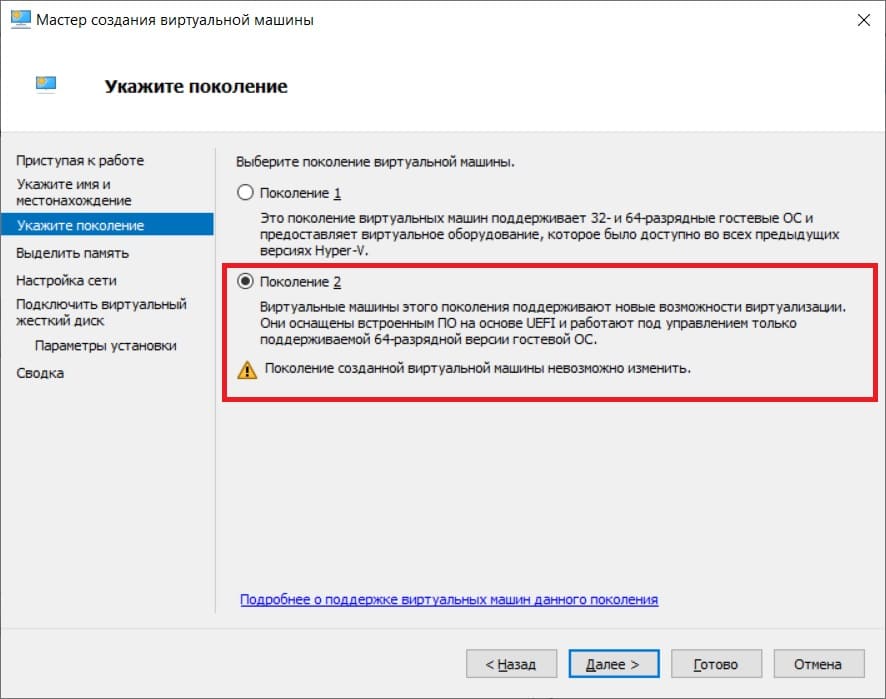
— Выбираем в следующем окне «Поколение 2» и жмем «Далее».
— Выделяем память для виртуальной машины с Windows 11. По системным требованиям нужно не менее 4 Гб ОЗУ. Выбирайте в зависимости от ОЗУ на Вашем реальном ПК (сколько вы можете выделить под приложение), но не менее 4х Гб.

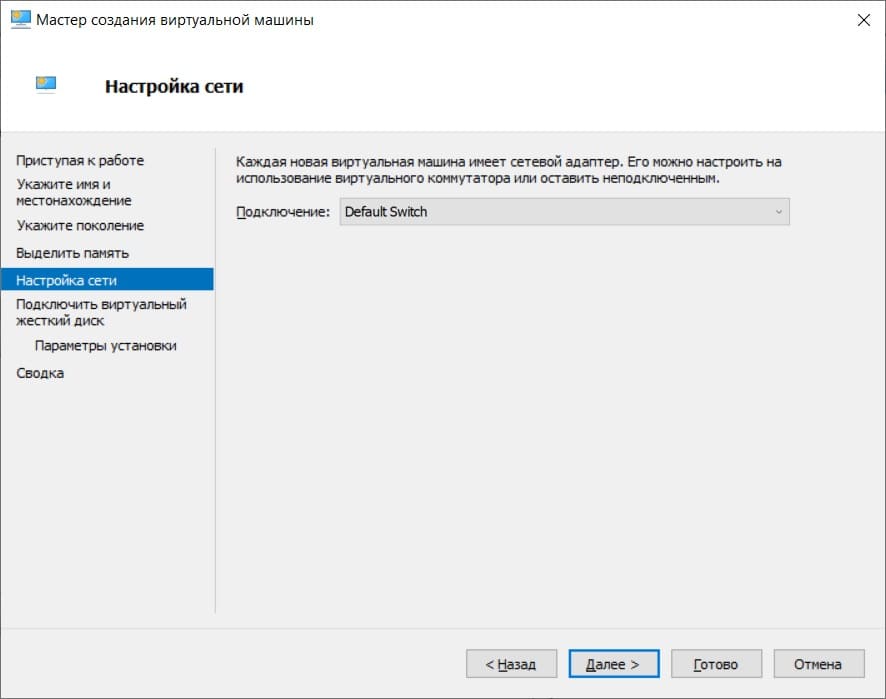
— Подключение в выпадающем меню выбираем «Default Switch».
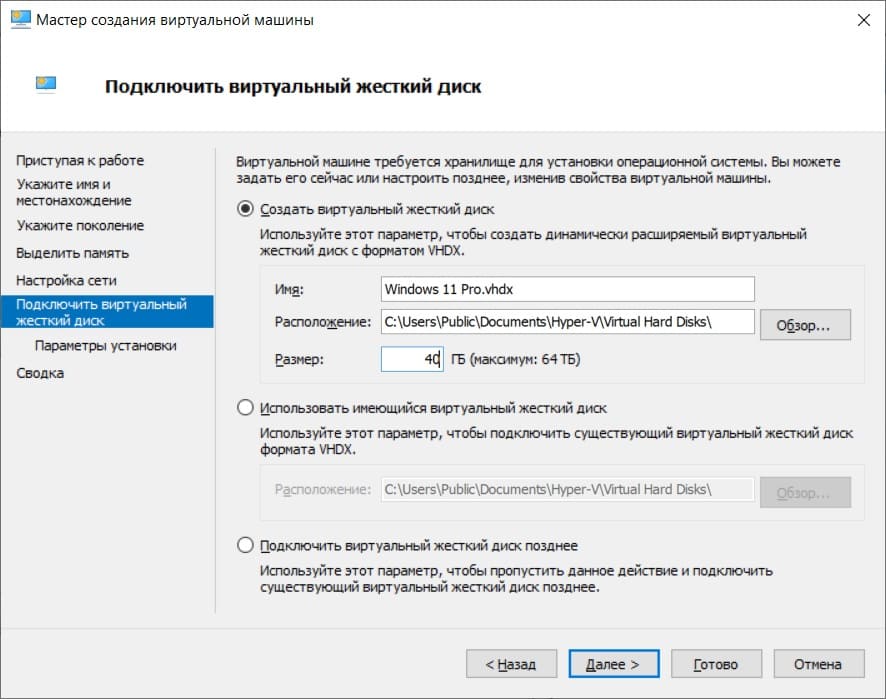
— Задаем разметку для памяти ВМ, рекомендуем не менее 40 Гб.
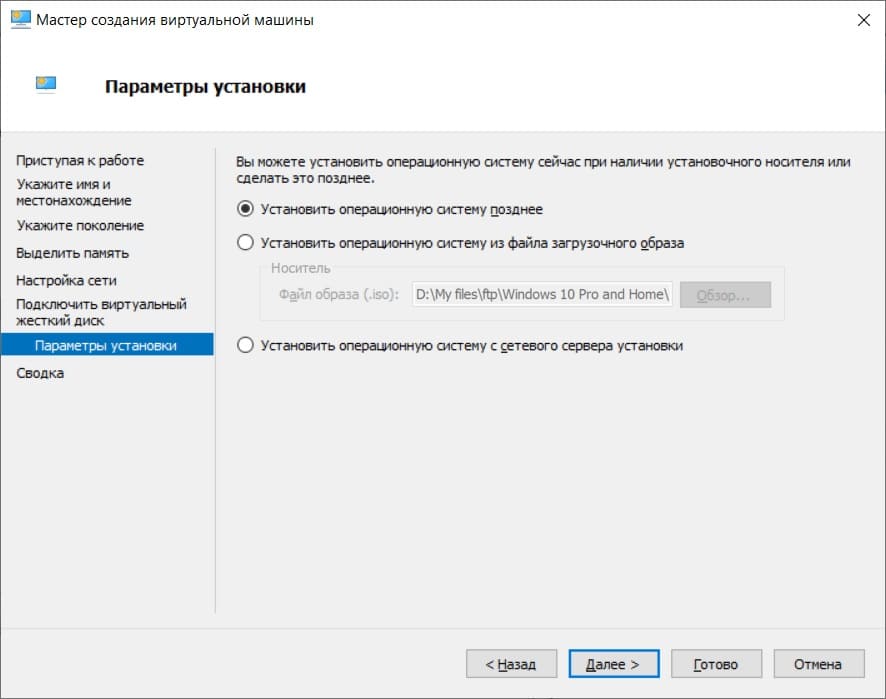
— Выбираем пункт «Установить операционную систему позже» и жмем «Далее».
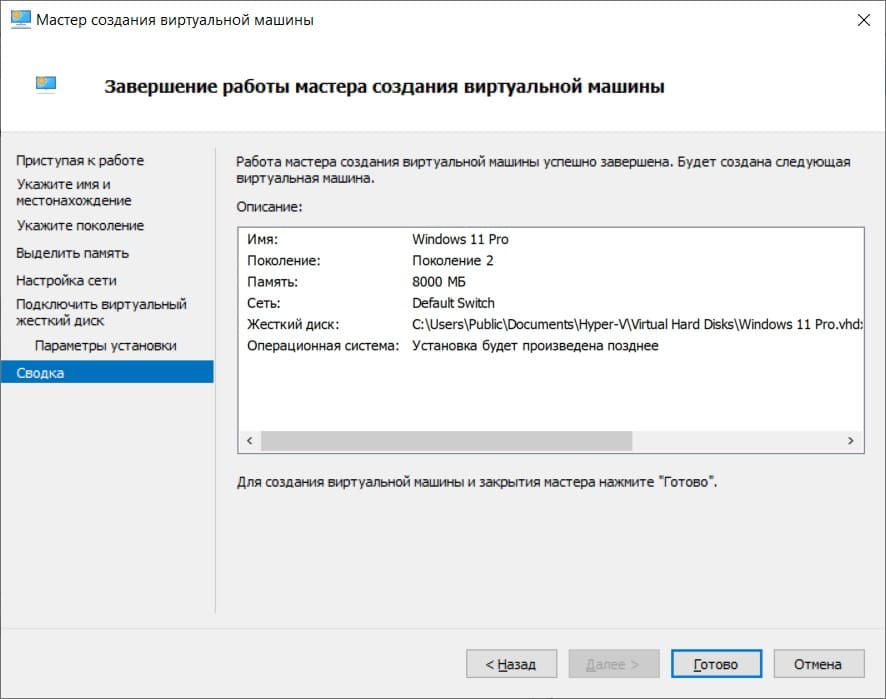
— Готово. Но это еще не все.
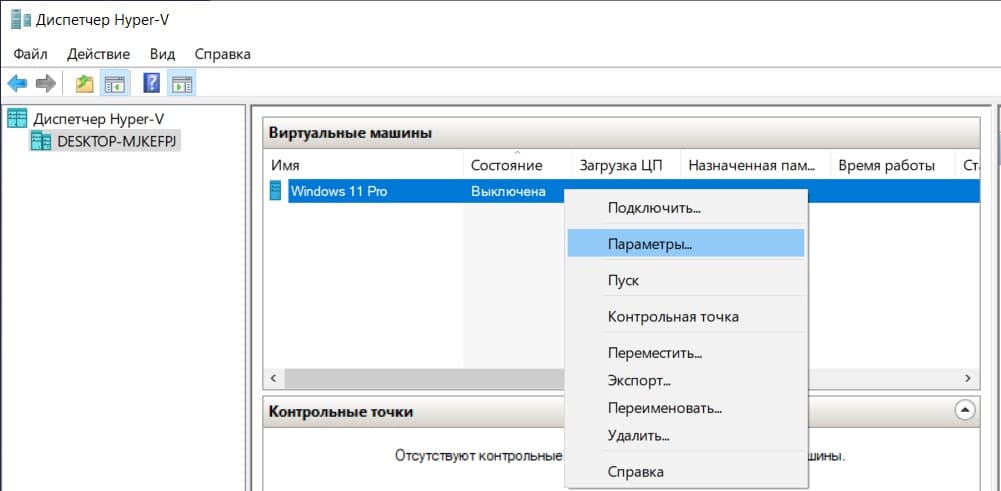
— Теперь нажимаем правой кнопкой мыши на созданную виртуальную машину с Windows 11 => Параметры.
— Слева выбираем меню «Встроенное ПО» и двигаем параметр «Жесткий диск» на верх.

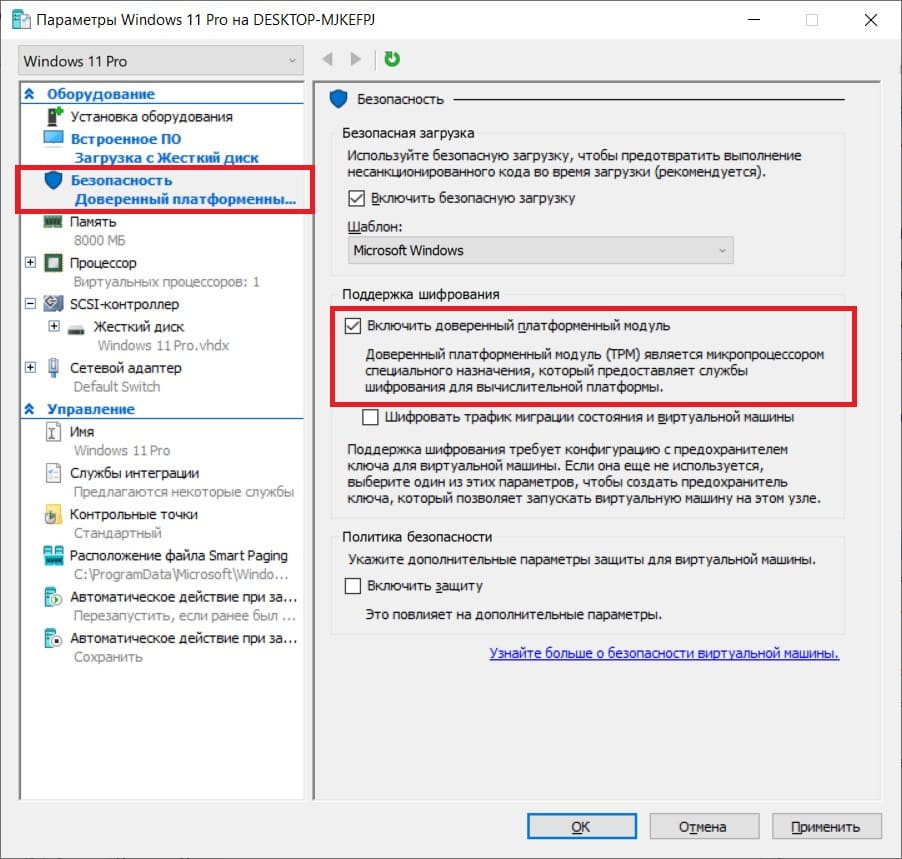
— Далее слева выбираем меню «Безопасность…» и включаем доверенный платформенный модуль (TPM).
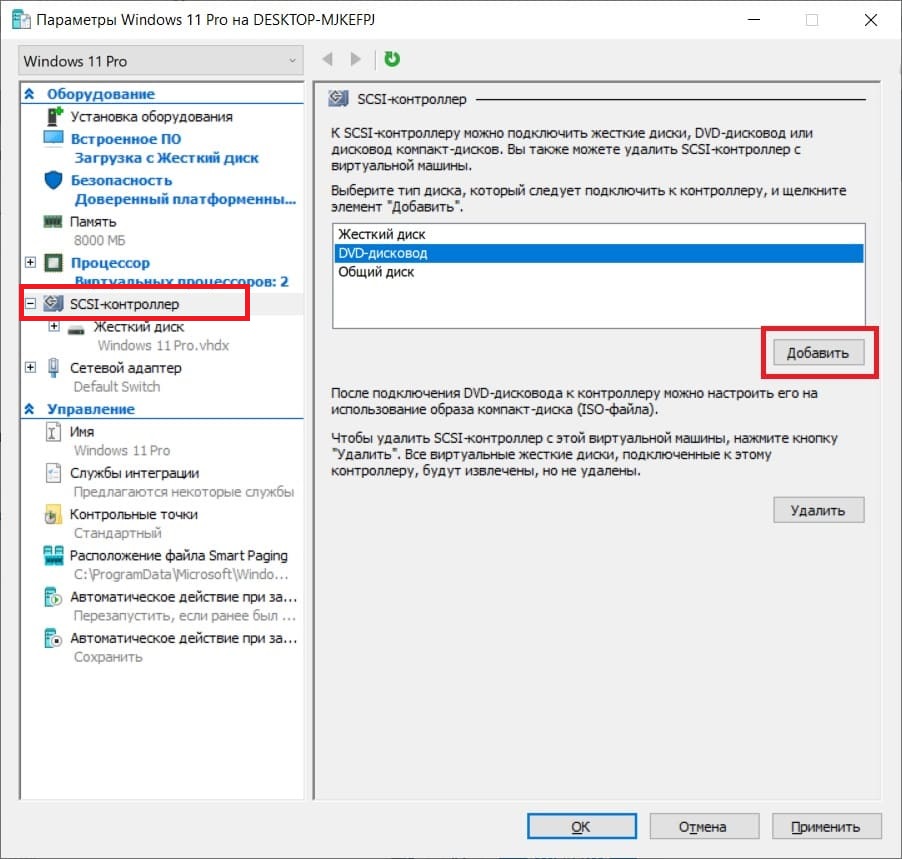
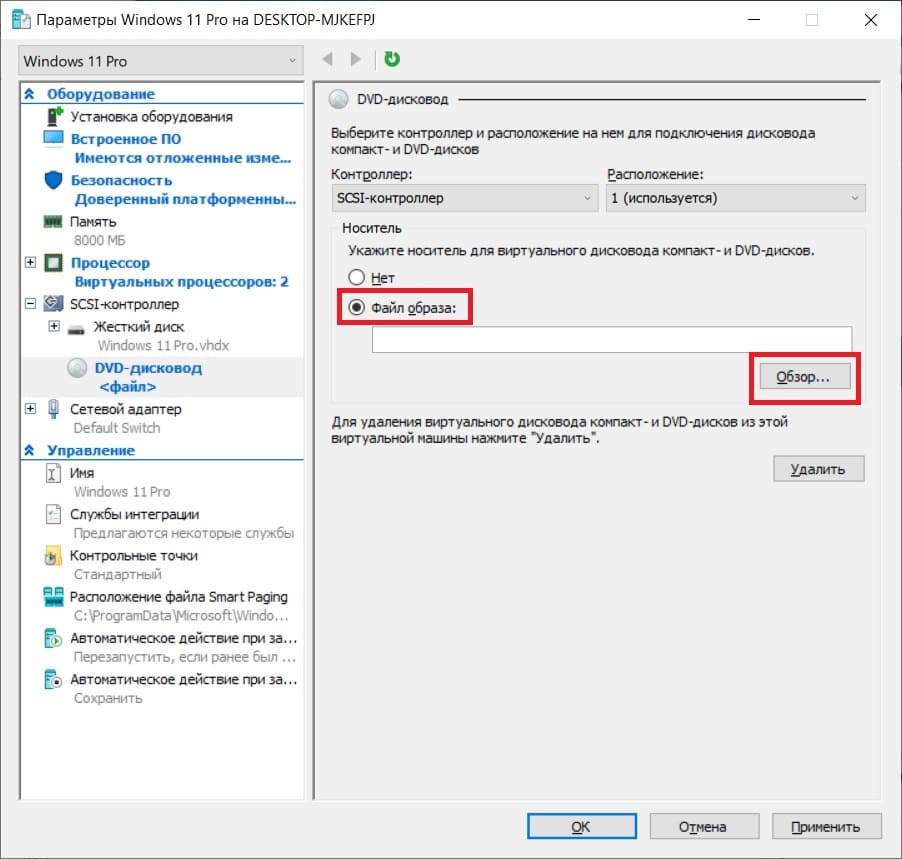
— В SCSI- контроллере выбираем пункт «DVD-дисковод» => Добавить.
— Выбираем пункт «Файл образа» => Обзор и выбираете на Вашем ПК сам дистрибутив Windows 11. Скачать его можете с официального сайта Microsoft, либо из нашего каталога.
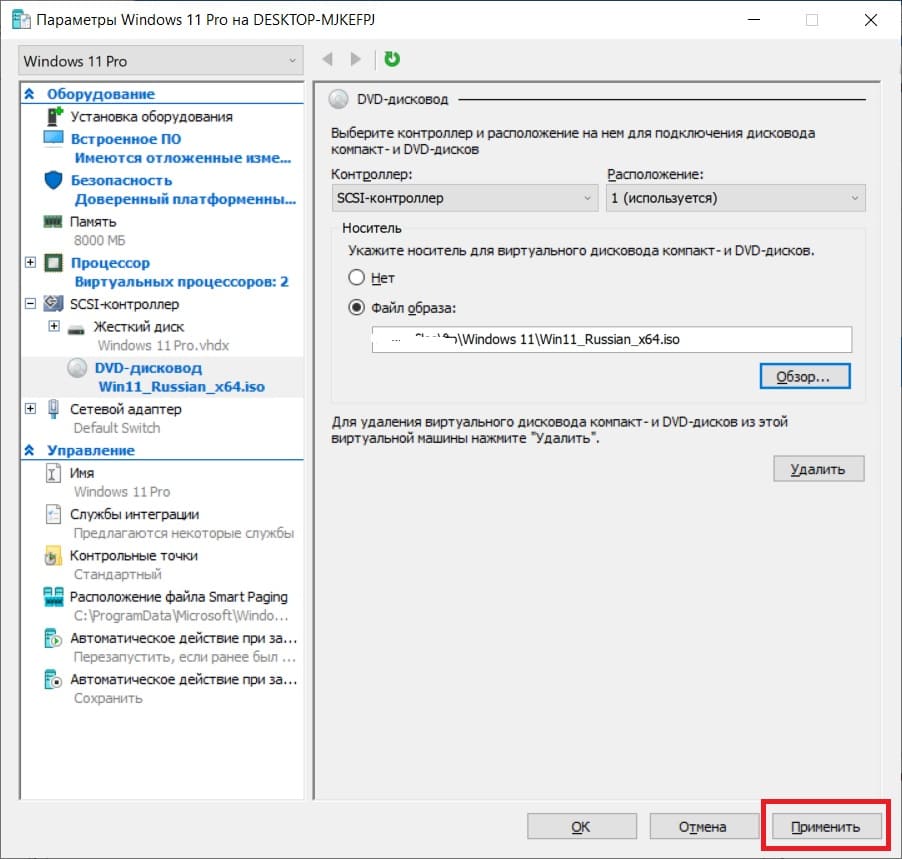
— Теперь нажимаем «Применить», когда файл образа Windows 11 был выбран.
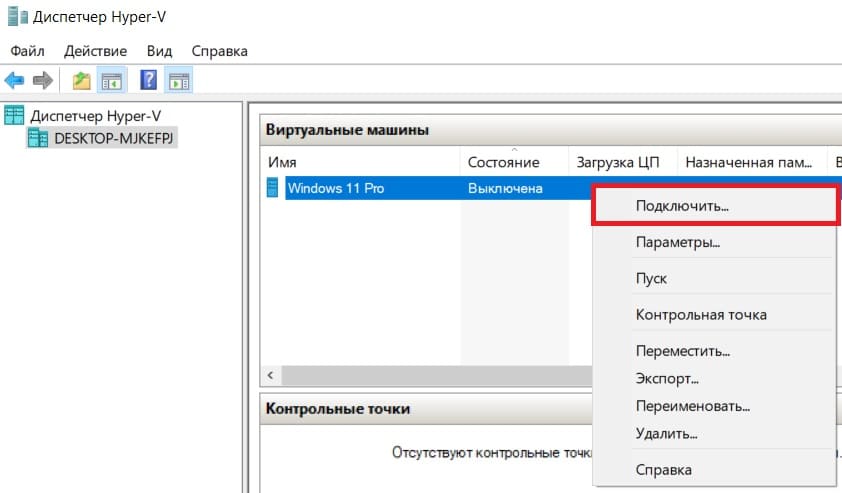
— Теперь снова правой кнопкой мыши на созданную виртуальную машину Windows 11 => Подключить.
— Пуск».
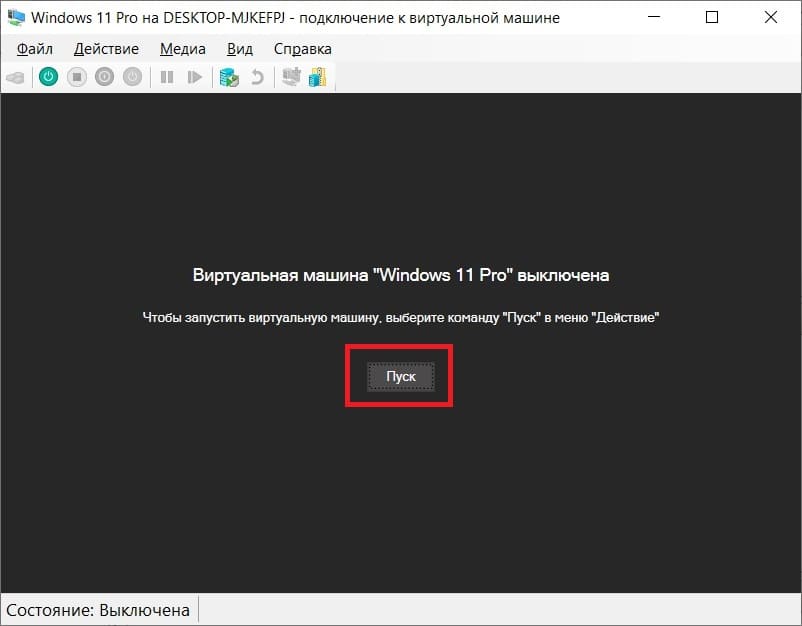
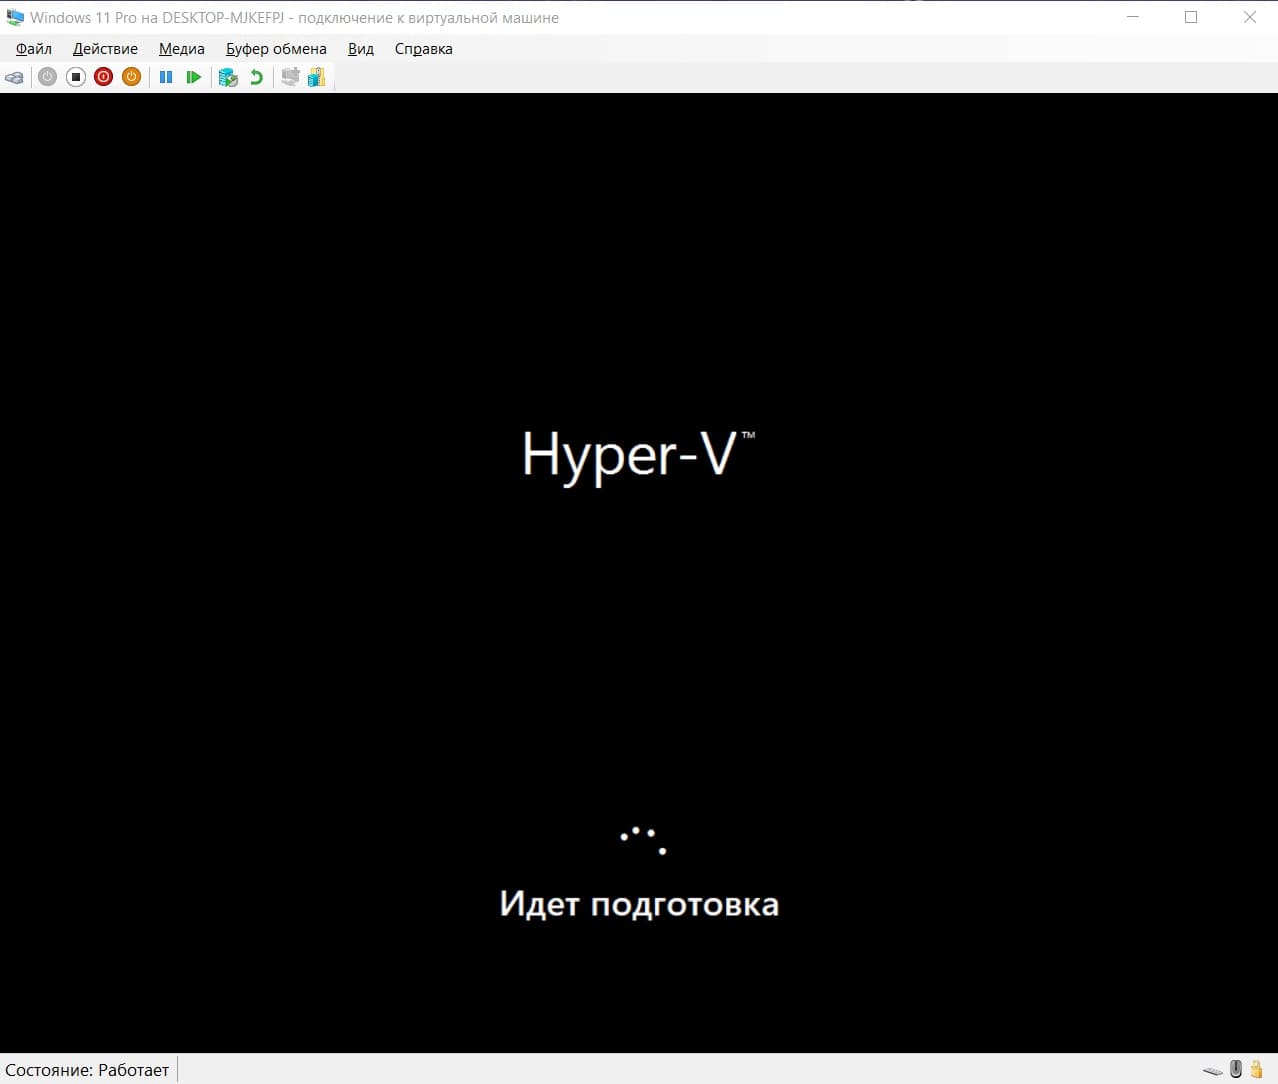
На этом все, настройка виртуальной машины будет закончена.
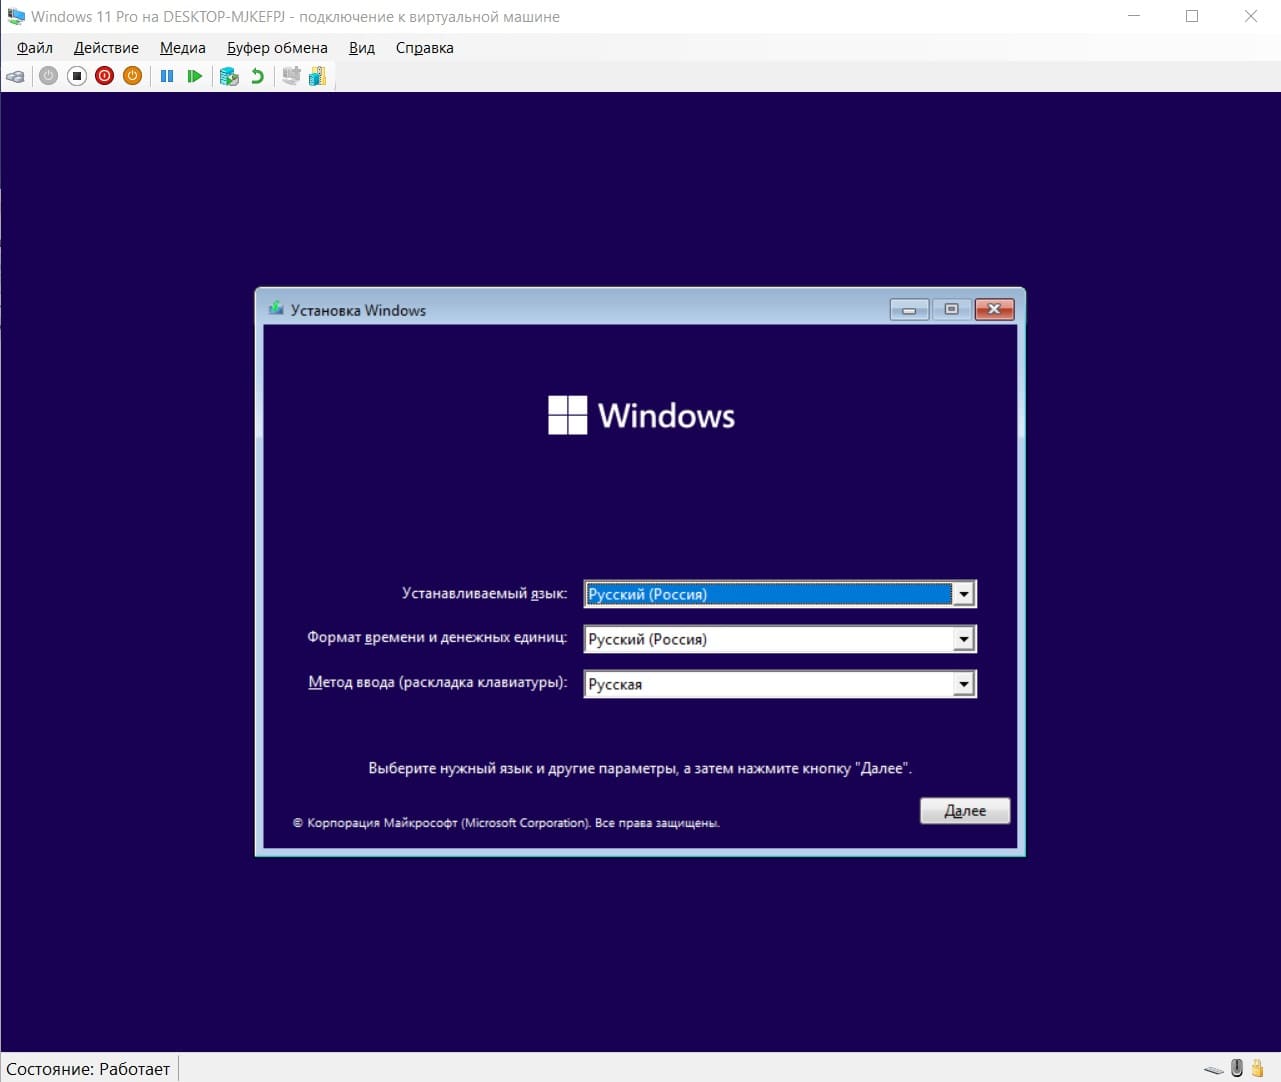
Далее начнется стандартная установка Windows 11. Мы ее так же рассмотрим.
— Нажимаем «Далее».
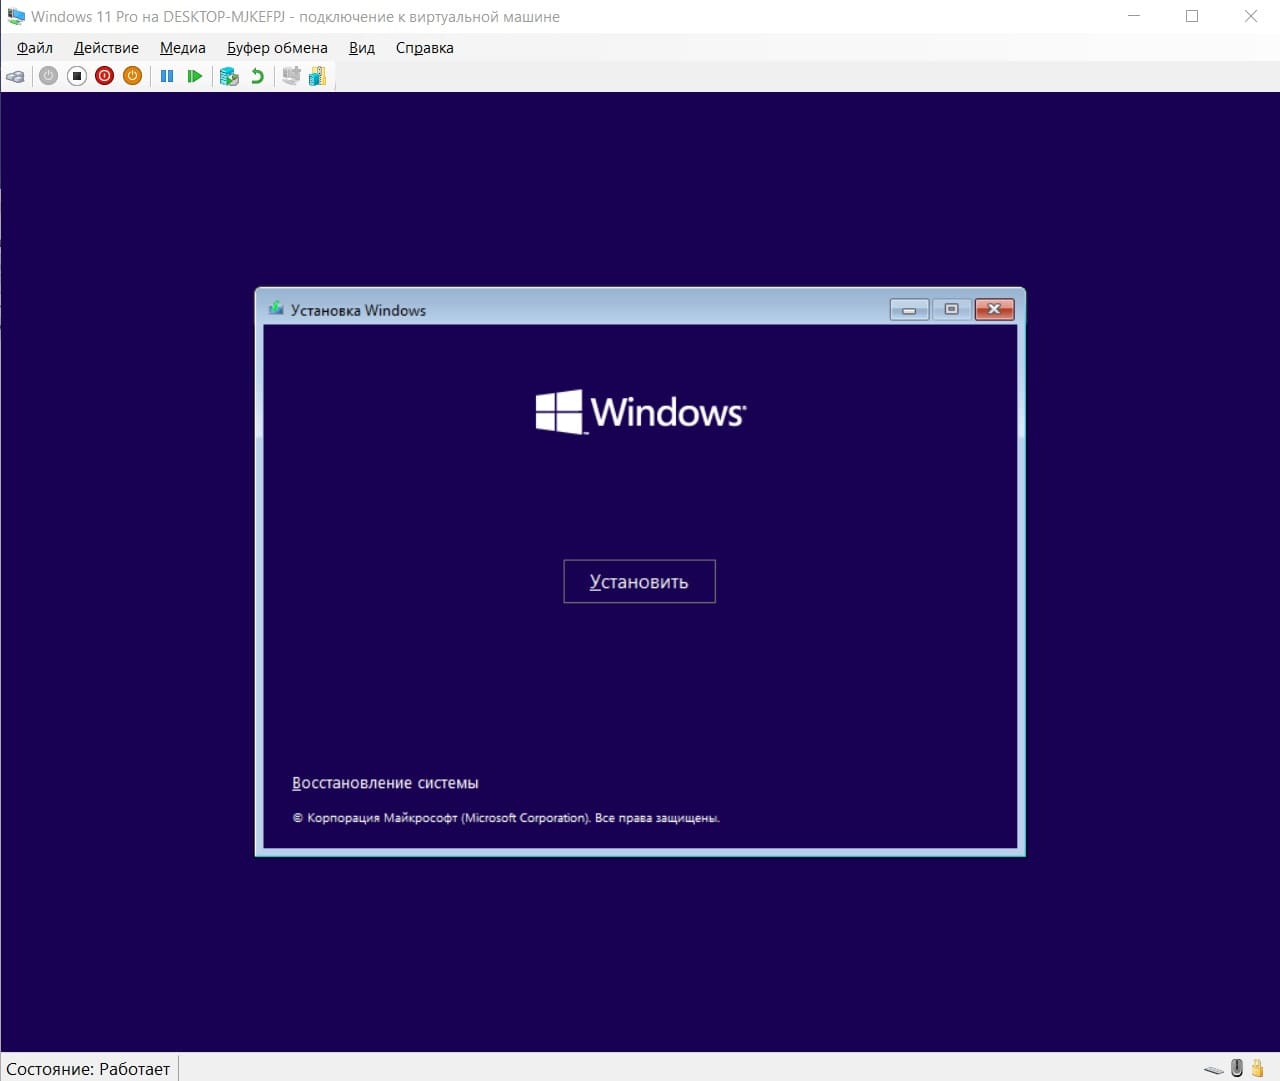
— Установить.
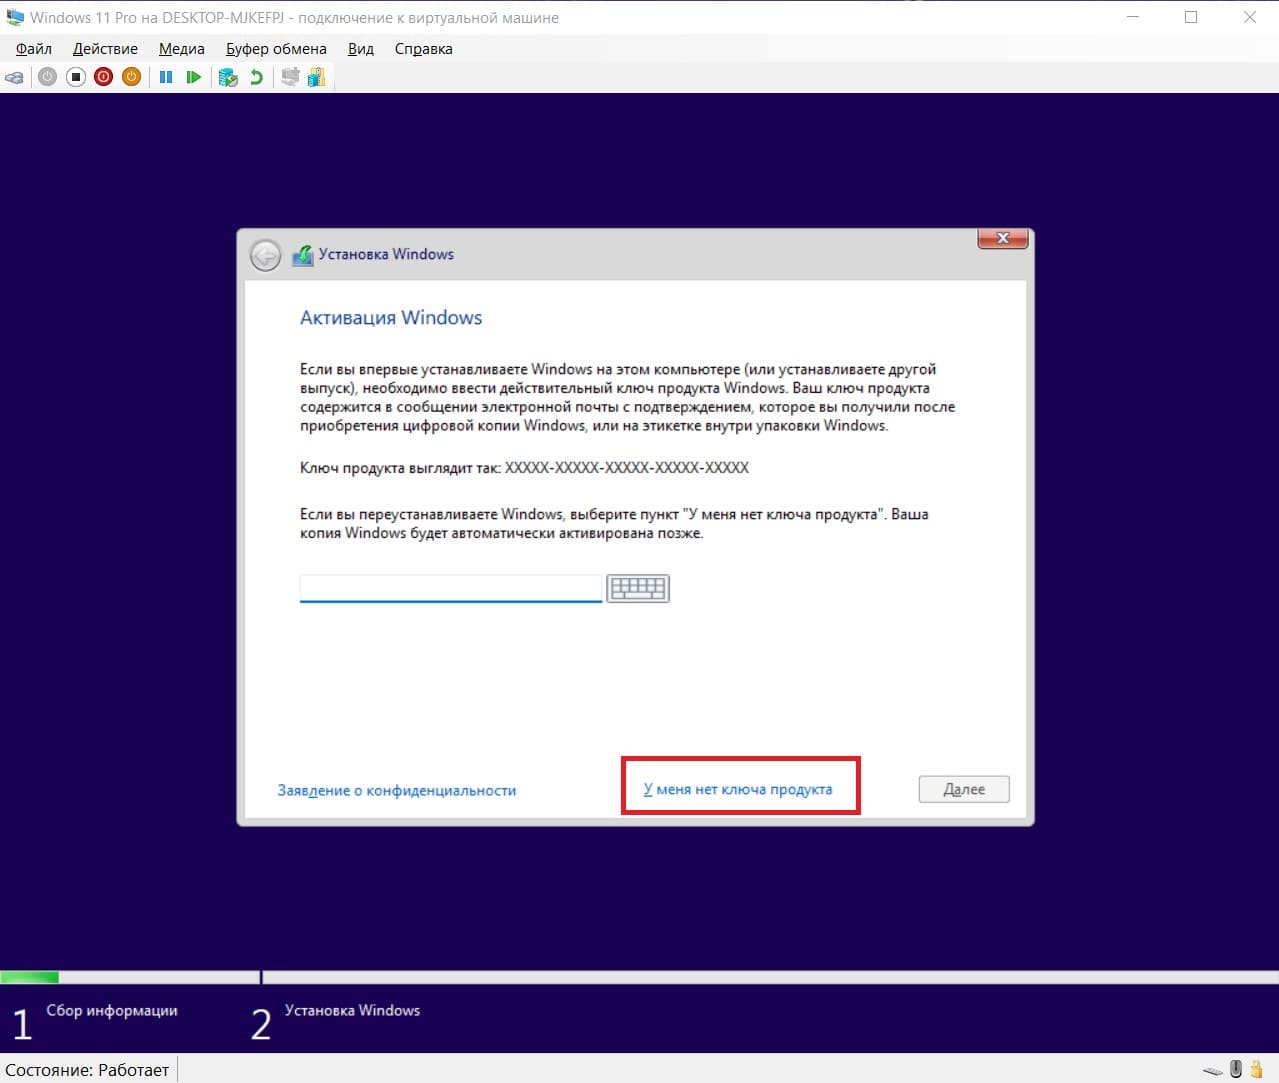
— Пока пропустим этот пункт, активируем систему тогда, когда она установится. В этом же меню нажмем «У меня нет ключа продукта».
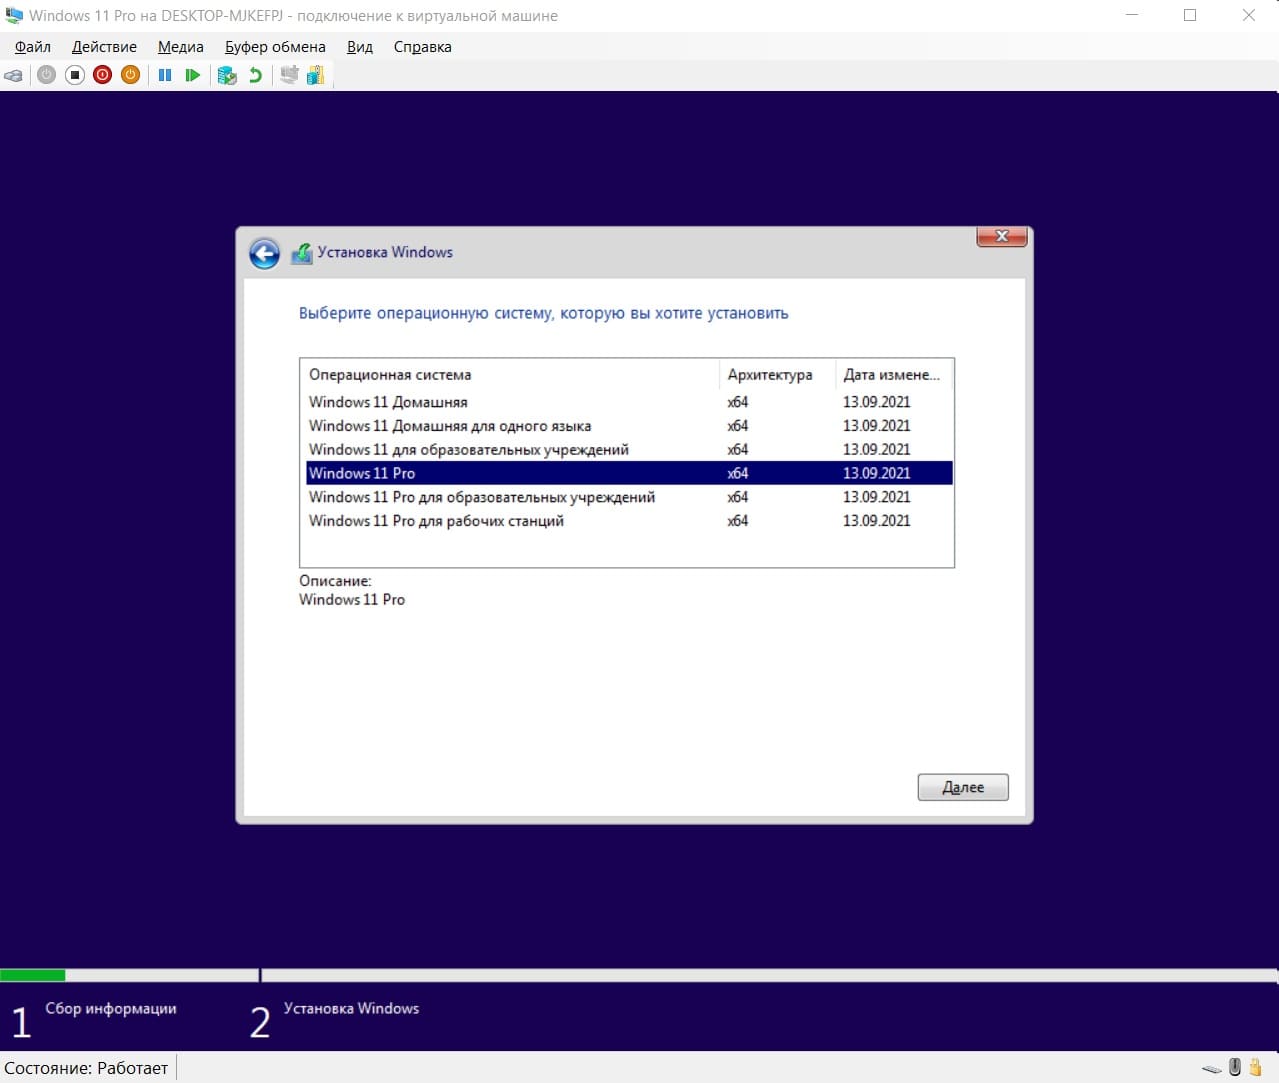
— Выберите версию Windows 11. Мы выберем на примере Windows 11 Pro, Вы можете выбрать любую другую по Вашему желанию.
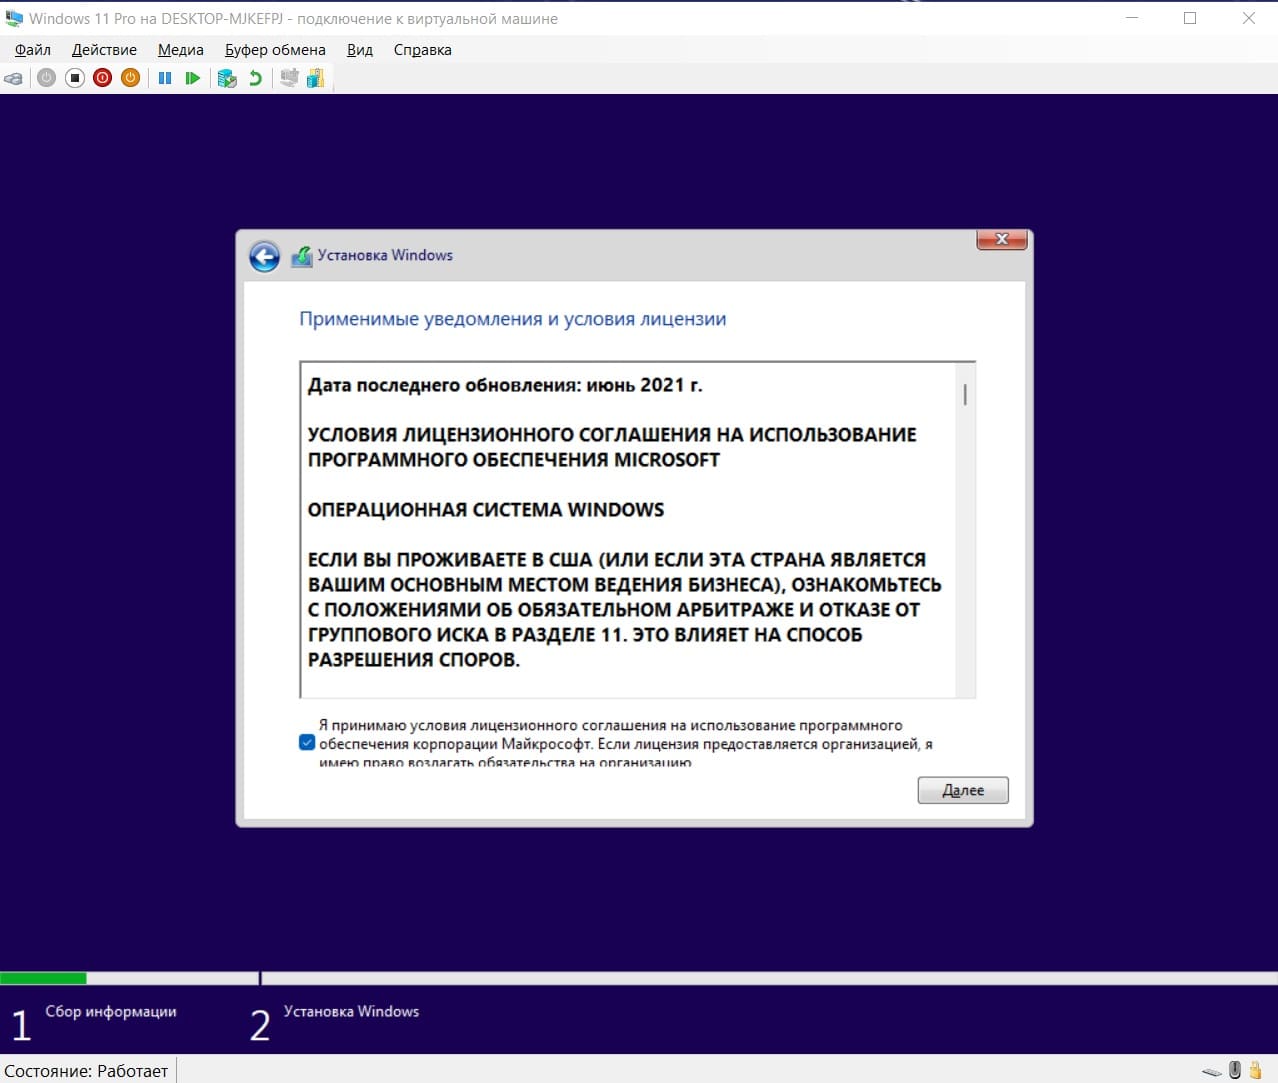
— Принимаем лицензионное соглашение.
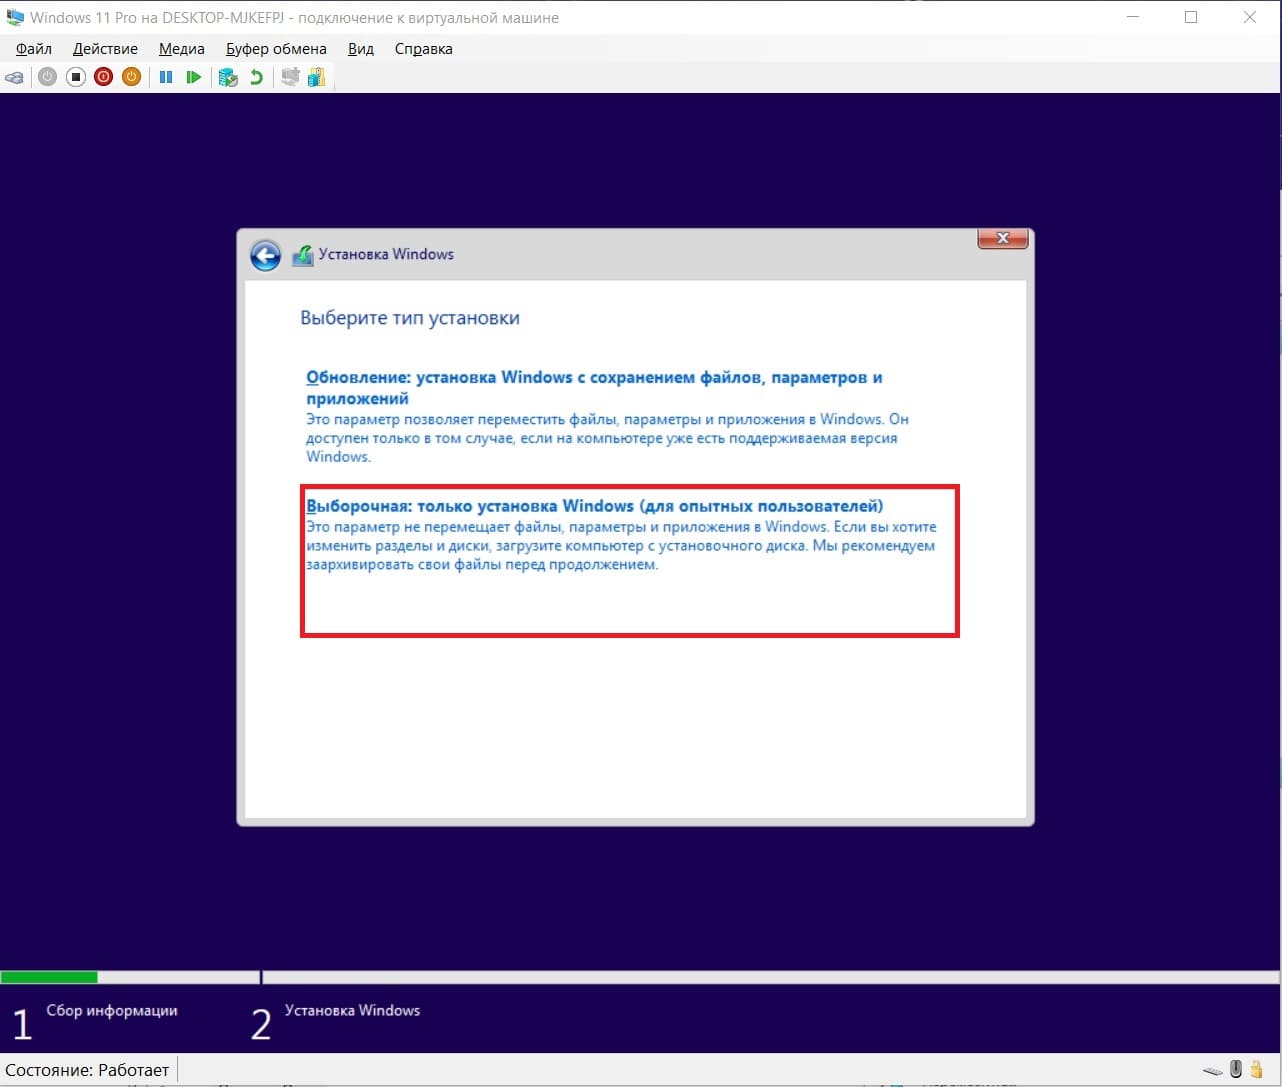
— Для новой установки необходимо выбрать «Выборочную» установку.
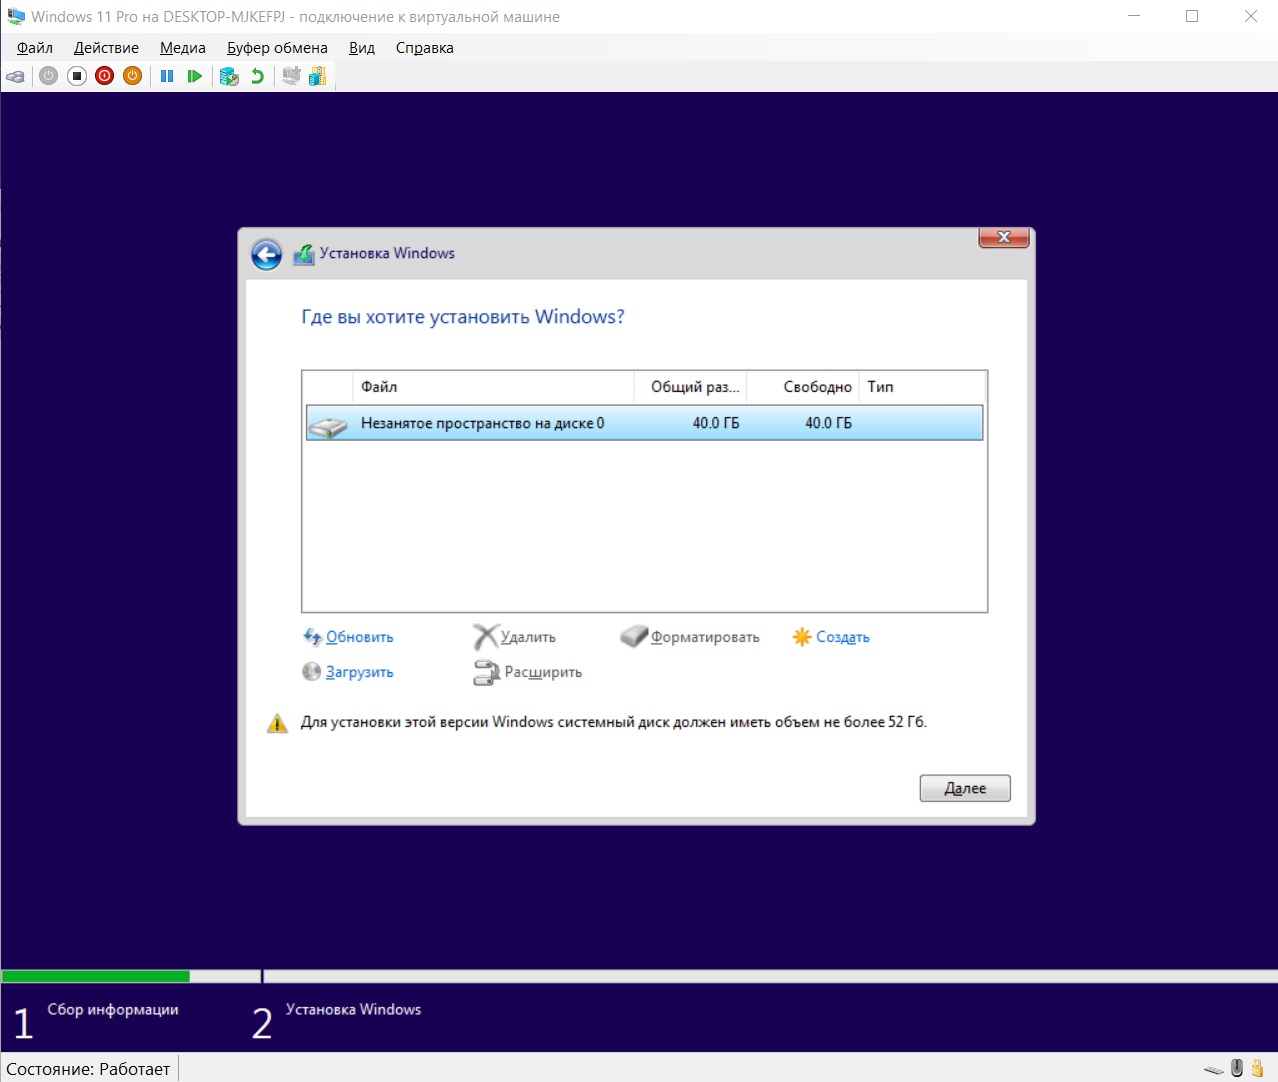
— Выбираем диск и нажимаем «Далее».
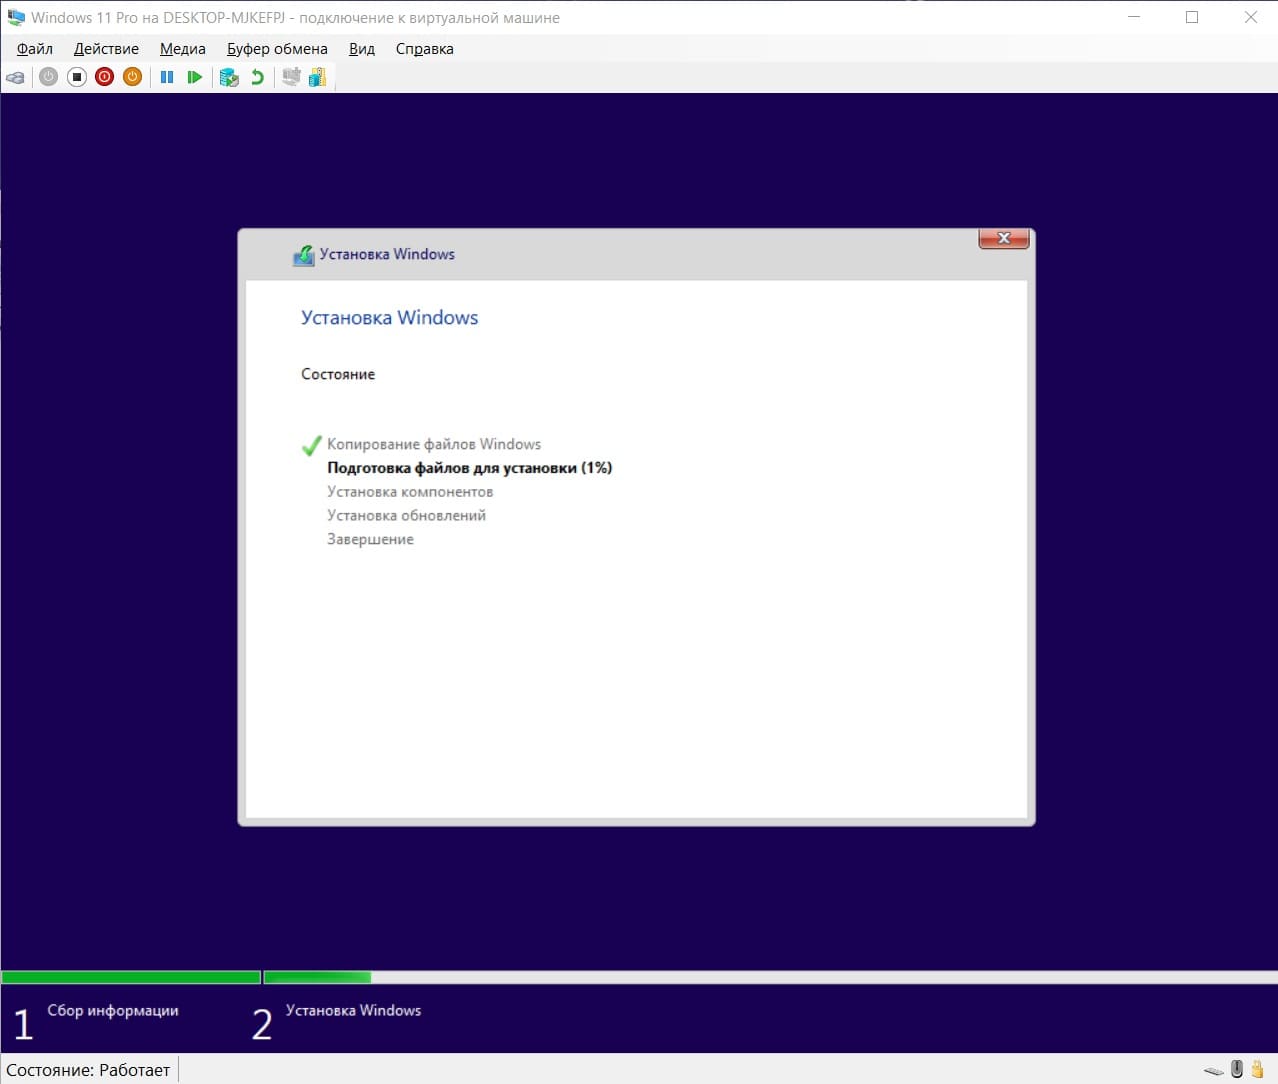
— Дожидаемся окончания установки.
Теперь переходим к первичной настройке Windows 11.
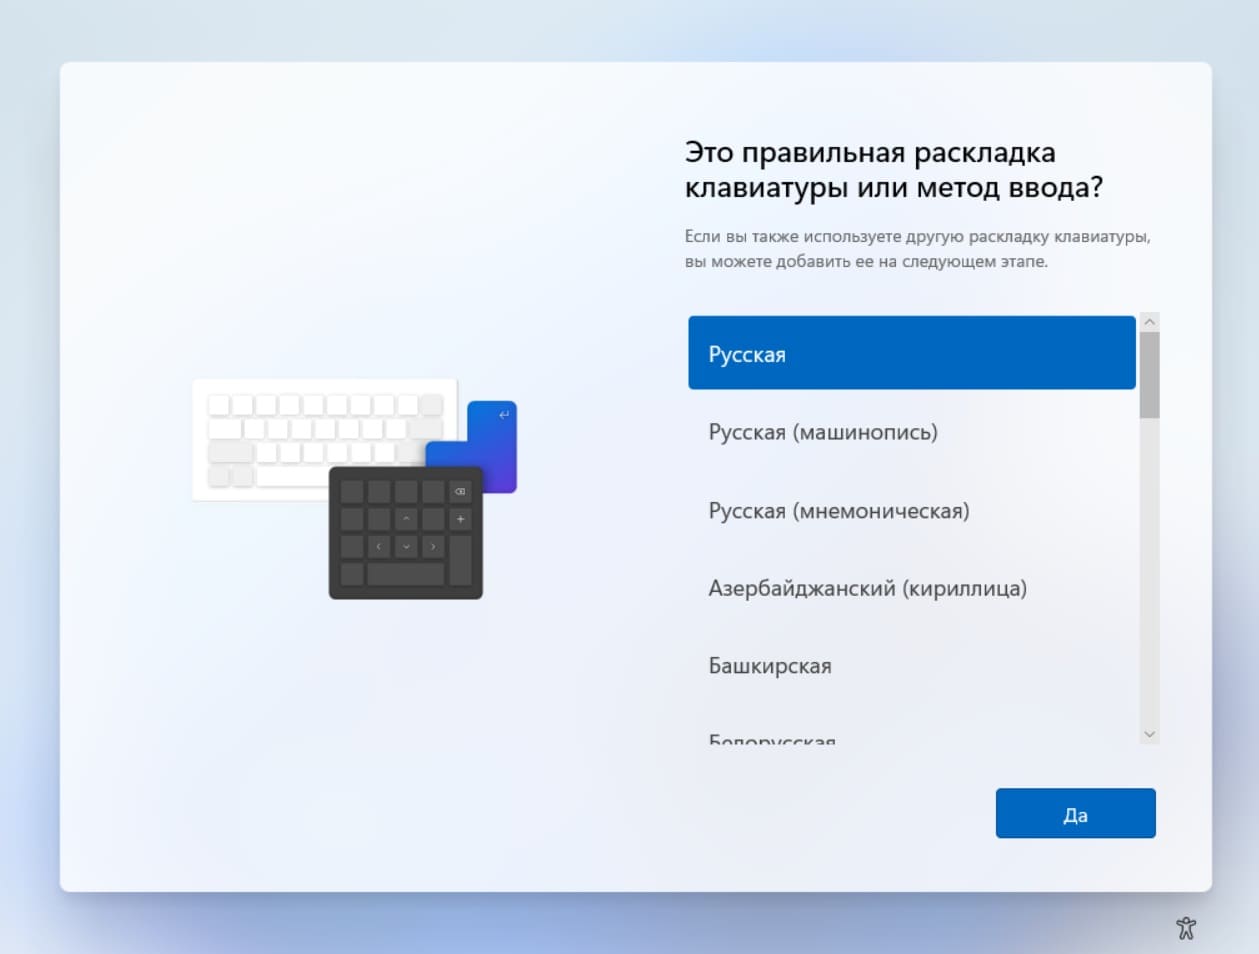
— Выбираем Ваш регион и раскладку клавиатуры.

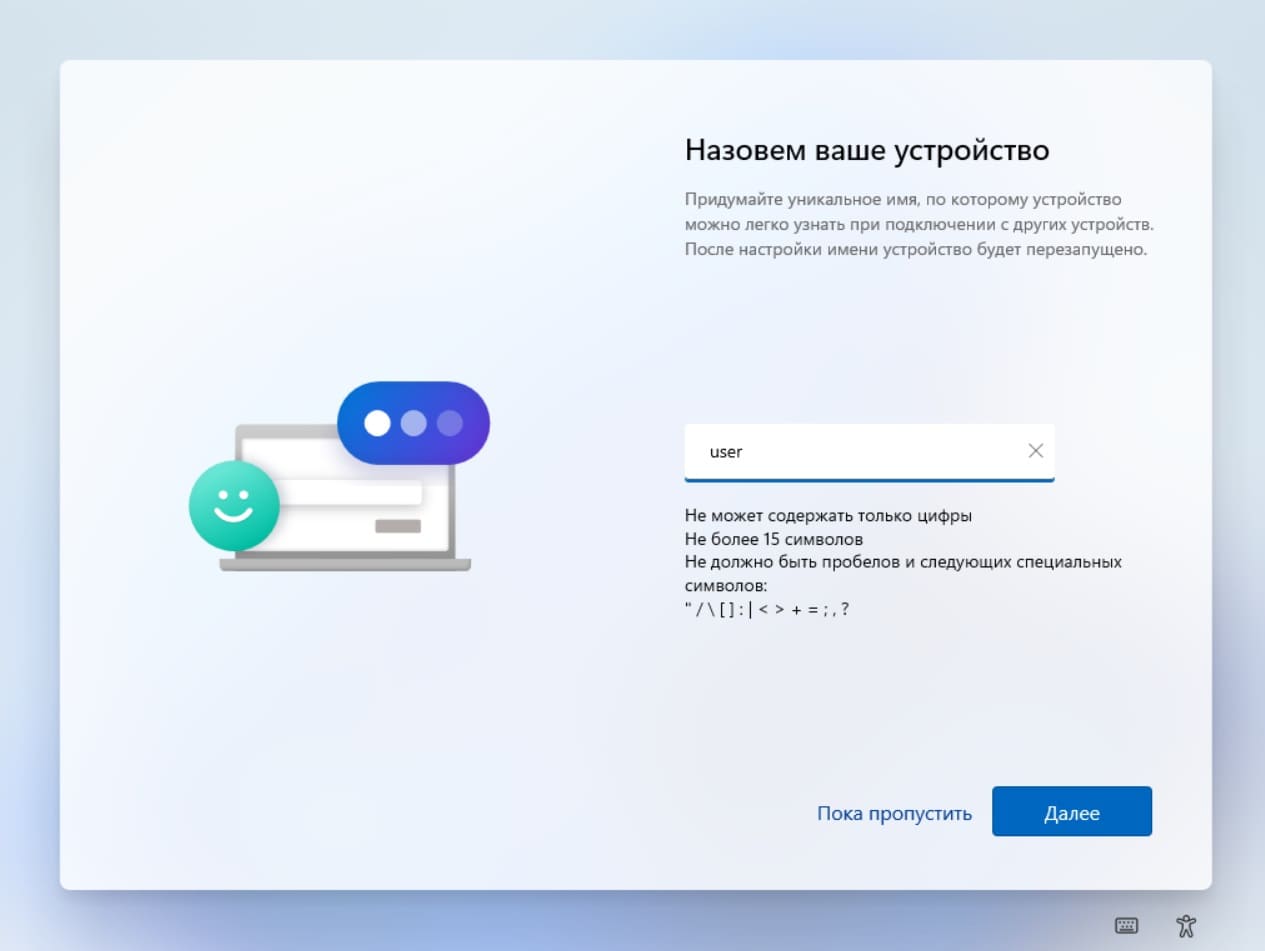
— Задаем имя ПК.
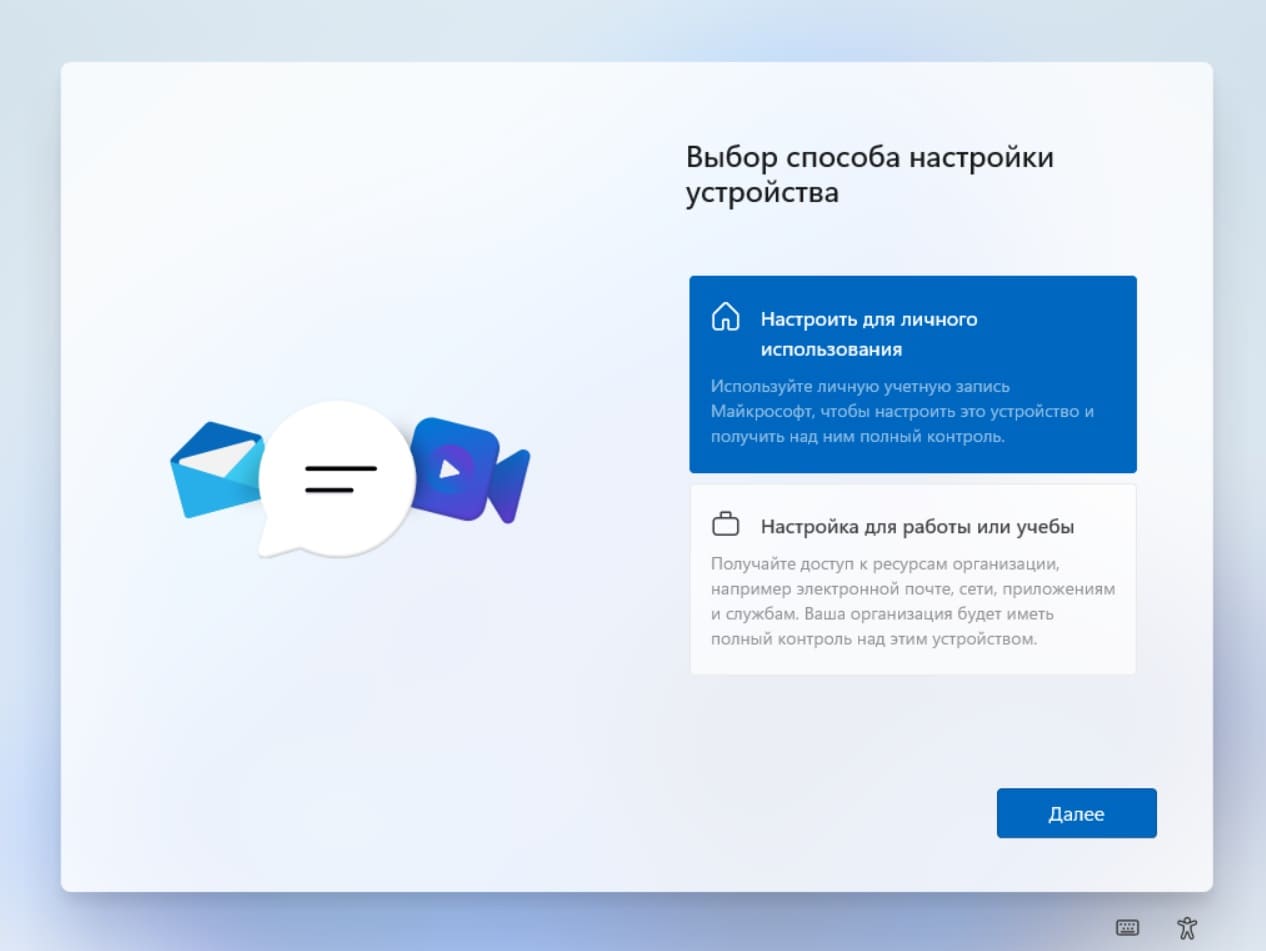
— Следующим шагом выбираем «Настроить для личного использования».
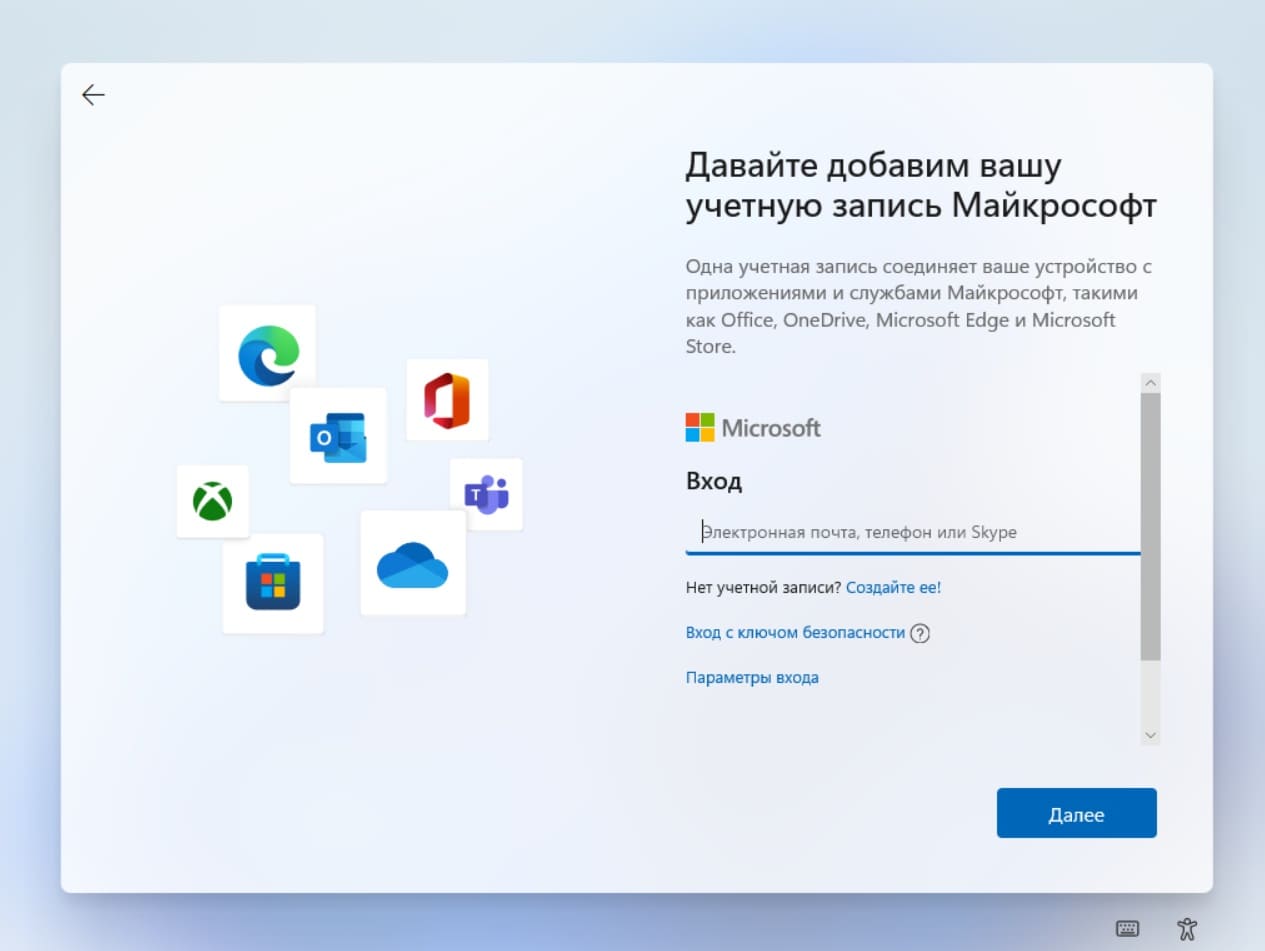
— Совершаем авторизацию под Вашей учетной записью Microsoft.
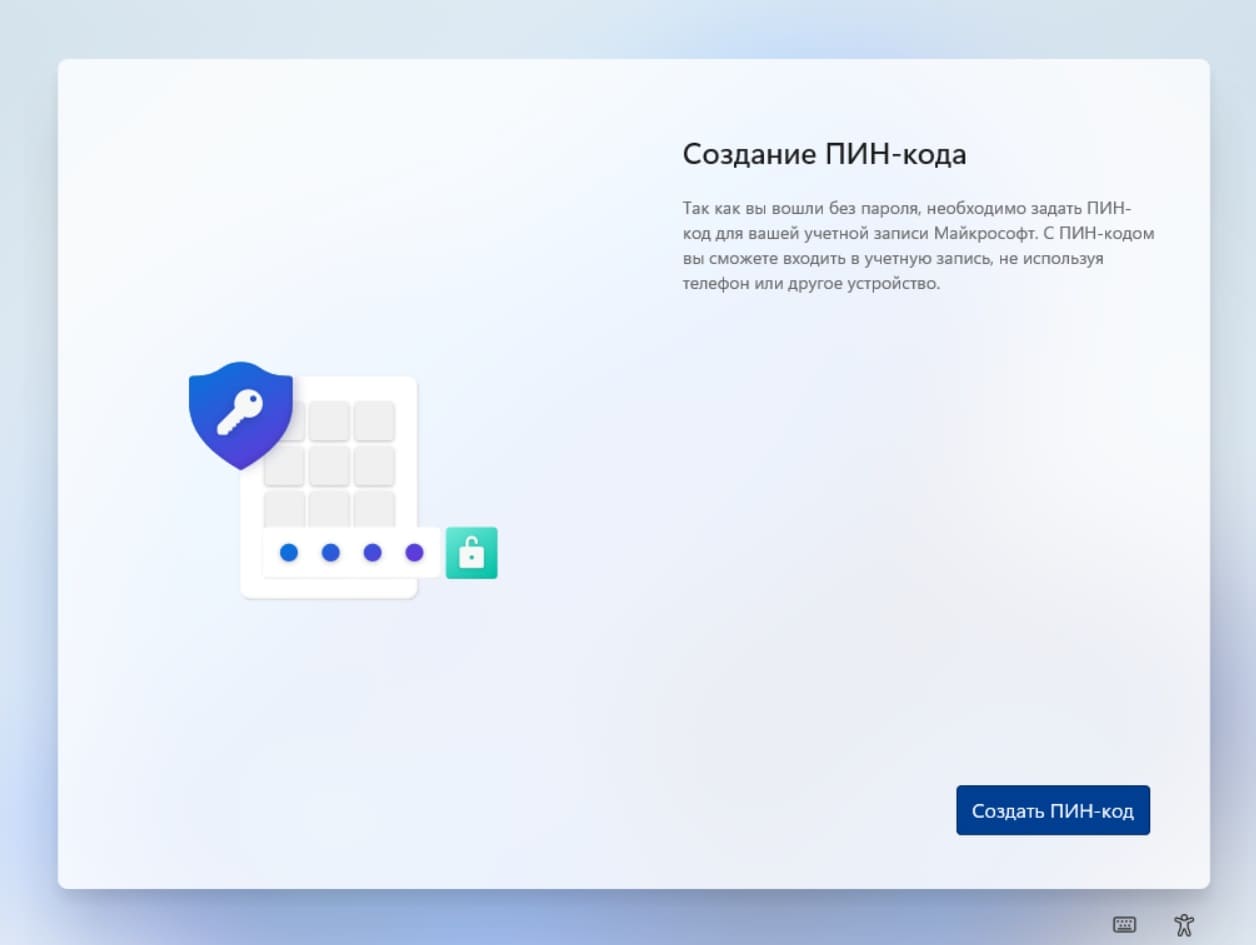
— Задаем пин-код для быстрого входа в систему.
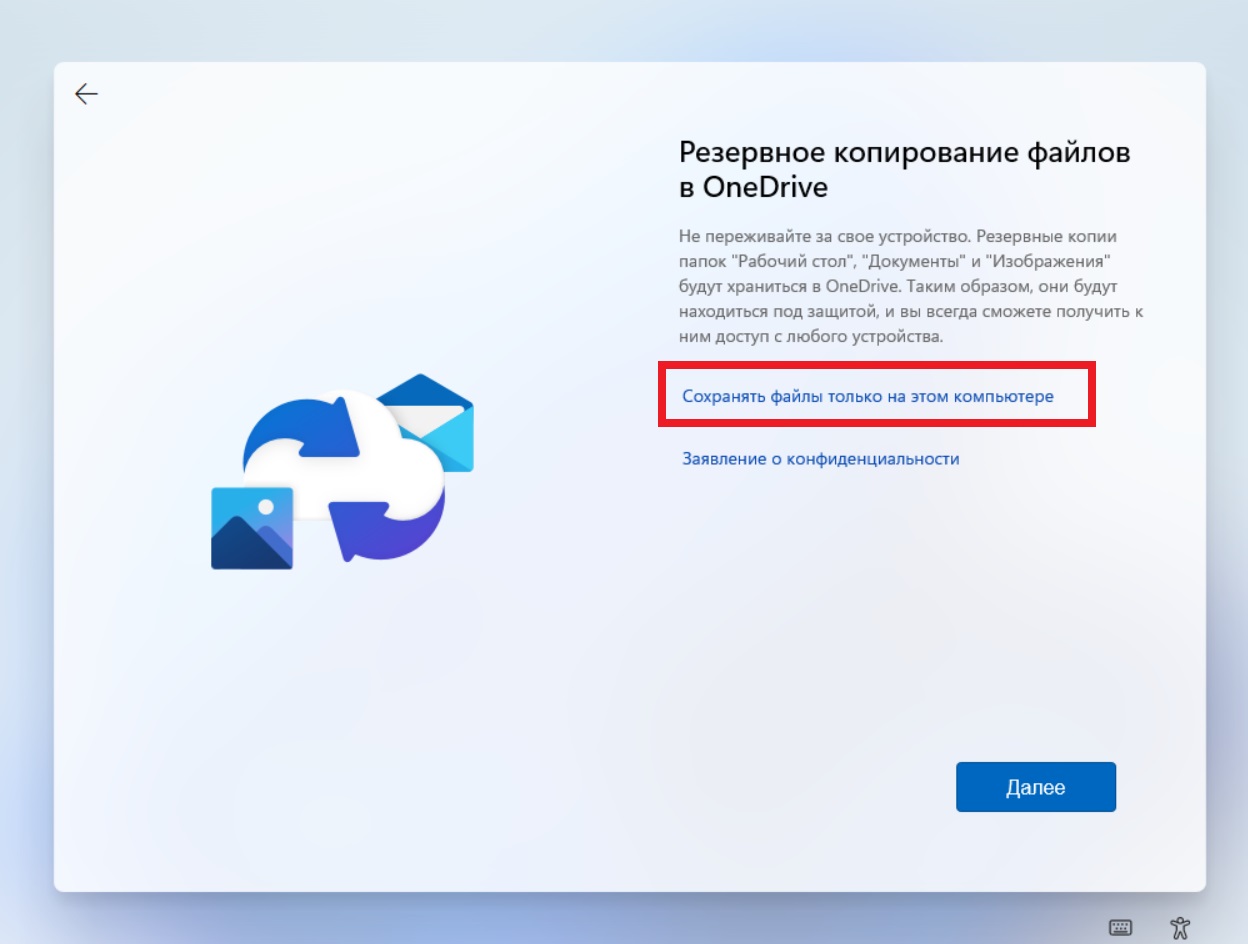
— Здесь выбираем «Сохранить файлы только на этом компьютере».
На этом сама установка системы закончена.
Установка системы закончена, но это еще не все. Систему на виртуальной машине так же необходимо активировать, как и на физическом ПК для ее полноценной работы.
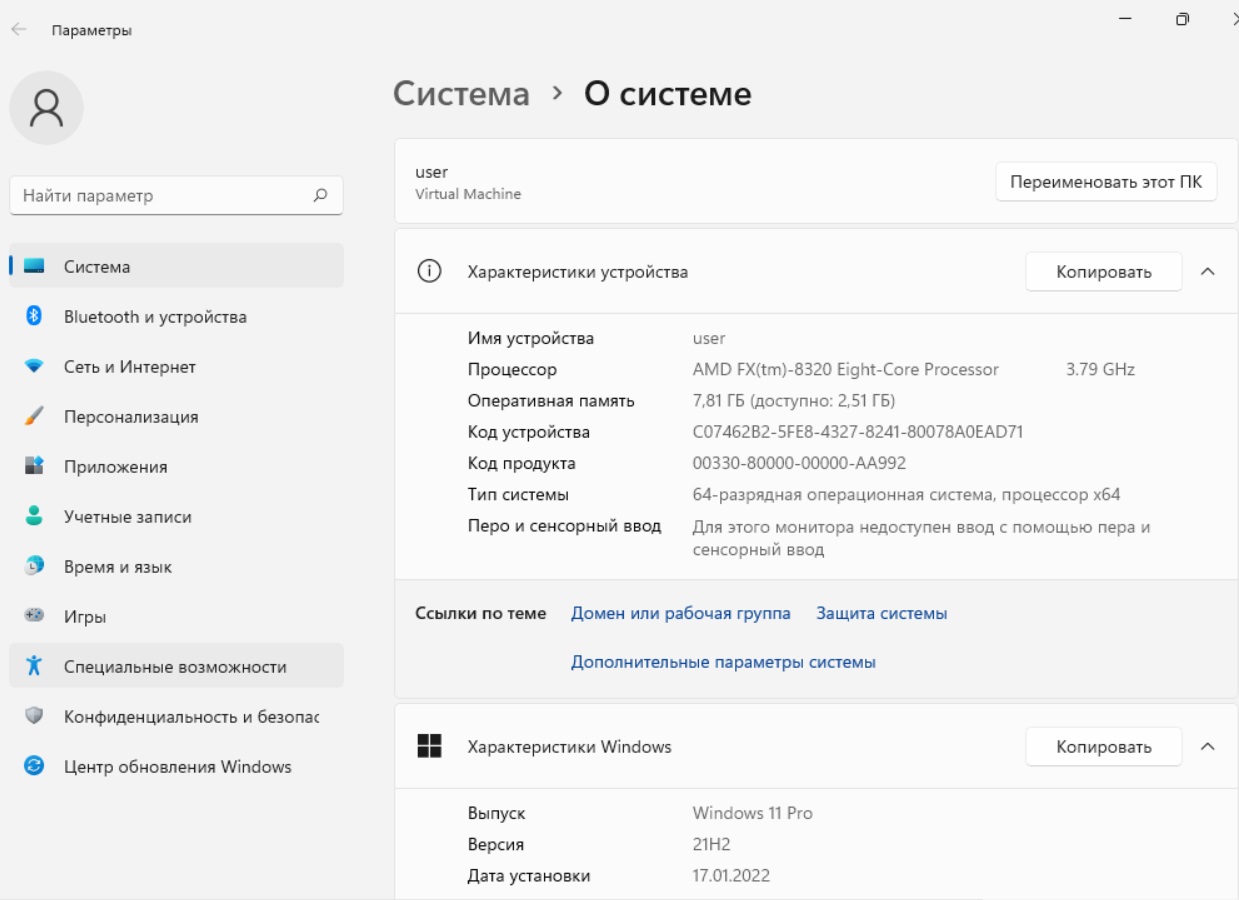
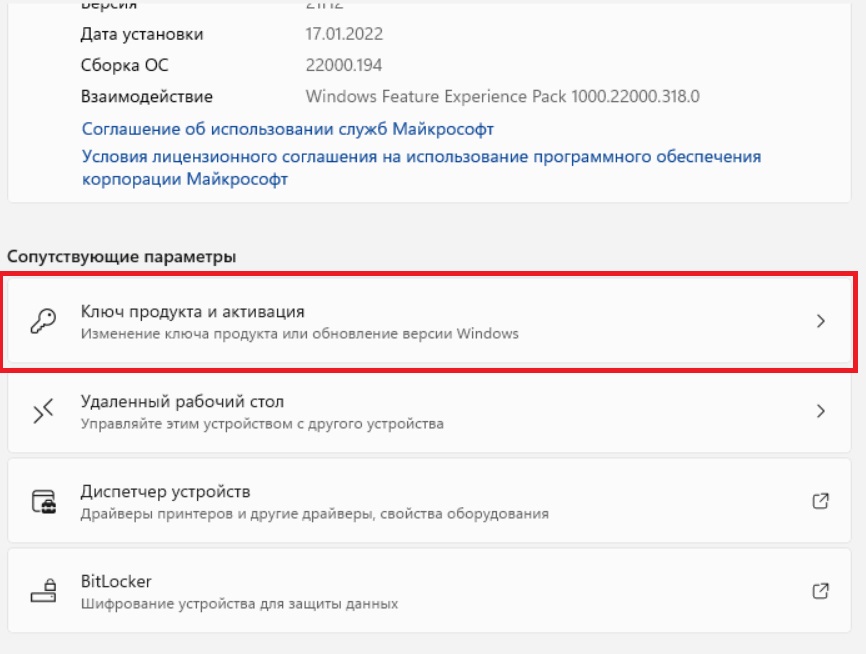
— Заходим в меню Параметры => Система => О системе. Там можете посмотреть Вашу версию Windows 11.
— Нажимаем на меню «Ключ продукта и активация».
— Для активации системы нажимаем кнопку «Изменить» в следующем окне. Для активации Вашей версии Windows Вам понадобится ключ активации, приобрести его можете в нашем каталоге. Доставка ключа моментальная на Вашу электронную почту сразу после оплаты товара.
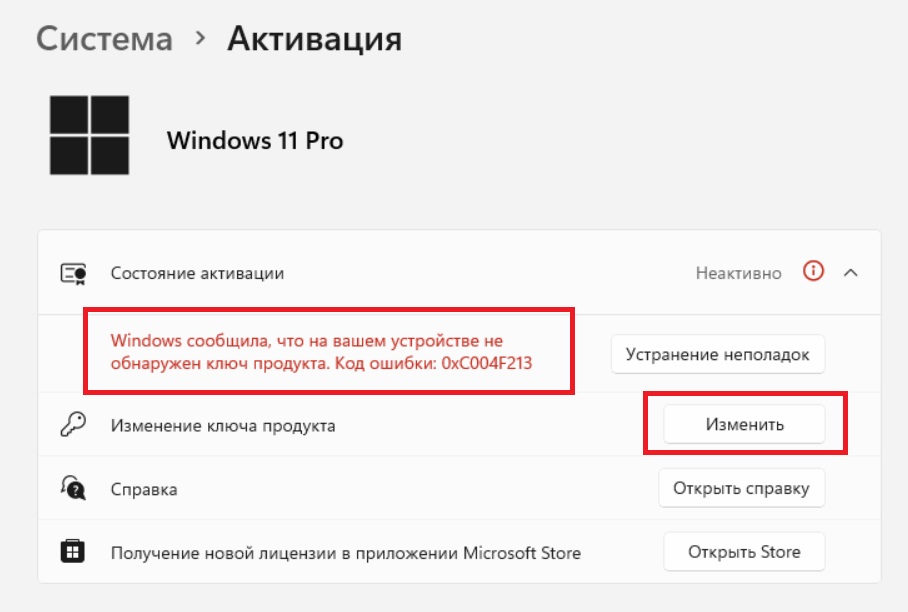
— Следующим окном вводите Ваш ключ продукта Windows 11. И активируете систему.

Ознакомиться с более подробной инструкцией по активации Windows 11 можете в нашей прошлой статье.