In this step-by-step guide with screenshots, we’ll walk through the process of installing Windows Server 2008 R2. The installation process is the same for all versions of Windows Server 2008, including Standard, Enterprise, and Datacenter.
First, you need to download the installer. You can download the unified installer (Standard, Enterprise, and Datacenter) from our catalog.
Next, you need to write the installer to a bootable flash drive so you can install it from BIOS/UEFI later. You can learn how to write Windows to a bootable flash drive on the following page.
Once the flash drive is ready, you can boot from it and proceed with the installation. The first window will prompt you to select language settings; choose your preferred language or leave it as default.

Click “Install now”.

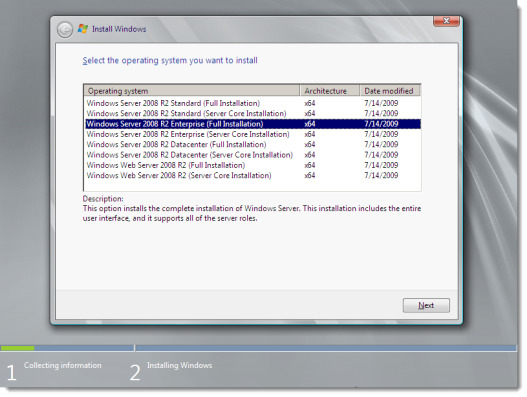
Next, select the desired version for installation. In this example, we’ll choose the most comprehensive version, Windows Server 2008 R2 Enterprise (full installation), but you can choose any version you prefer. The installation process will be the same regardless.
Accept the license agreement.

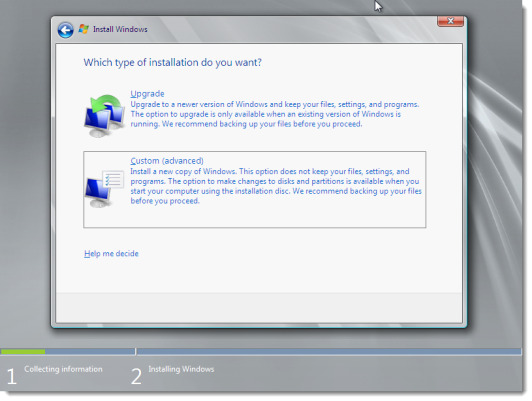
Since this is a clean installation from scratch, choose “Custom”.
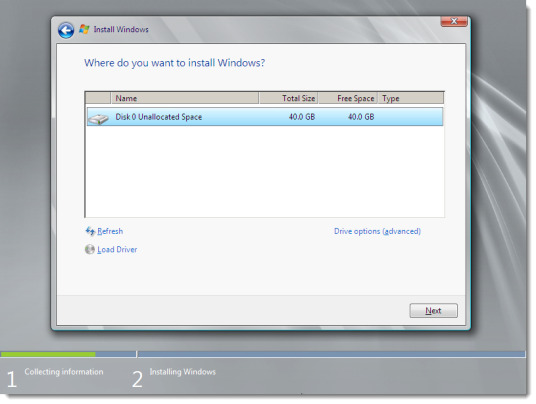
Next, you need to select the target hard disk where the system will be installed. In our example, there’s only one, so select it and click “Next”. If you have multiple drives, choose the one for installation.
The installation process will now begin. Wait for the installation to complete; your computer may reboot several times.

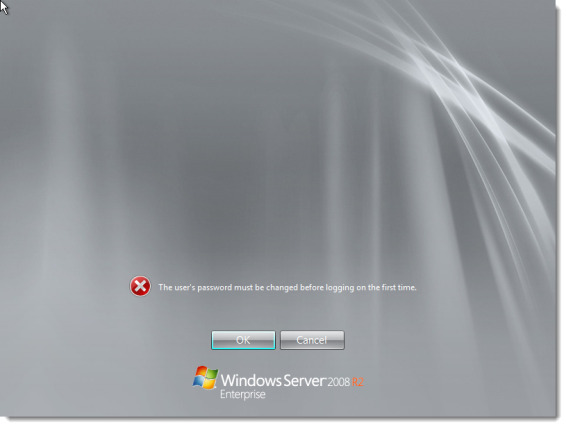
After installation, the system will prompt you to set an administrator password. Click “OK” and create your password.
That’s it! After installation, you can start using your system. The trial period without activating the system is 3 days. To activate the system, go to the “System Properties” menu and enter the product key for your version of the system. You can purchase product keys for Windows Server 2008 R2 Standard and Windows Server 2008 R2 Enterprise from our catalog. The product key will be delivered to your email within a few hours.
After clicking “Change product key,” a window will appear where you can enter your product key.

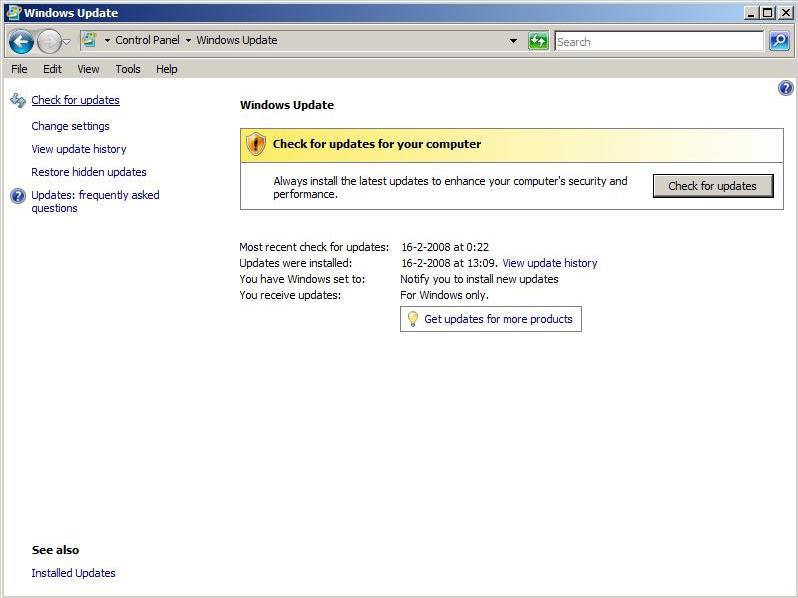
We also recommend that after activating your system, you immediately search for and download all available updates. You can do this in the “Control Panel” => “System and Security” => “Windows Update” menu.