
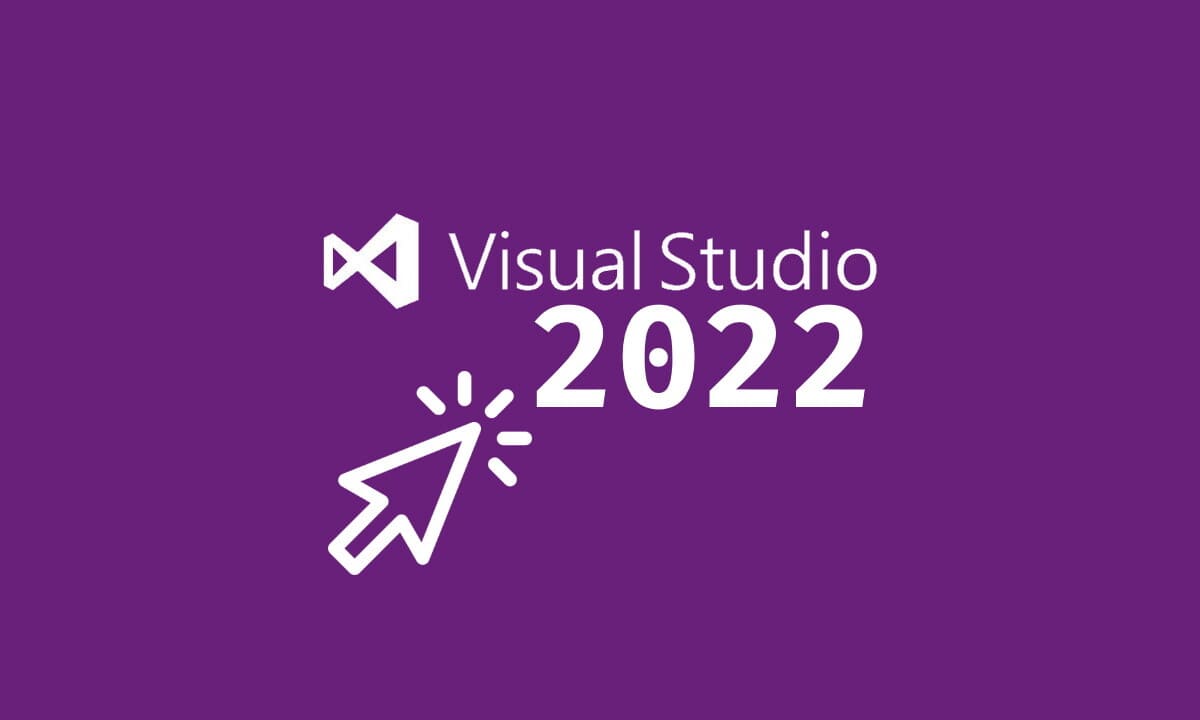
В данной статье мы пошагово рассмотрим как установить и активировать Microsoft Visual Studio 2022. Сделаем это на примере «Professional» версии.
1) Первое что, нужно сделать — это скачайте само приложение Visual Studio 2022 Professional, сделать это можете с сайта Microsoft по прямой ссылке — https://visualstudio.microsoft.com/ru/
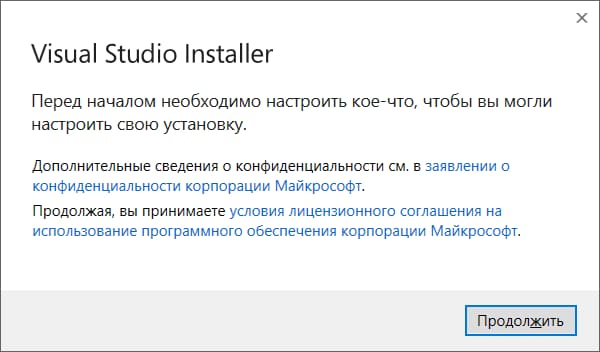
2) После скачивания — запускаем дистрибутив. Нажимаем «Продолжить».
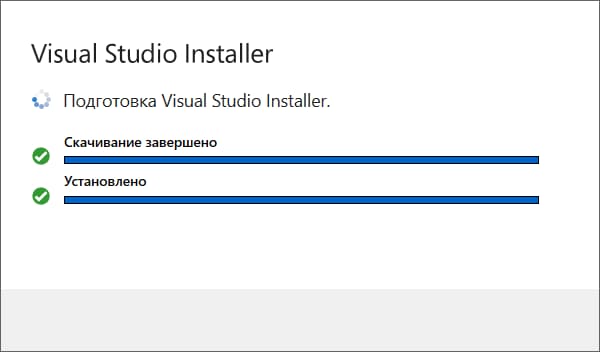
3) Дождитесь подготовки к скачиванию и выбору компонентов для установки.

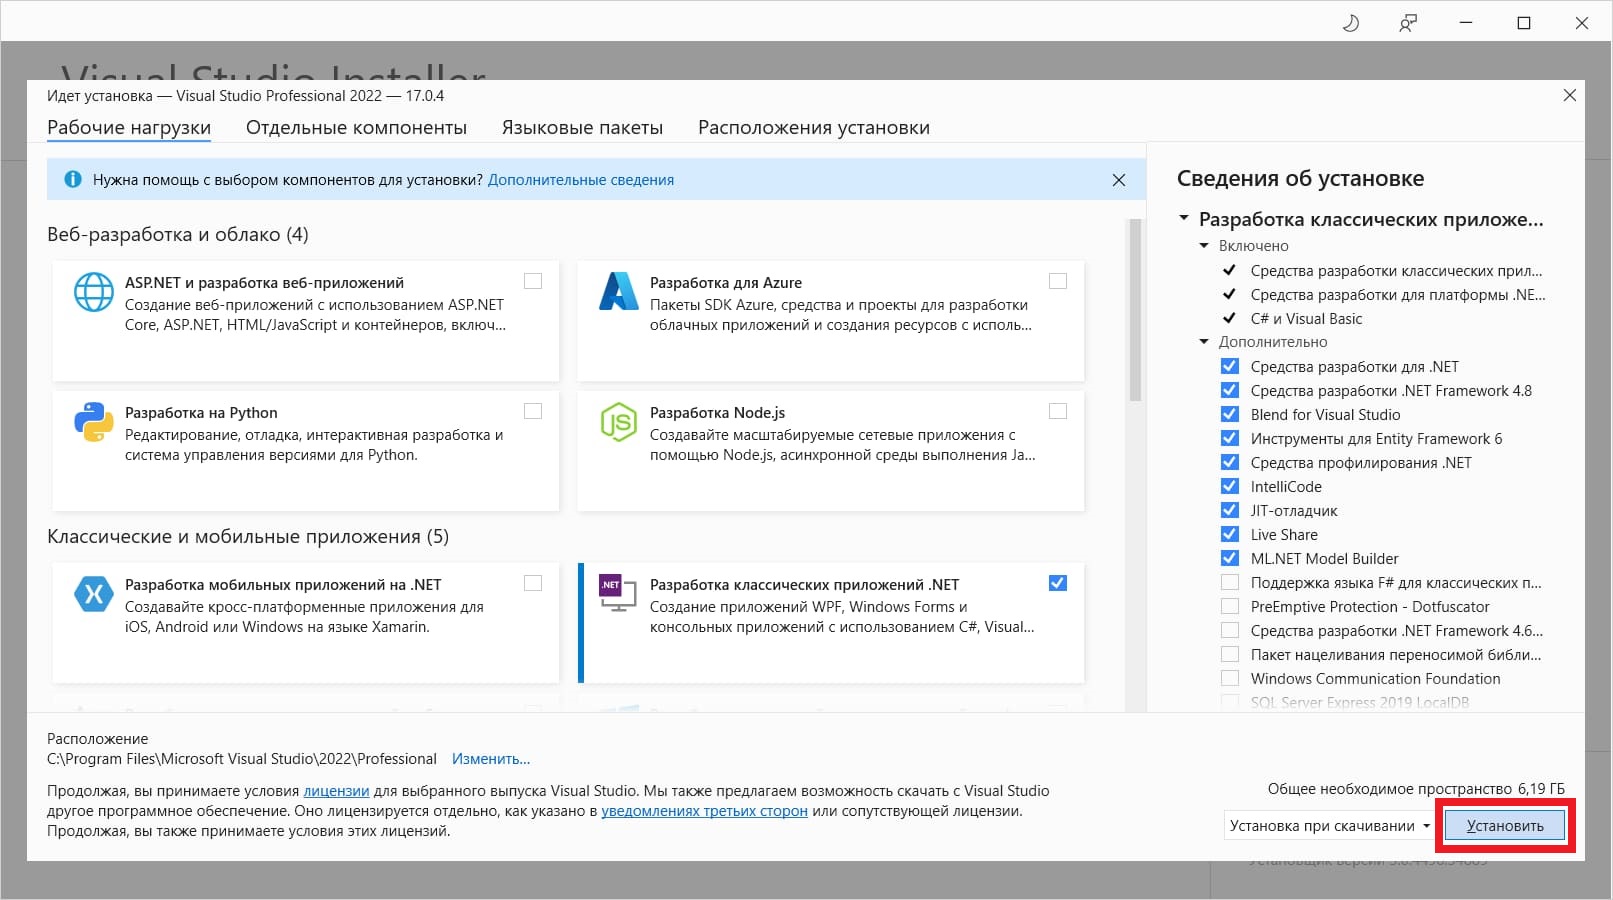
4) Следующим окном выберите нужные Вам компоненты, отдельные компоненты, языковые пакеты и пр. После нажмите на кнопку «Установить».
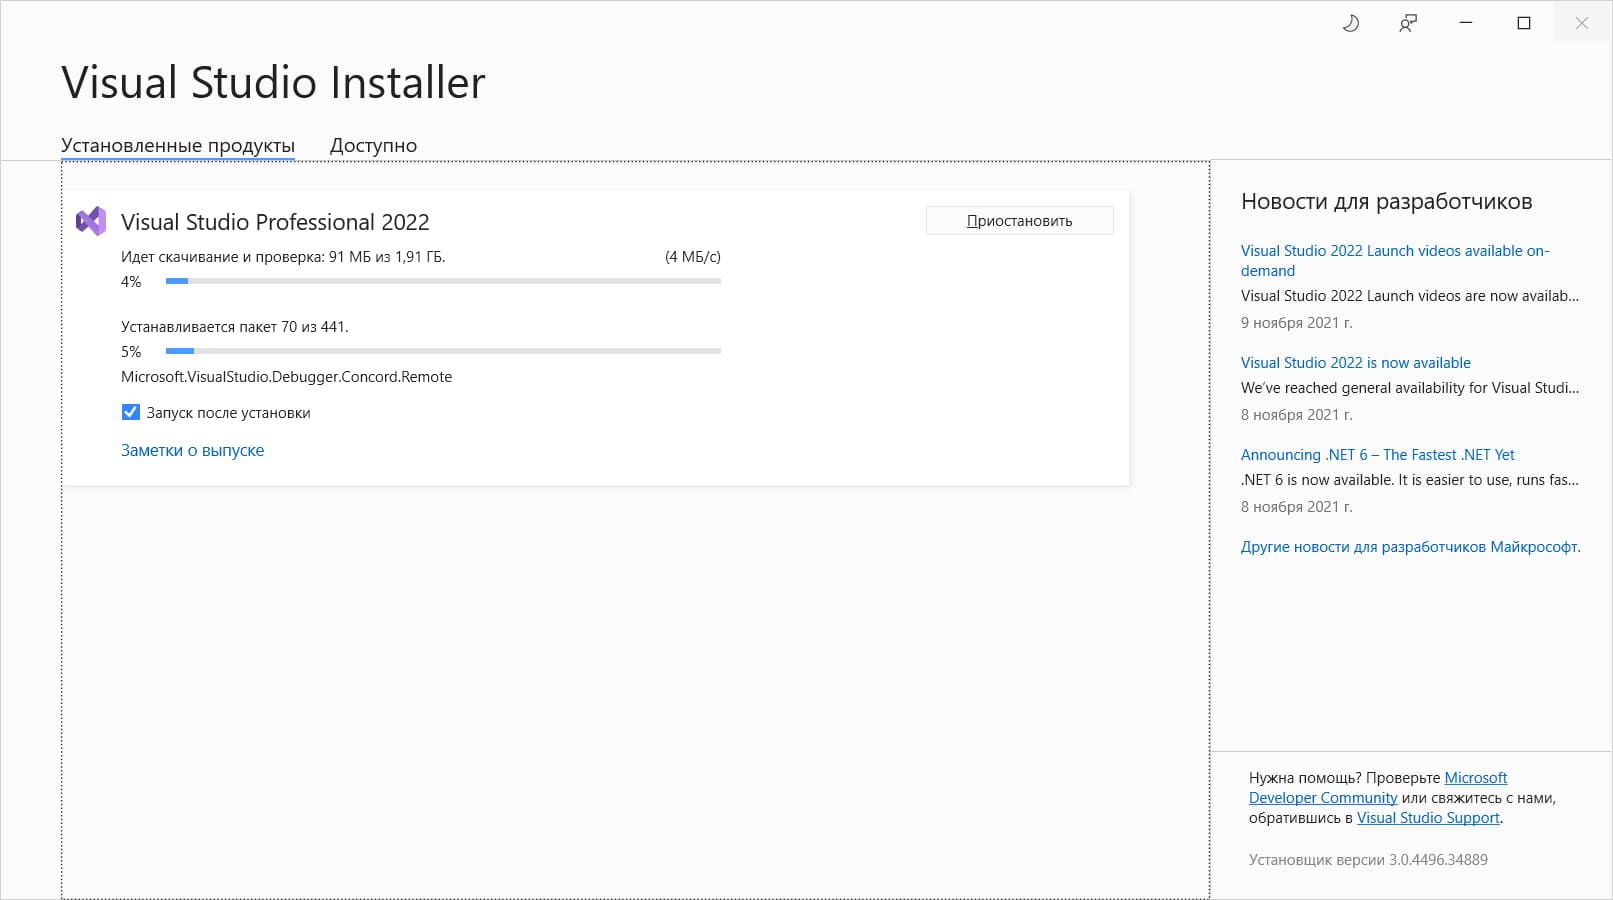
5) Далее дождитесь теперь установки приложения и его компонентов.
6) После установки необходимо будет войти в учетную запись Microsoft в новом окне, нажмите «Войти».

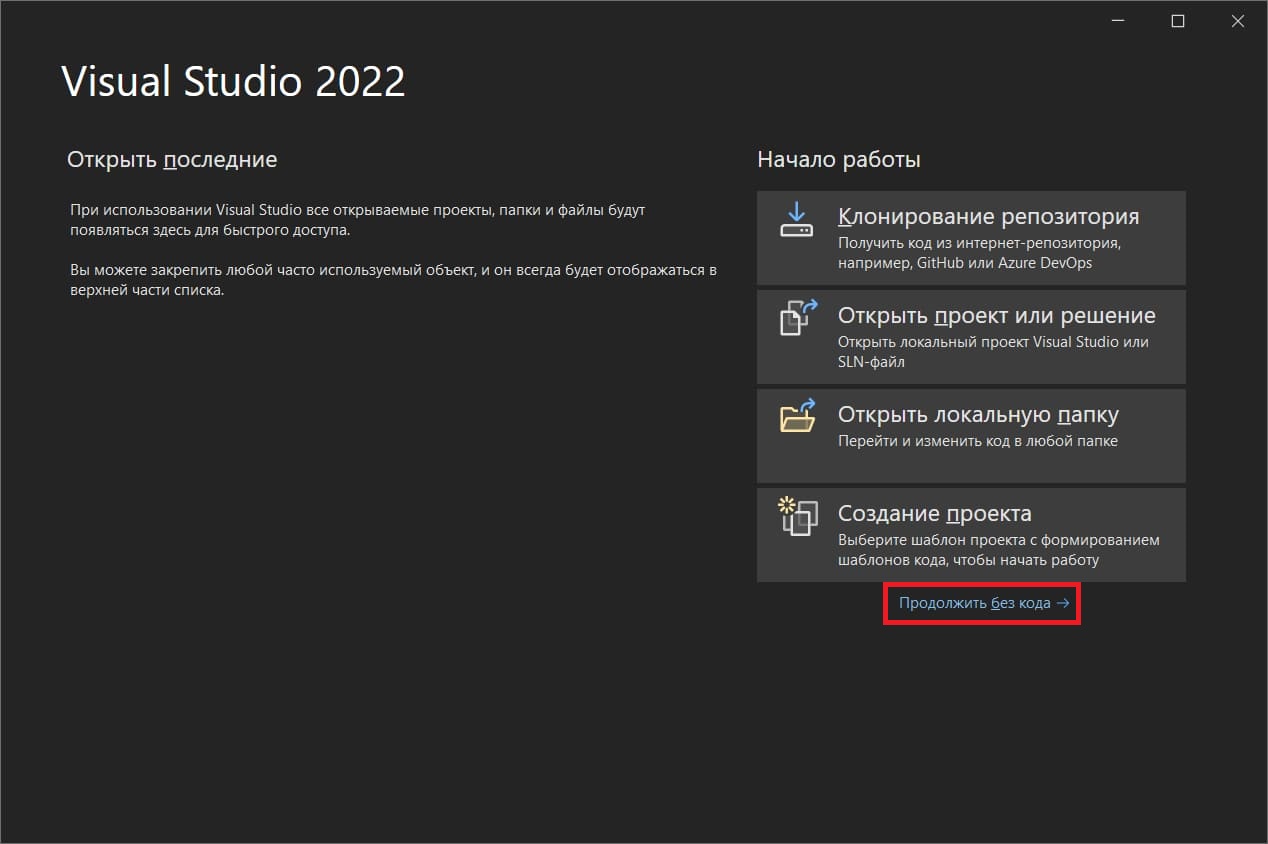
7) Теперь перейдем к активации приложения. При первом запуске можем нажать на «Продолжить без кода» в начальном экране приложения.
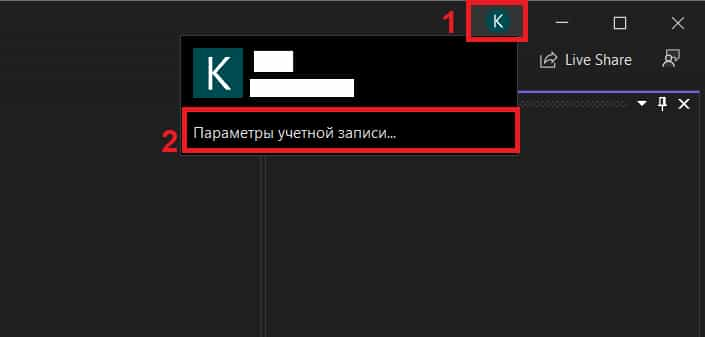
8) Далее, справа на верху нажмите на Ваш кнопку с Вашей учетной записью => Параметры учетной записи.
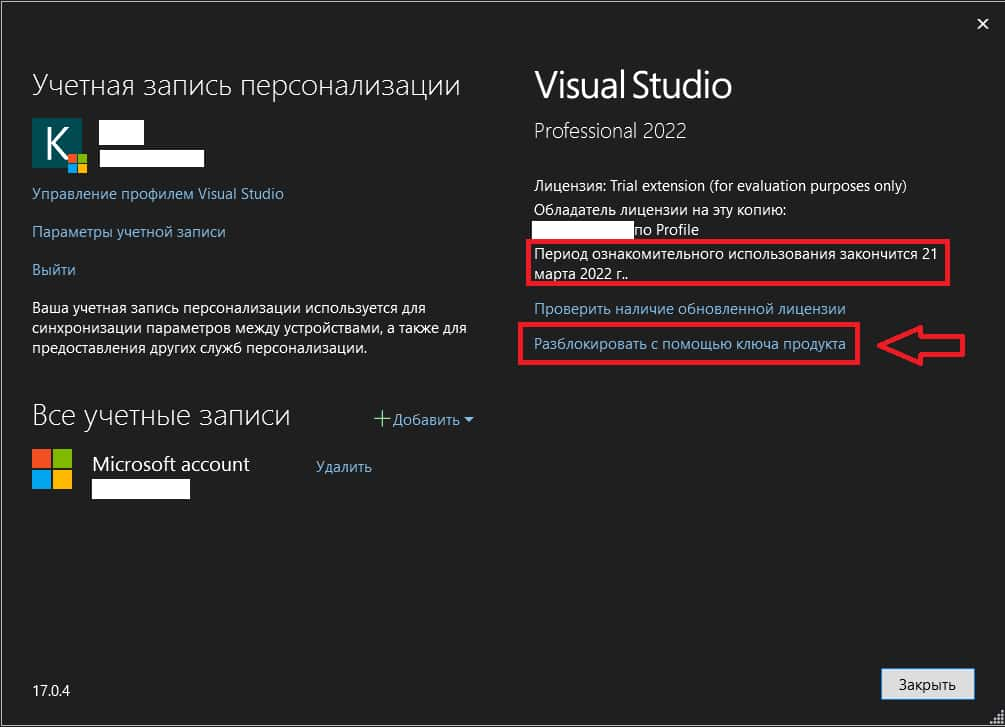
9) В окне учетной записи и активации Вы увидите, что у Вас установилась «ознакомительная» (пробная) версия на 1 месяц, отсчет начинается с момента установки.
Для активации приложения Вам потребуется сам ключ, приобрести его можете в нашем каталоге на следующей странице. Быстрая доставка ключа в течение 3х часов на Вашу электронную почту. Гарантия и круглосуточная техподдержка.
Итак, когда у Вас уже имеется в наличие ключ активации, нажимаем на «Разблокировать с помощью ключа продукта«.
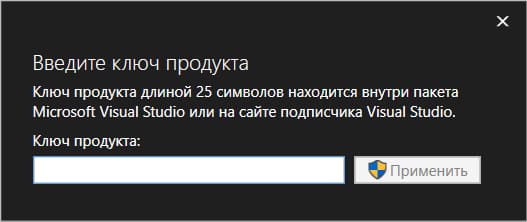
Далее вводите Ваш ключ.
На этом все, у Вас должно выйти сообщение, что ключ продукта применен.