

This article provides a step-by-step guide for installing Visual Studio Professional 2019.
The first step is to download the installer. You can download it from the official website or from our server.
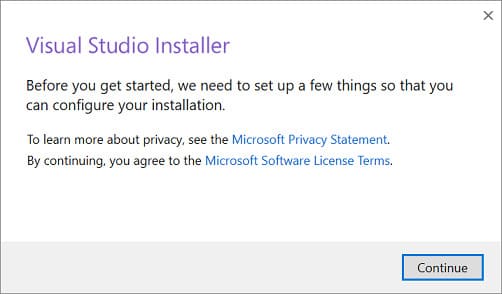
After downloading the application, run the installer and click "Continue."
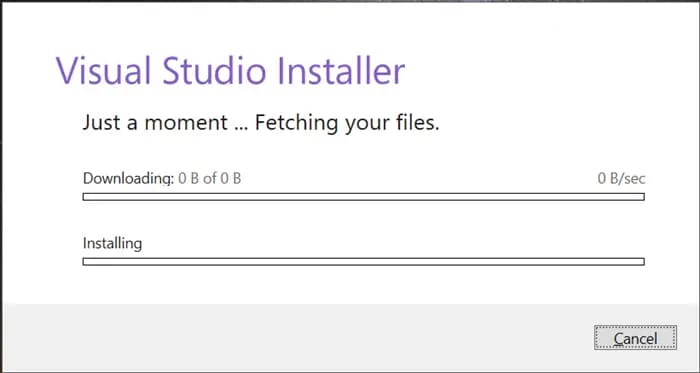
The installer will proceed to download all updates and install necessary components.

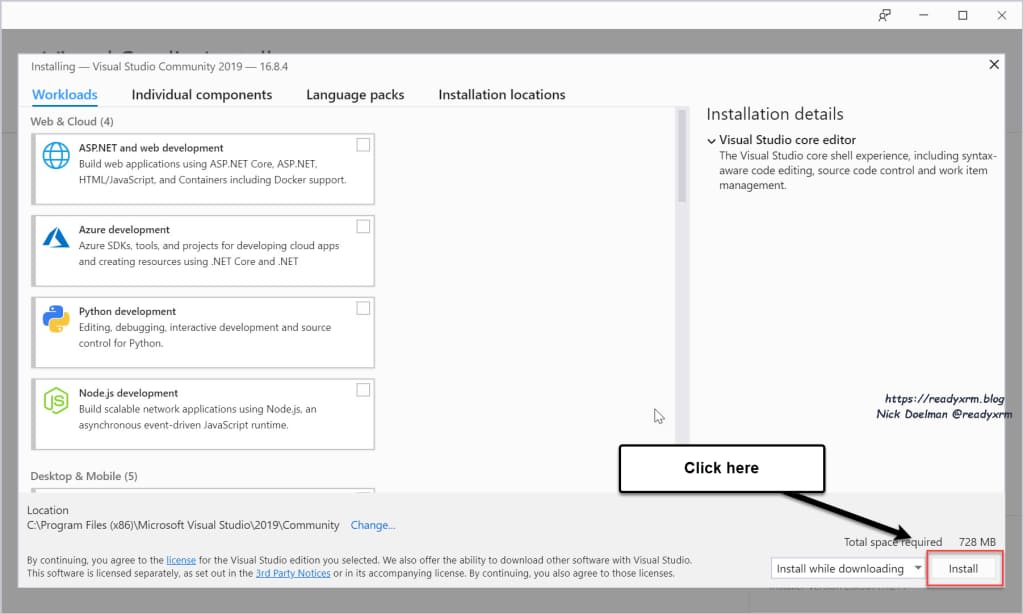
Once the installation process is complete, you will be prompted to install additional components tailored to your development needs. Select the desired components by checking the boxes and click "Install."
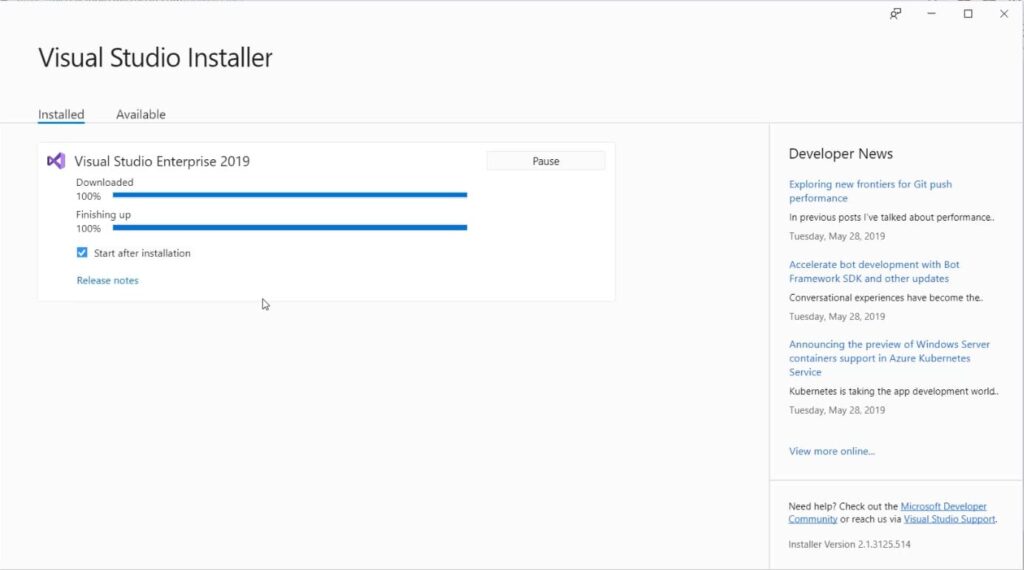
The application will start downloading additional components and proceed with their installation. Please wait for this process to complete.
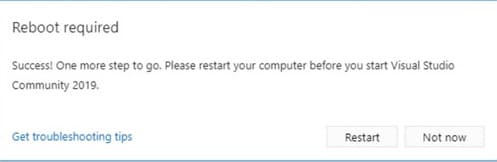
After the installation, the application will prompt you to restart your PC. Please proceed with the restart.
The application operates in a free (trial) period for 30 days. To activate it, you will need a product key, which you can purchase from our catalog.
Once you have obtained the Visual Studio 2019 product key, let's proceed with the activation process.
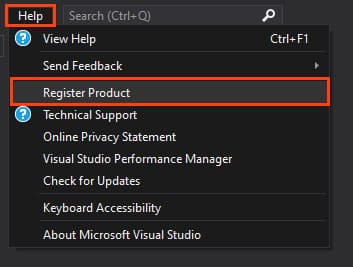
Navigate to the main window of the application => click on the "Help" menu => Register Product.
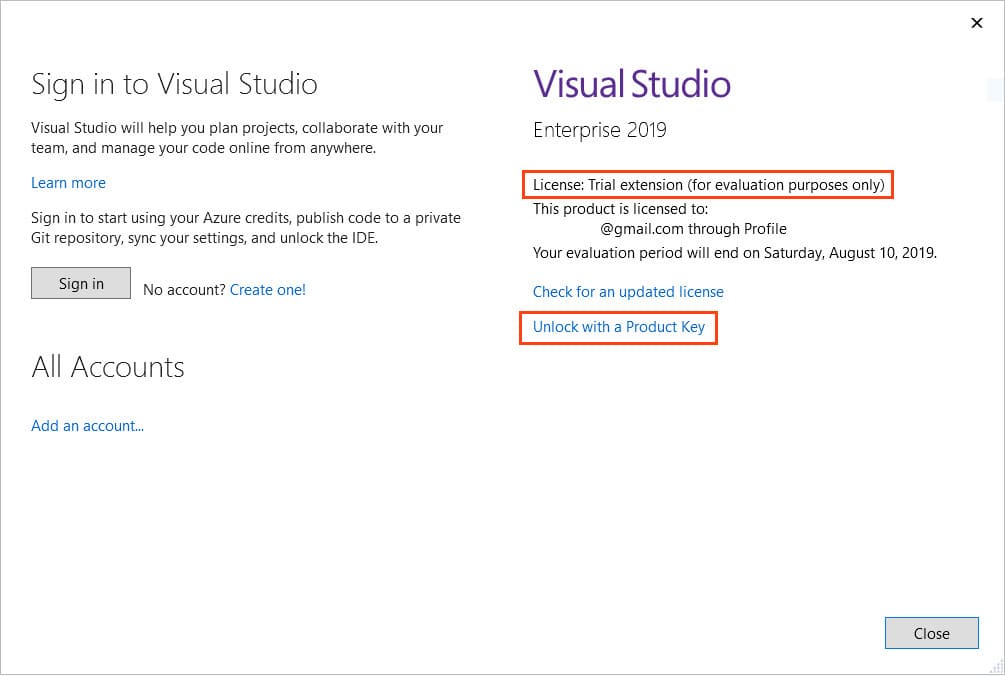
In the product registration window, you'll see that you currently have a "Thirty-day trial version." Click "Unlock with a product key".
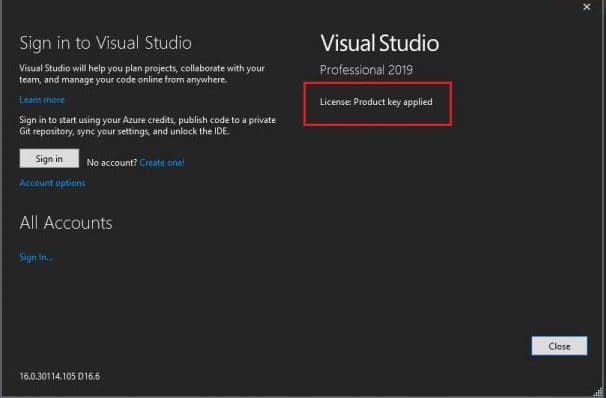
Enter your Visual Studio Professional 2019 product key and click "Apply."
If the activation is successful, you will see a window confirming "License: Product key applied." Activation is now complete!

")
")
")


