


В данной статье рассмотрим как сбросить до заводских настроек Windows 7, расскажем и покажем со скриншотами.
(Внимание! Данная статья несет в себе ознакомительную инструкцию, мы не несем ответственность за сохранность Ваших файлов после сброса системы)
— В Windows 7 сброс именно до заводских настроек только средствами системы отчасти невозможен, как это сделано в Windows 10. В Windows 7 для этого нужен загрузочный диск, или флешка с самим дистрибутивом Windows 7. Поэтому, прежде чем приступать к процедуре сброса до заводских настроек скачайте сам дистриубтив Windows 7, который соответствует Вашей версии Windows 7, сделать это можете в нашем каталоге на следующей странице. После записи вставьте загрузочную флешку с Windows 7 в Ваш компьютер.
— Далее запишите дистрибутив на флешку, сделать это можете по следующей инструкции.
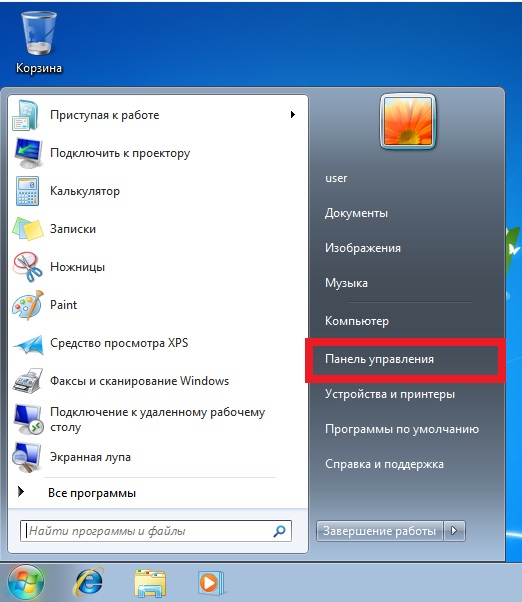
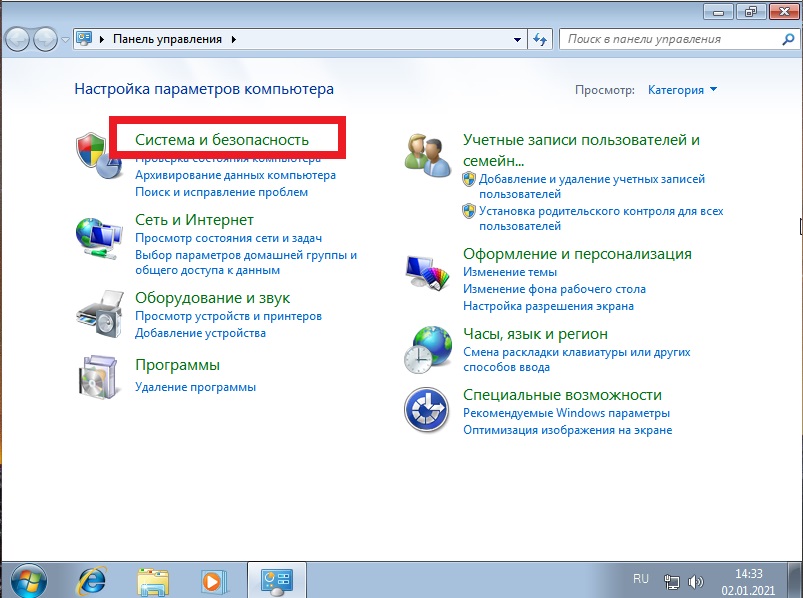
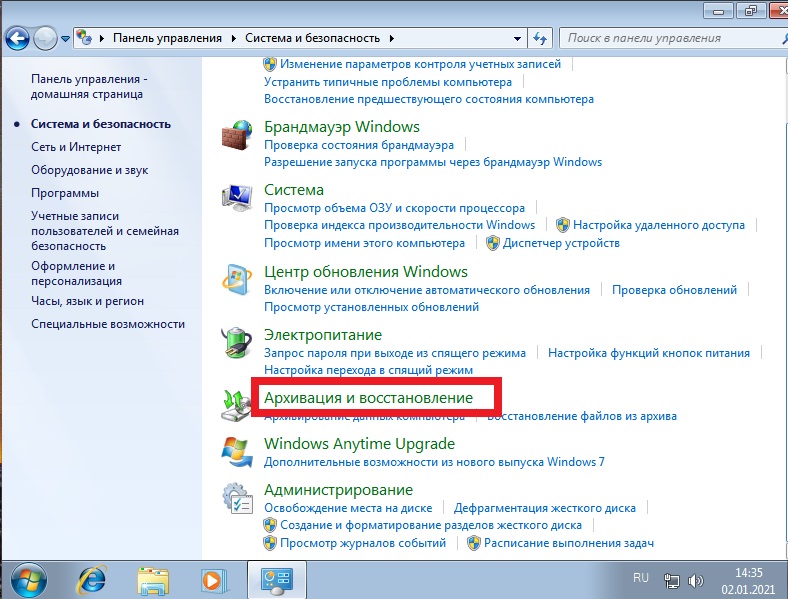
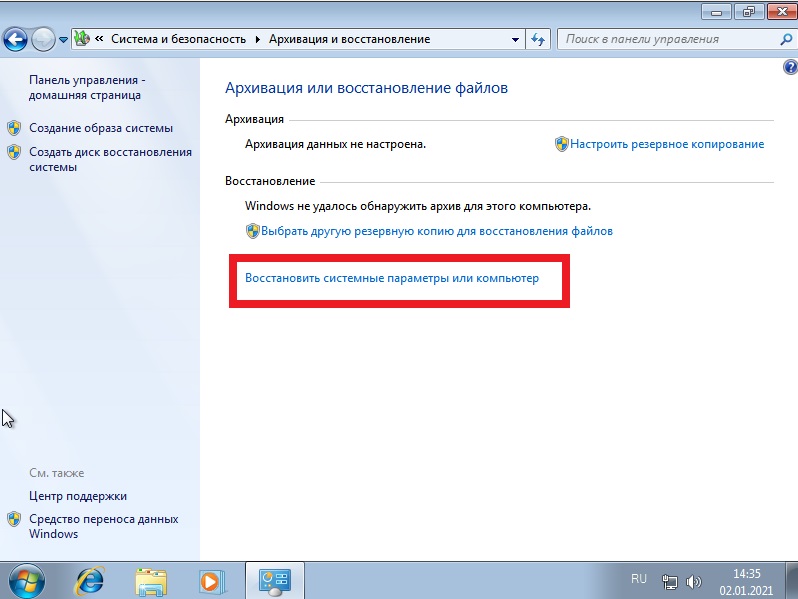
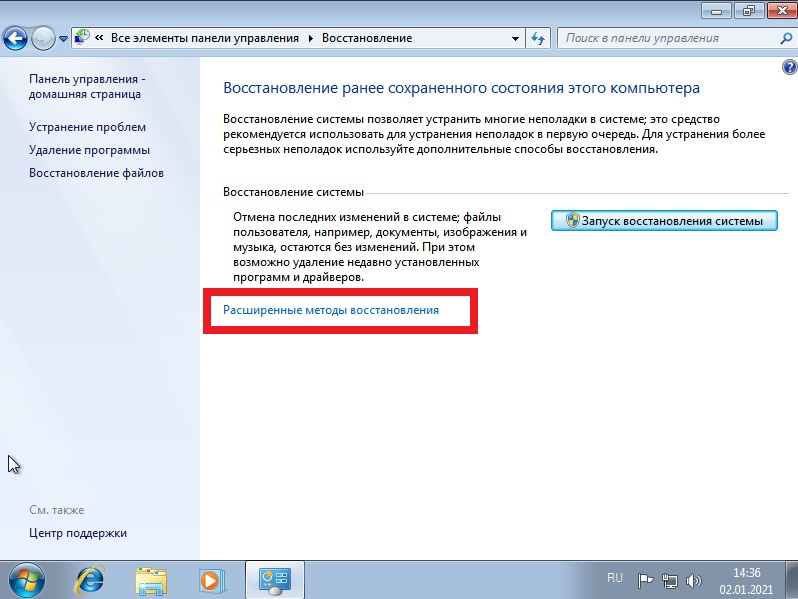
— Теперь можем приступать к процедуре сброса системы. Для этого зайдите в меню «Пуск» => Панель управления => Система и безопасность => Архивация и восстановление => Восстановить системные параметры или компьютер => Расширенные методы восстановления.
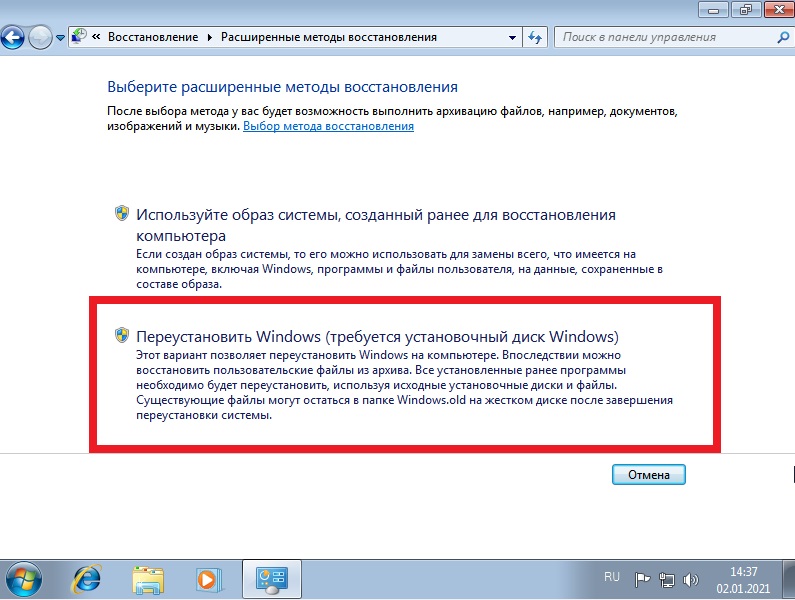
— В данной статье мы рассматриваем сброс системы путем ее переустановки, в последствие восстановлением пользовательских файлов. Нажимаем на соответствующий пункт.
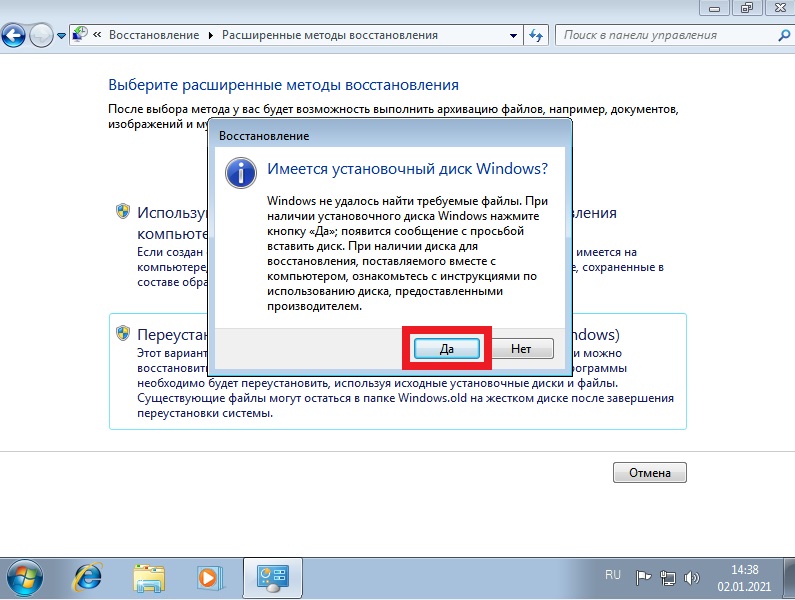
Здесь нажимаем «Да».
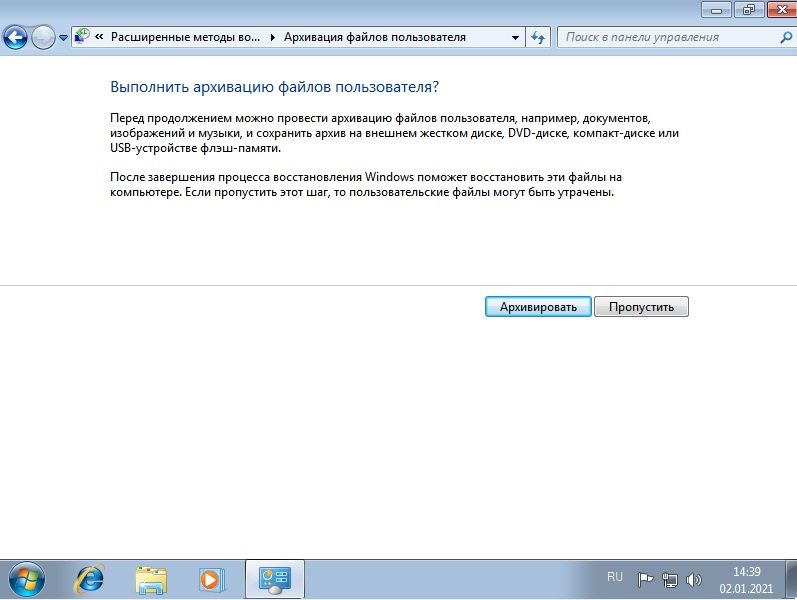
— Чтобы архивировать Ваши файлы, вставьте в Ваш ПК флешку для бекапа, либо съемный жесткий диск и нажмите «Архивировать». Либо пропустите этот пункт и продолжите процедуру.
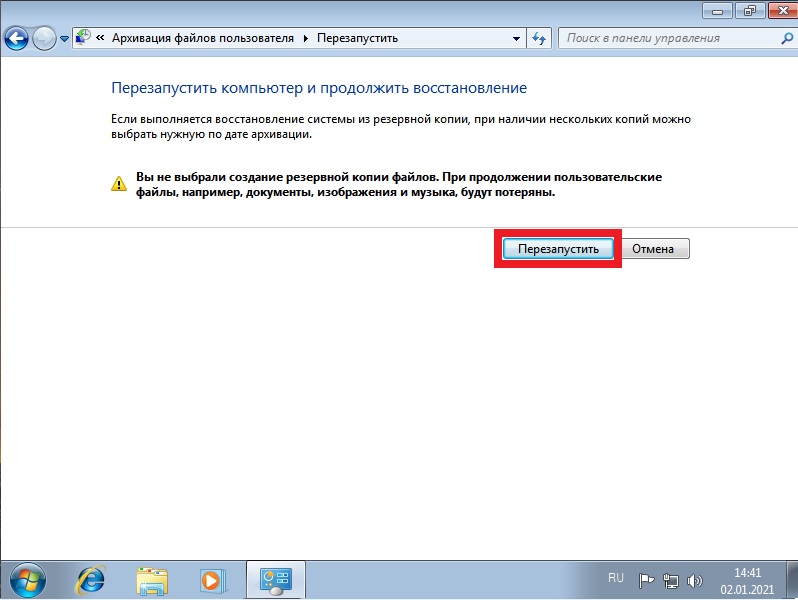
— Нажимаем «Перезапустить».
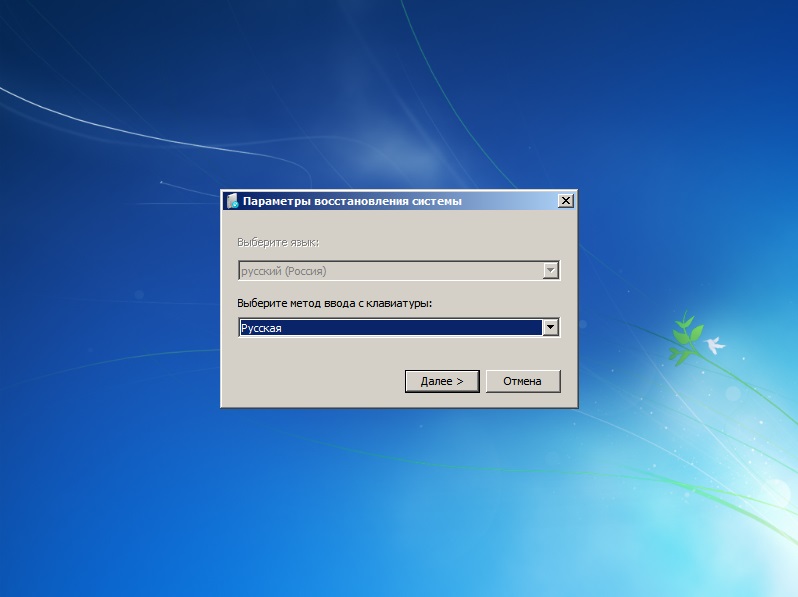
— В этом окне нажимаем «Далее».
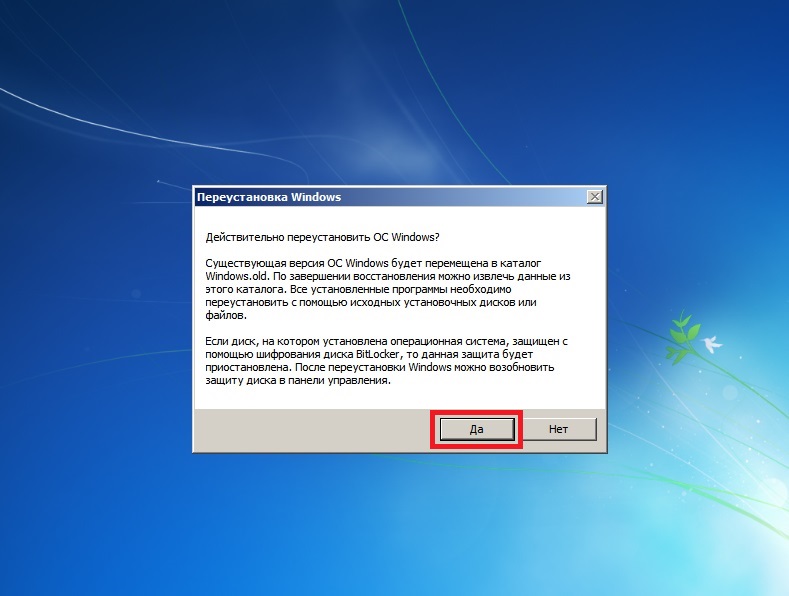
— Нажимаем «Да».
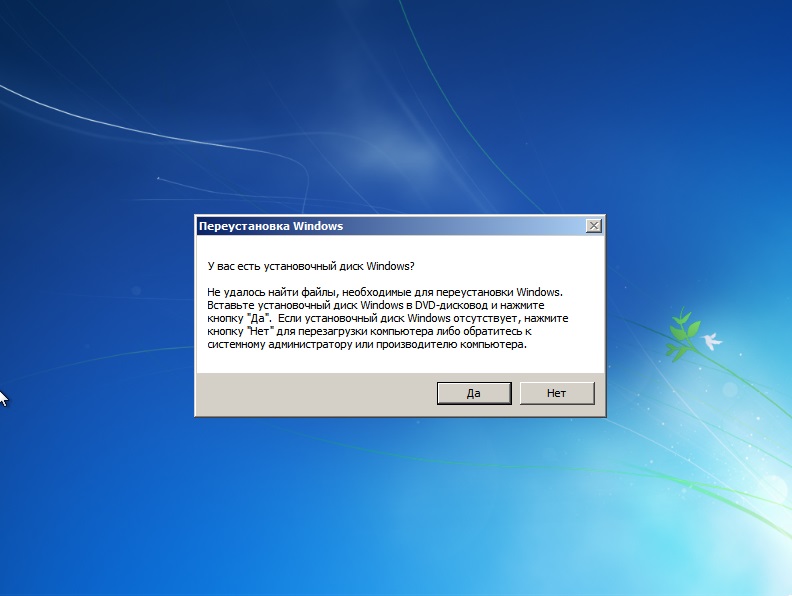
— Нажимая «Да» в этом окне, Вы подтверждаете, что у Вас вставлена загрузочная флешка с Windows 7, иначе сброс системы будет невозможен.

— Здесь так же нажимаете «Да».
Теперь дожидаетесь завершения процесса установки, после установки ПК перезагрузится и система предложит восстановить Ваши архивные файлы. Теперь Ваша система сброшена до заводских настроек.


