

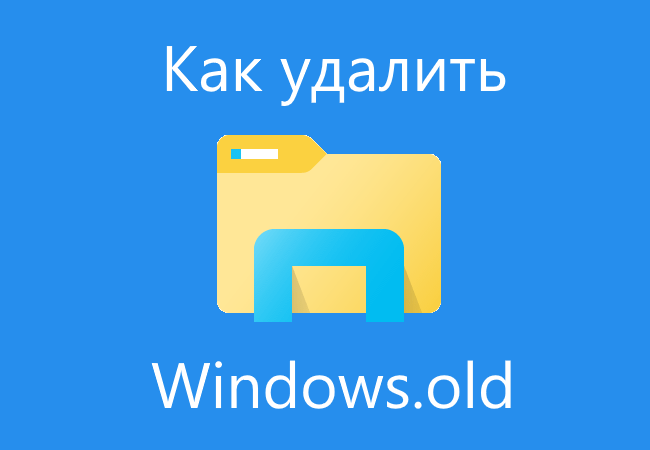
В данной статье пошагово рассмотрим процедуру как удалить папку Windows.Old после обновления Windows, либо ее установки. Данная инструкция подходит под все актуальные версии Windows (10, 8/8.1, 7).
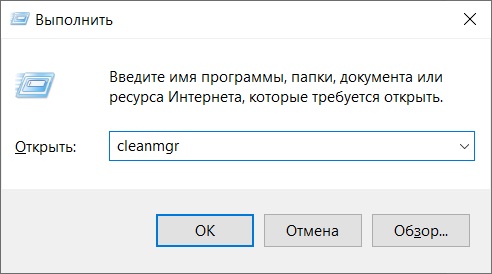
— Зажимаем горячие клавиши Win + R => Далее вводим команду: cleanmgr => Нажимаем «Ок».
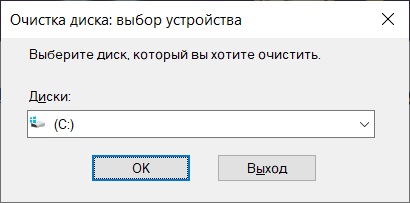
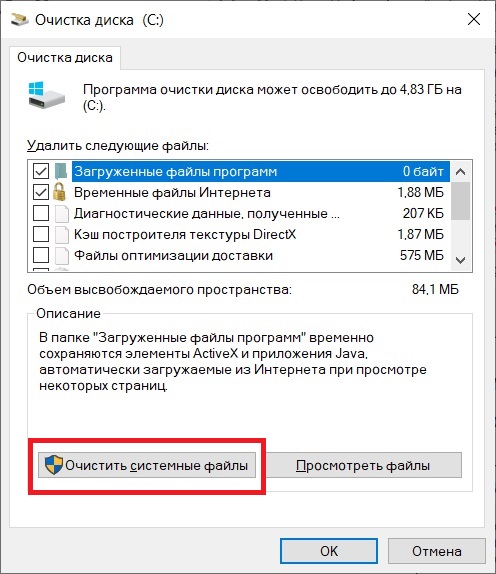
— В новом окне выбираем диск «С» => Ок.
— В следующем окне оставляем галки по умолчанию и сразу нажимаем на «Очистить системные файлы»
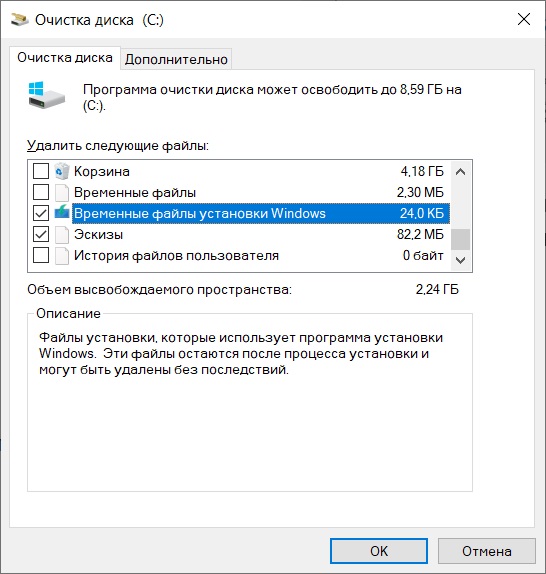
— Далее, теперь в новом окне выставляем галки на пунктах: Очистка обновлений Windows и Временные файлы установки Windows

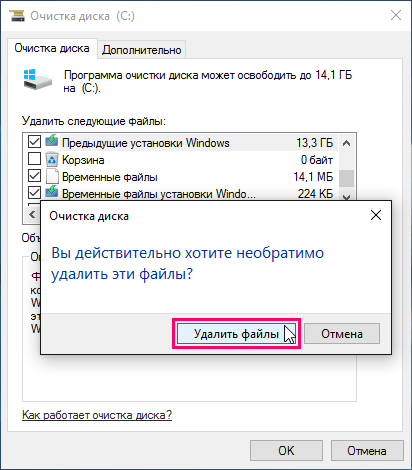
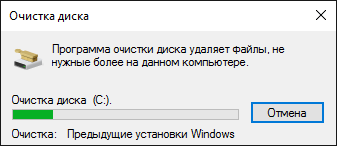
— В подтверждающем окне нажимаете «Удалить файлы» и дожидаетесь их очистки. После завершения процедуры можете перезагрузить ПК и папки Windows.old должна исчезнуть.
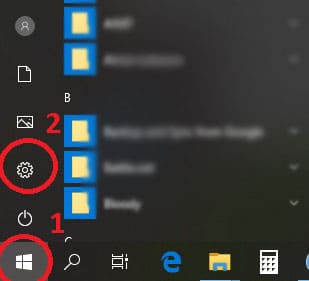
— Нажимаете на меню «Пуск» => Параметры
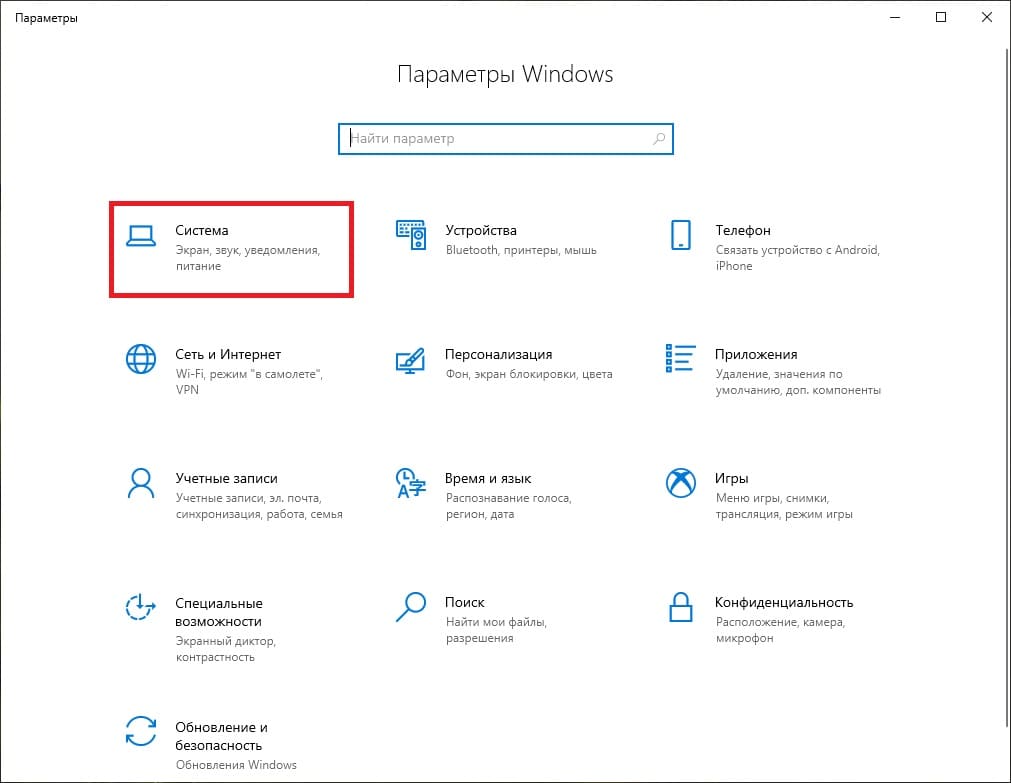
— В меню «Параметры Windows» => Система
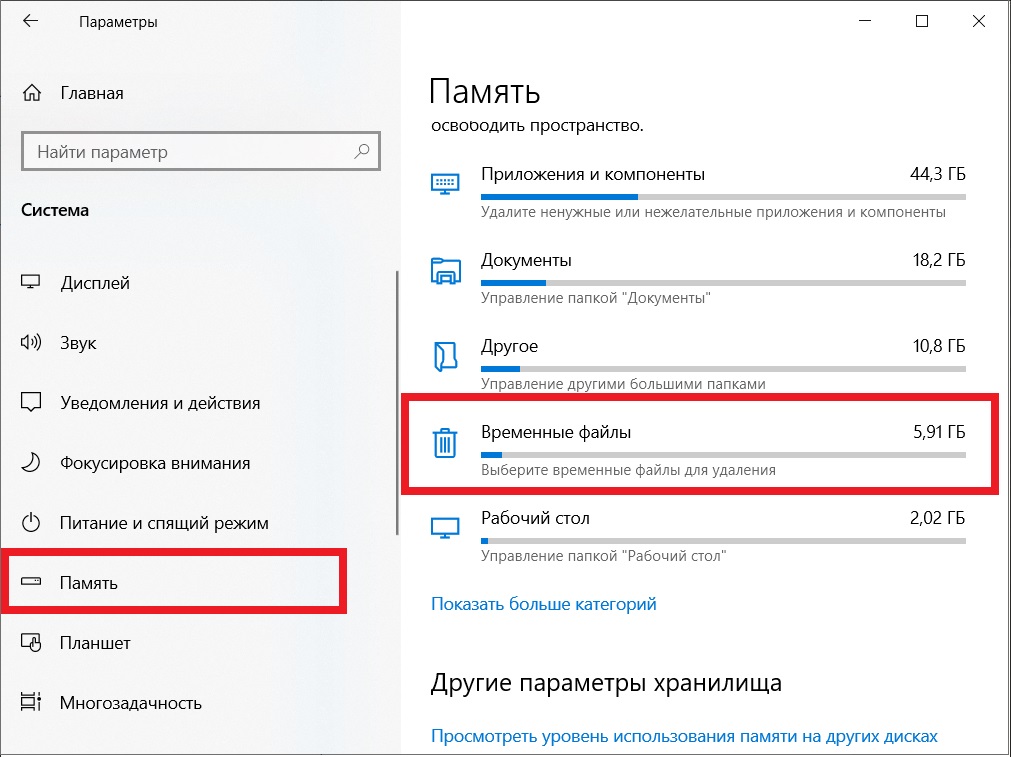
— Далее переходите на пункт «Память» => Временные файлы
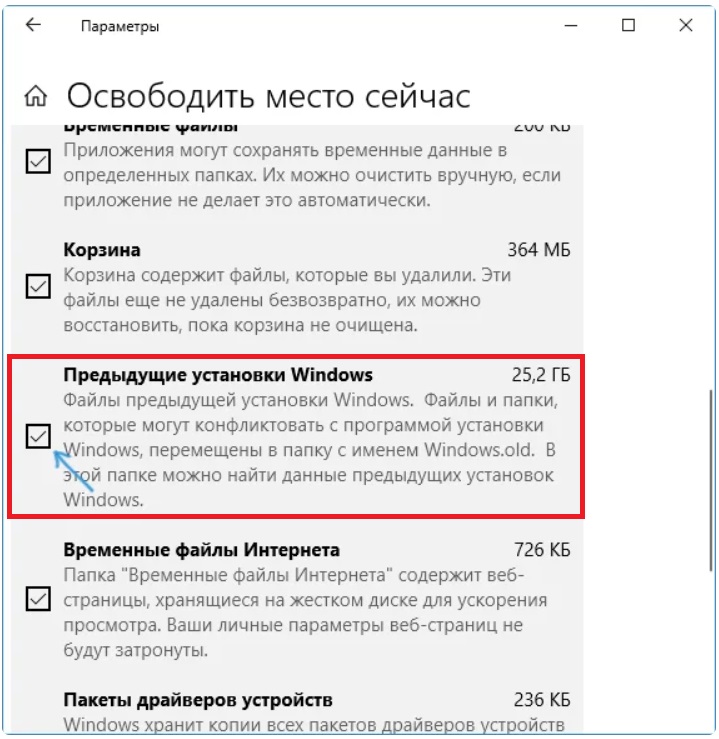
— В новом меню выставляете галку на пункт «Предыдущие установки Windows» => После на верху этого меню нажимаете на кнопку «Удалить файлы».
Дожидаетесь их очистки. После завершения процедуры можете перезагрузить ПК и папки Windows.old должна исчезнуть.