


В данной статье пошагово рассмотрим процесс установки и активации приложения Microsoft Project. Данная статья актуальна для любых версий Microsoft Project (2013, 2016, 2019 и т.д).
Для начала Вам необходимо скачать непосредственно сам дистрибутив, скачать оригинальный дистрибутив Microsoft Project различных версий можете из нашего каталога.
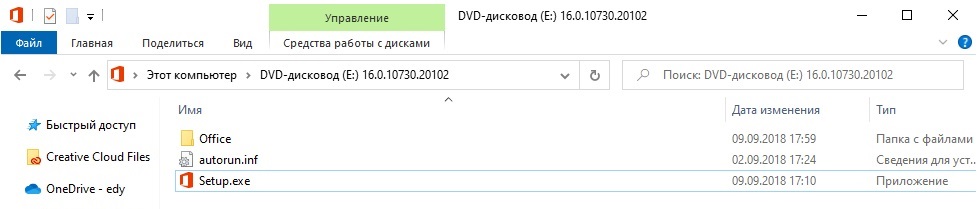
Открываем дистрибутив, запускаем файл Setup.
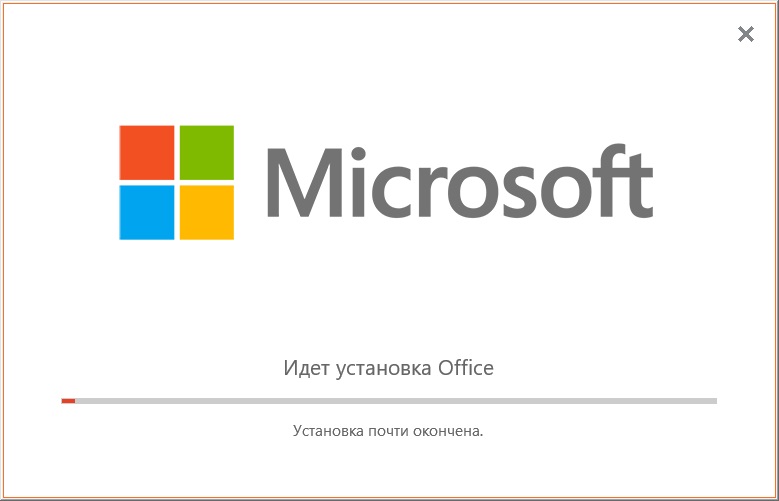
Теперь дожидаемся процесса установки и его окончания.
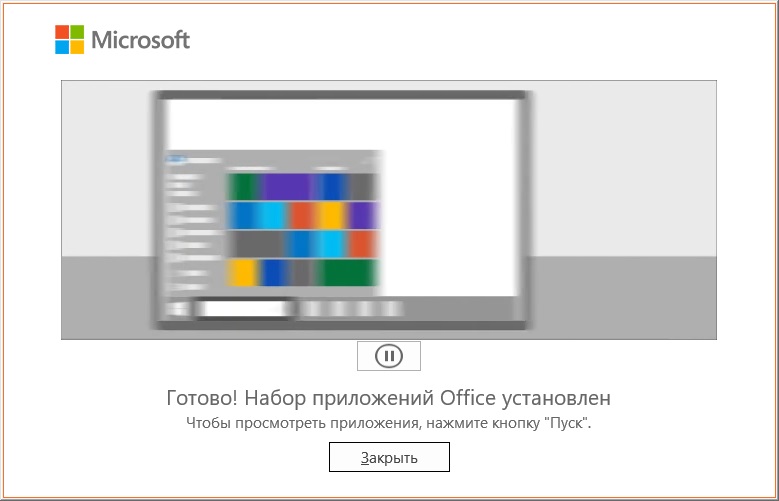
После завершения установки у Вас выйдет соответствующее окно, с сообщением, что приложение установлено. Нажимаем кнопку «Закрыть».
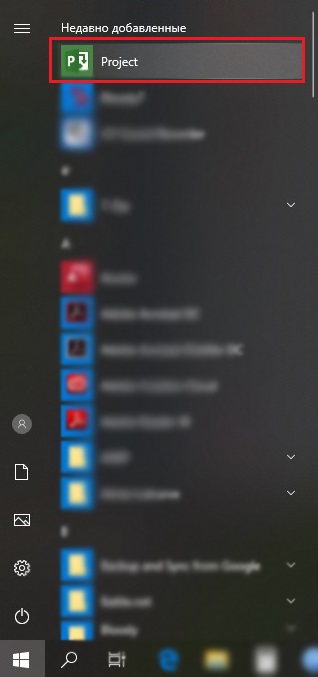
Теперь, чтобы запустить приложение и активировать его, заходим в меню «Пуск» и находим там приложение «Project».
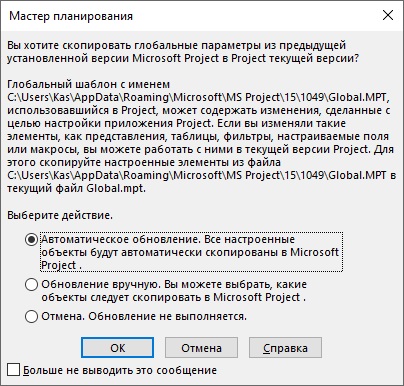
При первом запуске может выйти сообщение с выбором предложений об обновлении. Можете оставить по умолчанию — «Автоматическое обновление». Т.е когда для приложения будет актуальное обновление, то оно его загрузит и установит.
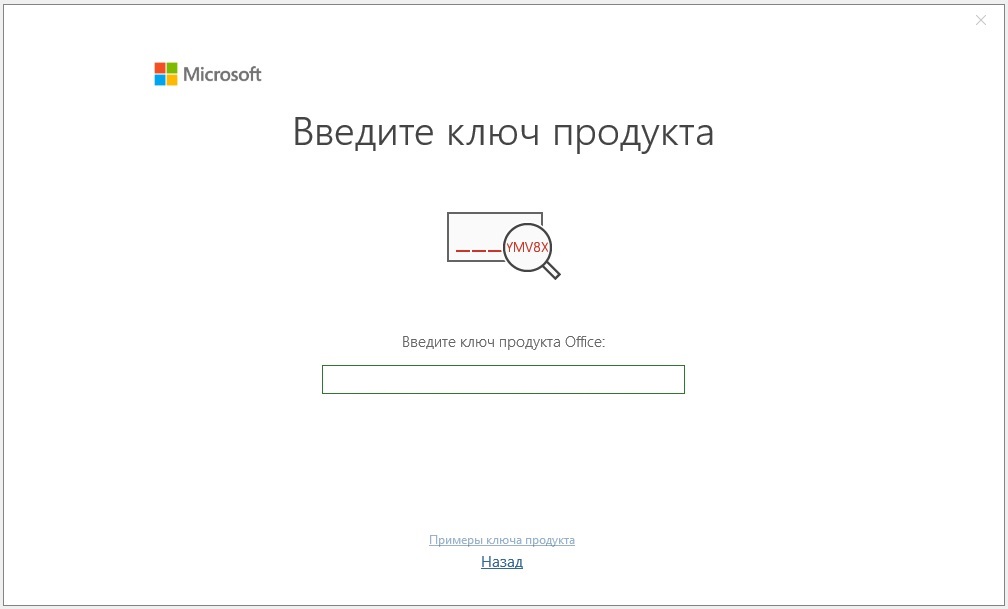
Далее у Вас выйдет окно с просьбой ввести ключ активации. Если у Вас нет ключа активации, то приобрести его можете так же в нашем каталоге на следующей странице. Доставка ключа моментальная, в автоматическом режиме на Вашу электронную почту сразу после оплаты.
Вводите Ваш ключ и активируете приложение.
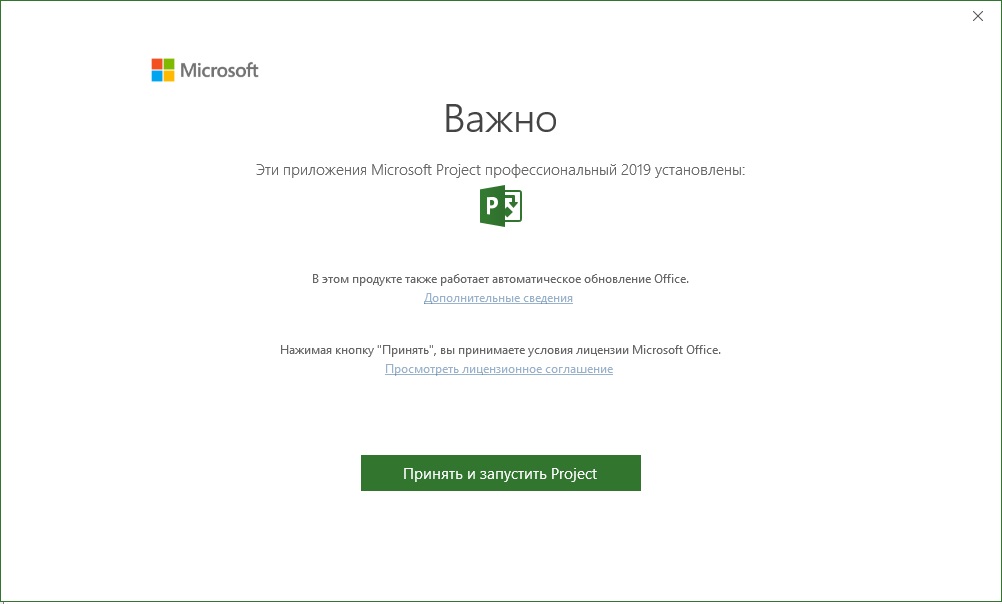
Принимаем лицензионное соглашение.
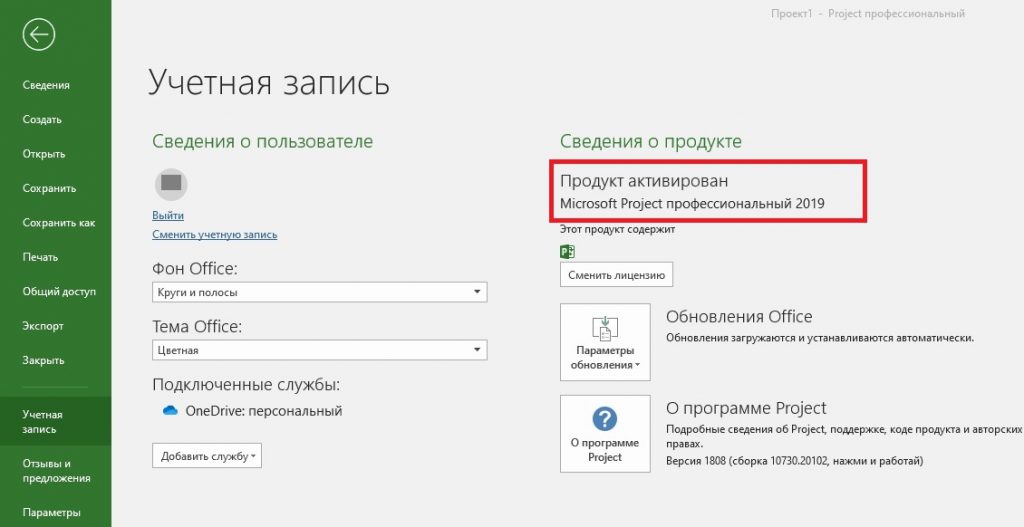
После можете перезапустить приложение и проверить наличие активации. Сделать это можете из приложения Prpject => Меню «Файл» => Учетная запись. У Вас должно быть указано, что приложение активировано.
На этом процесс установки и активации Microsoft Project закончен.